Abbreviations
✅ Pc: Cadena.
✅ Mpa: Medium high point.
✅ Pr: Sliding point.
✅ BLO: Back loop only.
Materials
✅ 1 ball of DAMASCUS by Rosários 4 (approximately 60 grams) color 27 – thread A.
✅ 1 egg of LISBOA de Rosários 4 (approximately 5 grams) color 31 – hilo B.
✅ 3mm and 3.5mm hook.
✅ Tapestry needle.
✅ Scissors.
Measurements
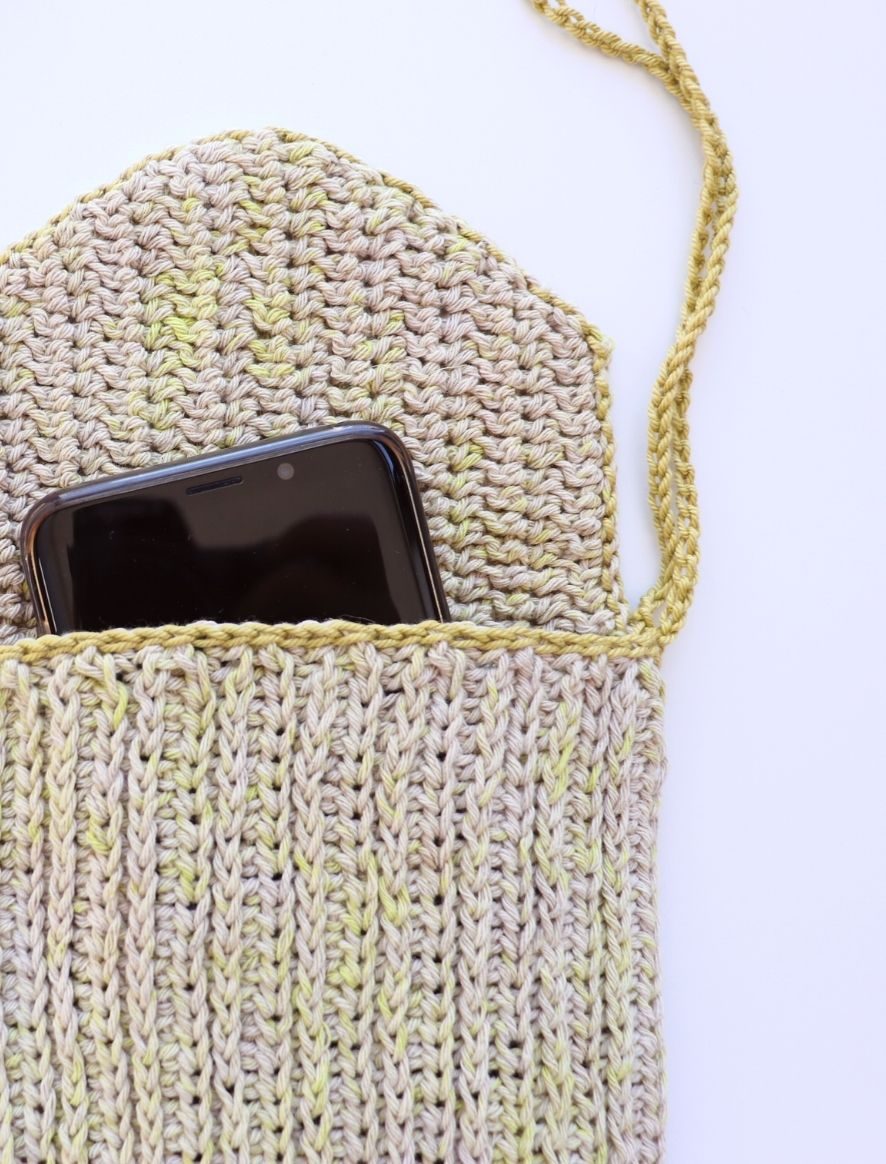
✅ The bag measures approximately 13.5 cm wide, 18 cm high and 40 cm drop.
Calibre
✅ 19 stitches and 14 rows = 10 x 10 cm on mpa with the 3.5 mm hook.
✅ 23 stitches = 10 cm on the pc (unstretched) with the 3 mm hook.
Instructions
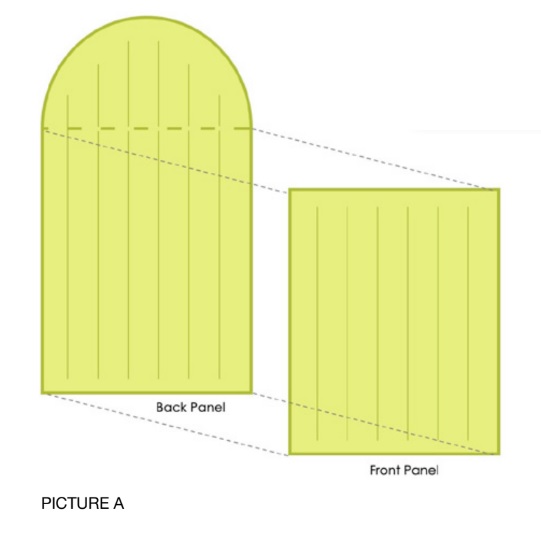
The project is worked as two panels that are sewn together. Folding the back panel creates a flap.
The thread used for the assembly and the strips is very similar to the main thread tufts, but you can use any colors you prefer.
Stc 1 at the beginning of the rounds does not count as a point.
The 3rd loop is the one found under the front loop when making a hdc.
You can make the strips as long or as short as you like, but keep in mind that they will stretch when using the bag.
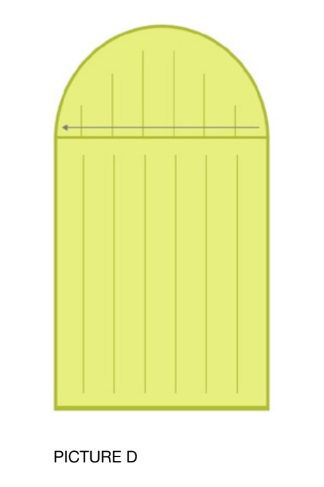
Panel frontal
With thread A and the 3.5 mm hook, make 36 stitches.
Row 1 [right side]: Dc in 2nd stitch from hook, dc across [35].
Row 2 [wrong side]: Turn, sc 1, hdc only in 3rd loop through [35].
Row 3: Turn, sc 1, mpa in BLO through [35].
Row 4-18: Repeat rows 2 and 3.
Button up.
Back panel
With thread A and 3.5 mm hook, pc 48.
Row 1 [right side]: Dc in 2nd stitch from hook, hdc across to last stitch, 2 hdc in last point [49].
Row 2 [wrong side]: Turn, sc 2, 2 hdc only in 3rd loop, hdc through only in 3rd loop loop [50].
Row 3: Turn, sc 1, hdc in BLO across to last stitch, 2 hdc in last stitch [51] .
Row 4-8: Repeat rows 2 and 3.
Row 9: Turn, sc 1, mpa in BLO through [55].
Row10: Turn, sc 1, hdc only in 3rd loop through [55].
Row 11: Turn, sc 1, hdc in BLO across to the last stitch leaving the last stitch unworked [54].
Row 12: Turn, sc 1, skip first hdc, hdc only in 3rd loop through [53].
Rows 13-18: Repeat rows 11 and 12.
Button up.
Assembly
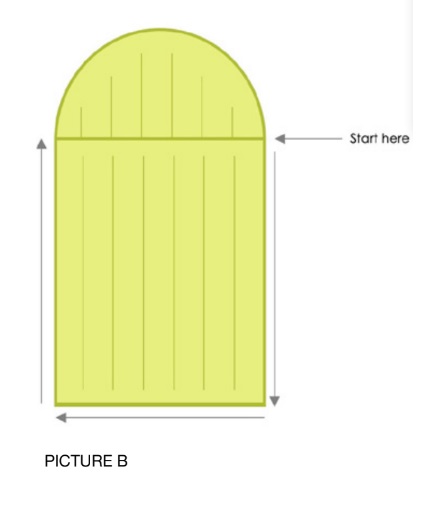
Place the front panel over the back panel, making sure the correct side of both panels is facing out. Align the panels as shown in photo A. Start from the top right corner of the front panel, as shown in photo B. Using thread B and the 3mm hook, pr on the BLO of the edges of both panels to close them. Close 3 sides.
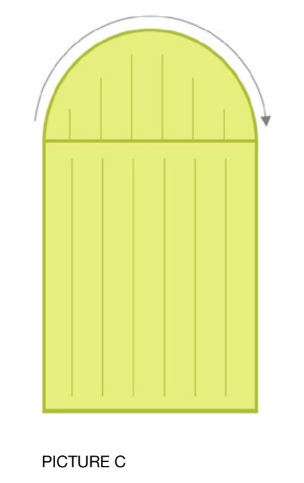
Don’t button up. Continue pr along the edge of the back panel flap, as shown in photo C. Once you reach the starting point, continue pr along the edge of the front panel, as shown in photo C. D. When you reach the other side of the panel, pc 185. Join with the other side of the panel with a pr to the starting point. Make another 185 sc and join to the other side with a sl st, as shown in photo E.
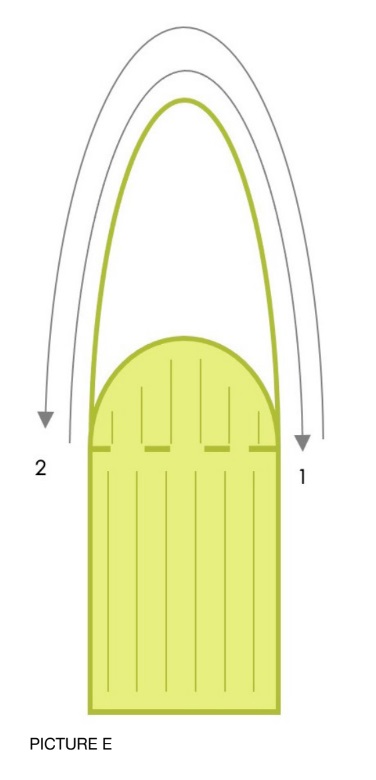
Fasten and weave all the ends. Fold the back flap over the front panel. Lock the shape of the bag to make it more uniform.