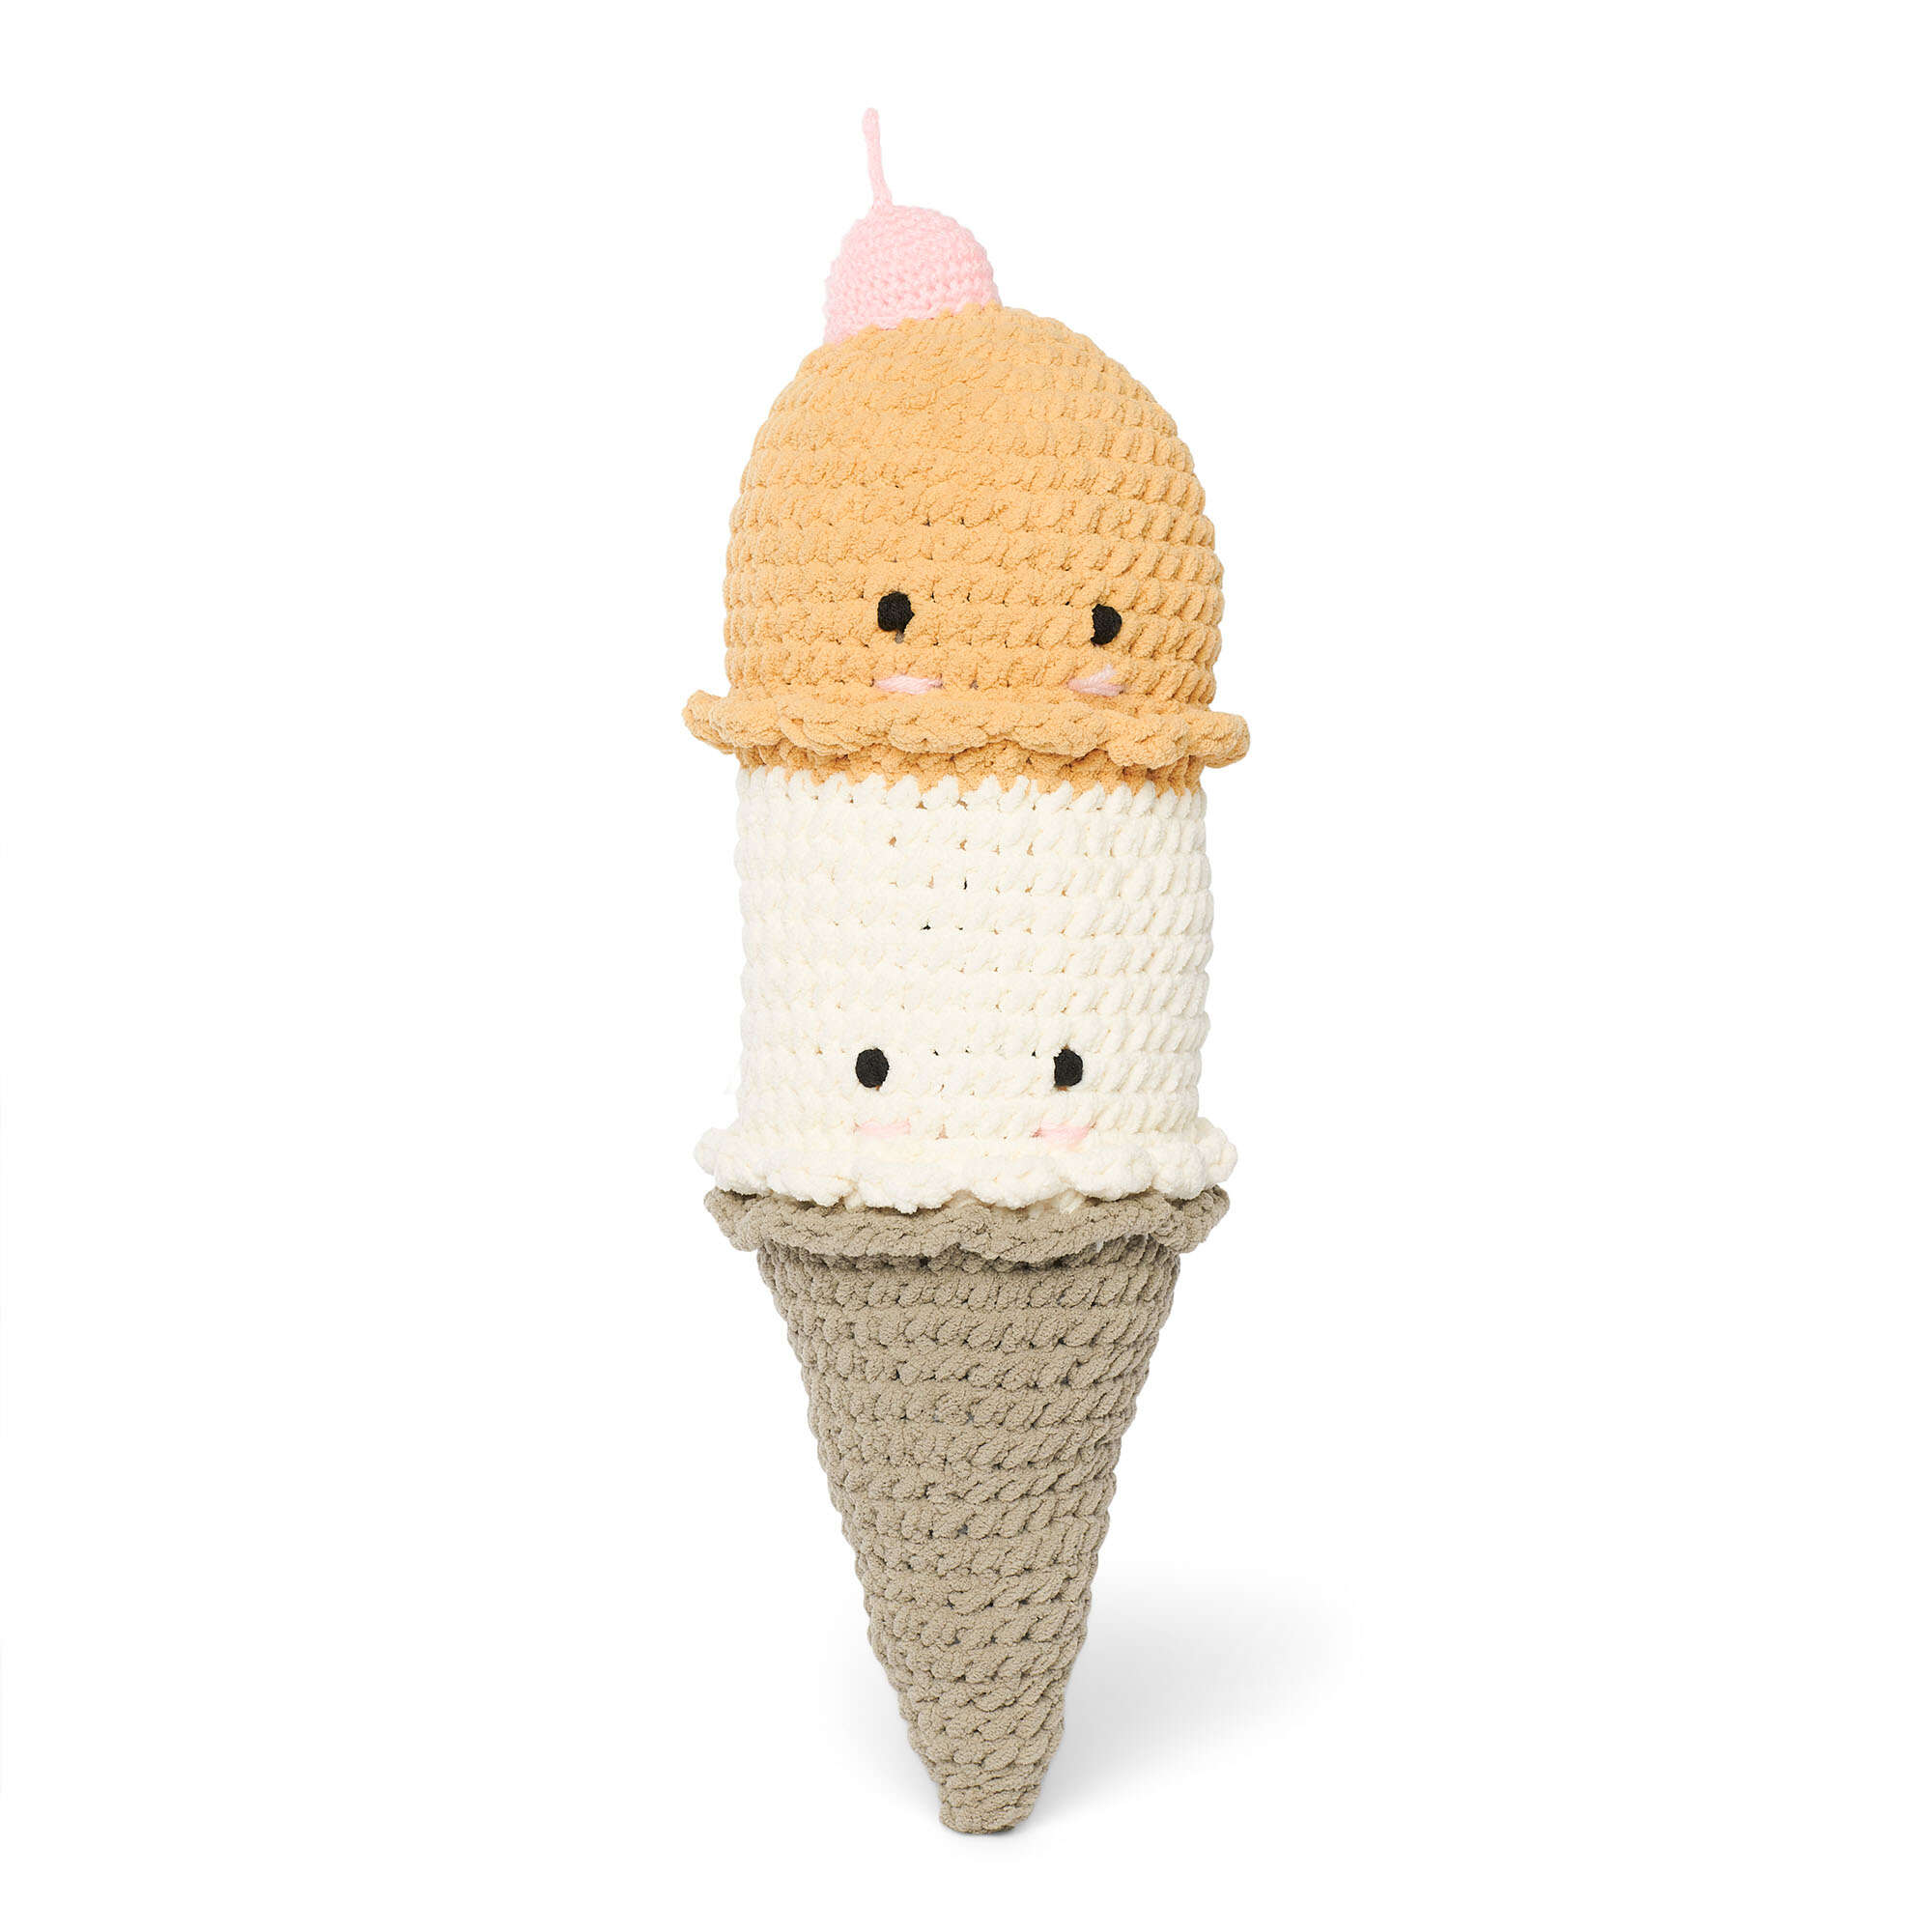
In this article, we will focus on creating a two-flavor amigurumi basket. This project combines creativity and knitting skills to create an adorable object that can be used as decoration or as a toy for the little ones in the house.
Throughout the article, we will guide you through the steps necessary to create this beautiful two-flavor amigurumi boat, from choosing the materials and preparing the tools to creating each of the details that make it unique. and charming.
Whether you are a beginner in the world of amigurumi or an expert in doll knitting, this project is an excellent opportunity to put your skills into practice and enjoy a creative and entertaining activity. Let’s get started!
Abbreviations
✅ Pc: Chain.
✅ Pb: Low point.
✅ Pr: Sliding point.
✅ Sc2tog: 2 single hooks together.
✅ Mpa: Half high point.
Materials
✅ Milk and Honey – 1 O’Go.
✅ US 7 (4.5mm) and US K/10 1⁄2 (6.5mm) size hook.
✅ Thread needle.
✅ Fiber filling.
✅ Approximately 3 yards/2.5 m black worsted floss to embroider the eyes.
✅ Approximately 15 yards/14 m of pink worsted yarn for the cherry.
Measures
✅ The amigurumi measures approximately 20 3⁄4″ [52.5 cm] tall, excluding the cherry.
Caliber
✅ 8 sc and 9 rows = 4″ [10 cm] with the long hook.
Instructions
To start working with the O’Go format, carefully cut the plastic zip tie where the ends of the O’Go join together.
Pull on the zip tie to remove it.
For this pattern, the colors can be easily separated by gently pulling and cutting at the color transition. Each color is ready to use. Follow the color guide shown in the materials section (Contrast A, B and C). You may find it helpful to place each color section in its own resealable (zip lock) bag and label each bag A, B, and C.
Join all the rows with a sl st in the first stitch.
Top ice cream
With B, pc 2.
Row 1: 6 sc in the 2nd sc from the hook. Join. 6 bp.
Round 2: Sc 1. 2 sc in each sc around. Join. 12 bp.
Round 3: Sc 1. *1 sc in the next sc. 2 sc in next sc. Repeat from * around. Join. 18 bp.
Round 4: Sc 1. *1 sc in each of the next 2 sc. 2 sc in next sc. Repeat from * around. Join. 24 bp.
Round 5: Sc 1. *1 sc in each of the next 3 sc. 2 sc in next sc. Repeat from * around. Join. 30 bp.
Round 6: Sc 1. *1 sc in each of the next 4 sc. 2 sc in next sc. Repeat from * around. Join. 36 bp.
Round 7: Sc 1. *1 sc in each of the next 5 sc. 2 sc in next sc. Repeat from * around. Join. 42 bp.
Rows 8 to 15: Sc 1. 1 sc in each sc around. Join.
Row 16: Working in front loops only, *pr in next sc. 3 hdc in next sc. Pr in next sc. Repeat from * around. Join.
Row 17: Sc 1. Working only in the back loops of row 15, *1 sc in each of the next 5 sc. Sc2tog. Repeat from * around. Break B. Join C. 36 sc.
bottom ice cream
Row 18: With C, sc 1. Working only in the front loops, 1 sc in each sc around. Join.
Round 19: Sc 1. *1 sc in each of the next 5 sc. 2 sc in next sc. Repeat from * around. Join. 42 bp.
Rows 20 to 27: Sc 1. 1 sc in each sc around. Join.
Row 28: Working in front loops only, *pr in next sc. 3 hdc in next sc. Pr in next sc. Repeat from * around. Join.
Row 29: Sc 1. Working only in the back loops of row 27, *1 sc in each of the next 5 sc. Sc2tog. Repeat from * around. Break C. Join A. 36 sc.
Embroidery
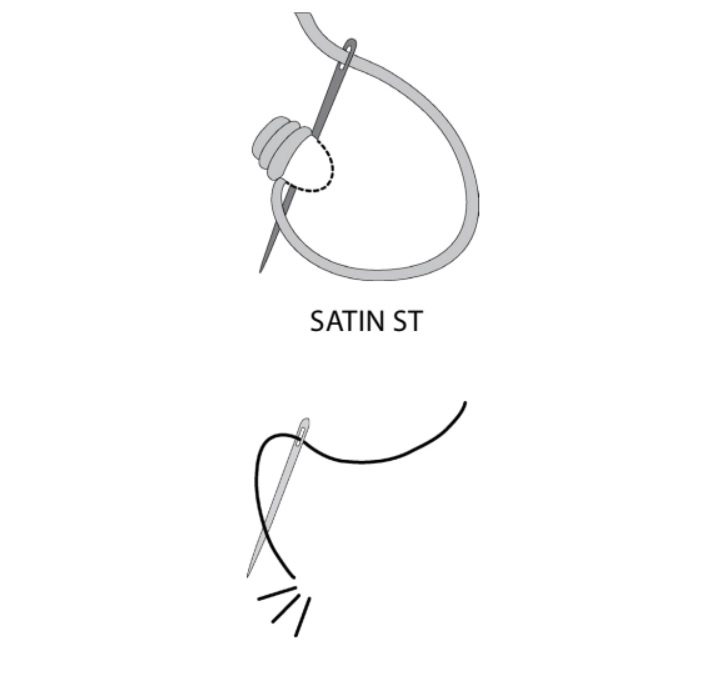
With black thread, embroider the eyes using a satin stitch on the ice creams as shown in the photo. Using pink thread, she embroiders the blush lines under each eye using a straight stitch, as shown in the photo.
Pussy
Row 30: With A, sc 1. Working only in the front loops, *1 sc in the next sc. Pc 1. Repeat from * around. Join.
Row 31: Sc 1. Working only in the back loops of row 29, 1 sc in each sc around. Join.
Rows 32 and 33: Sc 1. 1 sc in each sc around. Join.
Row 34: Sc 1. *1 sc in each of the next 4 sc. Sc2tog. Repeat from * around. Join. 30 bp.
Rows 35 and 36: Sc 1. 1 sc in each sc around. Join.
Fill the ice cream and cone firmly.
Row 37: Sc 1. *1 sc in each of the next 3 sc. Sc2tog. Repeat from * around. Join. 24 bp.
Rows 38 and 39: Sc 1. 1 sc in each sc around. Join.
Round 40: Sc 1. *1 sc in each of the next 2 sc. Sc2tog. Repeat from * around. Join. 18 bp.
Rows 41 and 42: Sc 1. 1 sc in each sc around. Join.
Round 43: Sc 1. *1 sc in the next sc. Sc2tog. Repeat from * around. Join. 12 bp.
Round 44 and 45: Pc 1. 1 sc in each sc around. Join.
Finish filling the cone firmly.
Round 46: Pc 1. *Sc2tog. Repeat from * around. Join. 6 bp.
Rows 47 and 48: Sc 1. 1 sc in each sc around.
Fasten, leaving one end short. Trace the end firmly through the remaining points.
Cherry
With the small hook and pink thread, pc 6.
Row 1: Working in horizontal bulge on back sc, pr in 2nd sc from hook. Pr in each of the next 3 pc – cherry stem made. Working in front loops only, 6 sc in last sc.
Hold the stem of the cherry to the front of the work.
Join the last sc to the first sc. 6 bp.
Round 2: Sc 1. 2 sc in each sc around. Join. 12 bp.
Round 3: Sc 1. (1 sc in the next sc. 2 sc in the next sc) 6 times. Join. 18 bp.
Round 4: Sc 1. (1 sc in each of the next 2 sc. 2 sc in the next sc) 6 times. Join. 24 bp.
Row 5: Sc 1. (1 sc in each of the next 3 sc. 2 sc in the next sc) 6 times. Join. 30 bp.
Fasten, leave one end long.
Firmly fill the cherry. Using the long end, sew the cherry onto the top ice cream, as shown in the photo.