Pieces are worked in a continuous spiral from a magic ring, unless otherwise specified. Mark the first stitch of each round with a removable stitch marker.
Make sure the stitches are tight enough to prevent filling from showing through, adjust the hook size if necessary.
All stitches for the shell pieces after round 1 are worked into the third loop.
Identify the third loop in mpa
If you look at the top of your work, you will see the front and back loops of each stitch. Tilt the work towards you and you will see an additional bar behind each stitch. This is the third loop and the one you will use for the shell part of this project.

Carapace (beam 2)
V1: 8 mpa in magic ring (8). Work only on the third loop for the rest of the shell.
V2: [Mpa-aum] x8 (16).
V3: [Mpa, mpa-aum] x8 (24).
R4: Mpa, hdc-inc, [2 hdc, hdc-inc] x7, hdc (32).
R5: [3 mpa, mpa-inc] x8 (40).
R6: 2 hdc, hdc-inc, [4 hdc, hdc-inc] x7, 2 hdc (48).
V7: [Mpa] x48 (48).
Sc in the next stitch, pr in the next and fasten invisibly, leaving a long tail to sew. You need it to be long enough to sew the shell pieces together and sew the shell to the body. Repeat the operation for the second piece, but weave the end after closing it.
Head and body (beige)
R1: 6 sc in magic ring (6).
V2: [Inc] x6 (12).
R3: [Sc, inc] x6 (18).
R4: Sc, inc, [2 sc, inc] x5, sc (24).
R5: [3 sc, inc] x6 (30).
V6-9: [Pb] x30 (30).
R10: [3 sc, inc] x6 (24).
V11-12: [Pb] x24 (24).
Insert the safety eyes between rows 6 and 7, 10 stitches apart. Make sure they look the same on both sides.
R13: SC, invdec, [2 sc, invdec] x5, sc (18).
R14: [Pb] x18 (18).
V15: [Pb, invdec] x6 (12). Stuff the head firmly but don’t stuff the rest of the body.
V16-42: [Pb] x12 (12).
R43: SC, invdec, [2 sc, invdec] x2, sc (9).
V44: [Pb] x9 (9).
V45: [Pb, invdec] x3 (6). Fasten and knit the end.
Antenna (beam 2 with beige)
R1: Pc 6, sl into back bump of 2nd pc from hook and into each pc across (5) Fasten, leaving a long tail to sew.
Flower (starting yellow)
R1: 5 sc in magic ring, changes color in the last sc. Join with a tr to the first sc.
R2: [Sc 2, 2 dc in the same point, sc 2, pr in the same point. Pr in the next point] x4. In the last stitch – sc 2, 2 dc in the same stitch, sc 2, pr in the same stitch (5 petals). Fasten, leaving a long tail for sewing.
Assembly
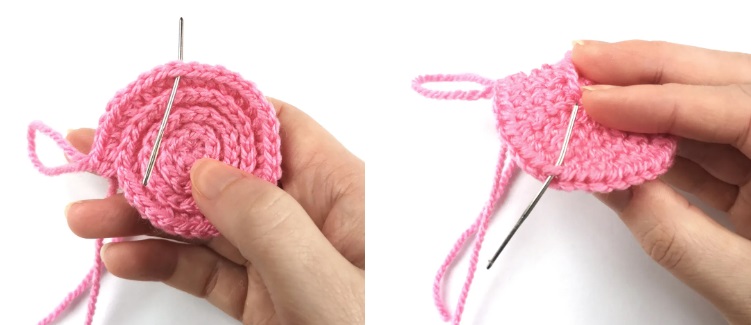
Place the shell pieces from the wrong sides together and whip stitch together through the back loops. Start filling 3/4 of the way around. Avoid overfilling so the filler doesn’t show through the stitches.
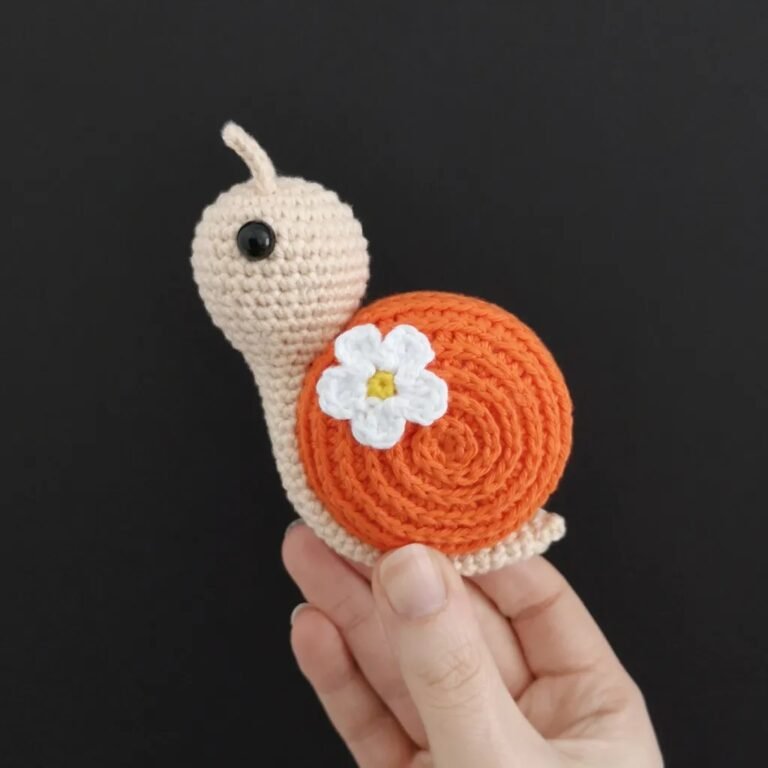
Using the leftover thread from the shell, sew the shell to the head/body piece, going up one side of the body, across behind the head, down the other side of the body, and across the tail. Fasten and weave the end.
Sew the antenna to the head above the eyes, 2 turns from the center of the magic ring.
Sew the flower to the shell. In the amigurumi shown it has been placed next to the head, but you can put it wherever you want.