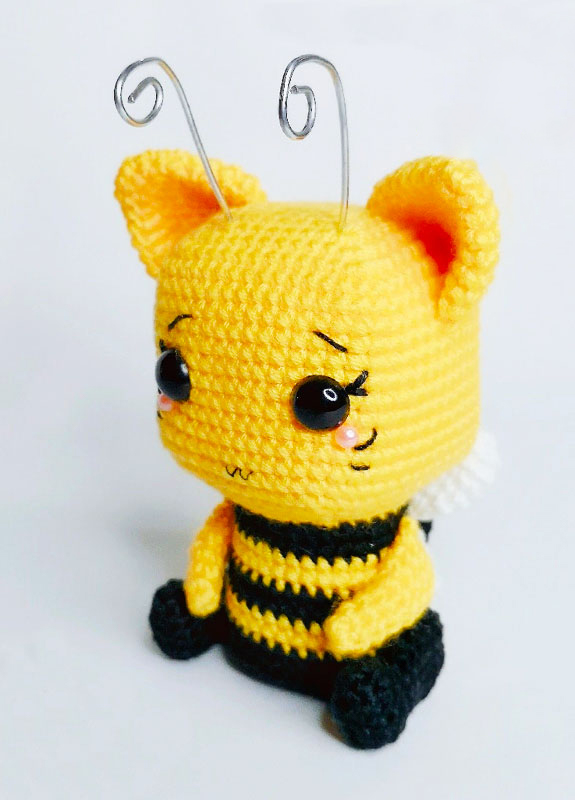
An amigurumi bee costume for a kitten can be adorably fun! This lovely knitting task is a great way to add a touch of cheer . The little bee that is knitted for the costume is very fun because it is a mix between a kitten and a bee. Let’s get started!
Abbreviations
✅ AM: Magic Ring.
✅ Cad: chain.
✅ A: Increase.
✅ X: Low Point.
✅ A3: Triple increase same point.
✅ X Rd: Right Reverse Low Point.
✅ D: Decrease.
✅ A: Round.
✅ D3: Triple decrease.
✅ Pts: Points.
✅ FL: Work only in the front loop of the piece.
Materials
✅ Hook size 2mm.
✅ Cotton thread in black, yellow and white.
✅ 8mm safety eyes.
✅ Synthetic fiber filling.
✅ Aluminum wire to form the antennas.
✅ Needle, scissors, pliers, pins and stitch marker.
Measurements
✅ 10 cm wide by 5.5 cm wide.
Instructions
head
R1: AM with 4X (4)
R2: 4A (8)
R3: (X + A3) *4 (16)
R4: 2X + (A3 + 3X) *3 + (A3 + X) (24)
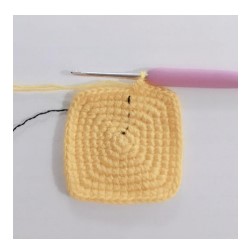
A5: 3X + (A3 + 5X) *3 + (A3 + 2X) (32)
A6: 4X + (A3 + 7X) *3 + (A3 + 3X) (40)
A7: 5X + (A3 + 9X) *3 + (A3 + 4X) (48)
A8: 6X + (A3 + 11X) *3 + (A3 + 5X) (56)
R9-21: 56X(13R)(56)
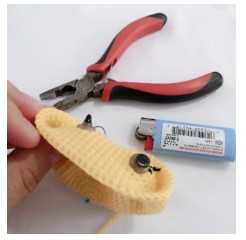
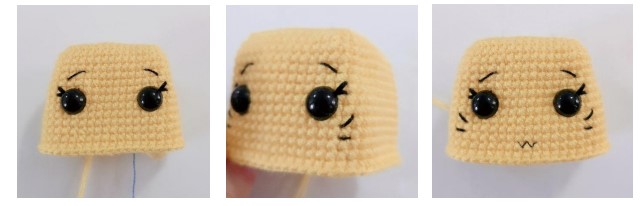
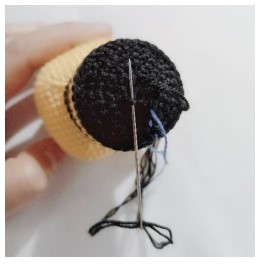
At this point we will introduce the safety eyes between R15-R16 with 10 points of separation. As a tip, I suggest that you use a lighter or candle and burn the tip of the eye. Once hot, use the tongs or something metal to flatten the surface. This will help us create double security and that our eye will never come off our amigurumi. .
We will embroider eyelashes, eyebrows, mustaches and mouth.
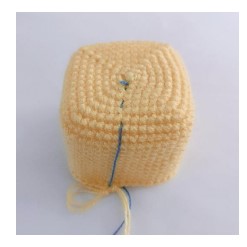
With the help of some pins we will mark between R5-R6 with 7 points of separation, that will be the distance in which we will bend our wire, we will use a pliers to do it, once folded we will insert it internally in this way we will have ours ready. antennas.
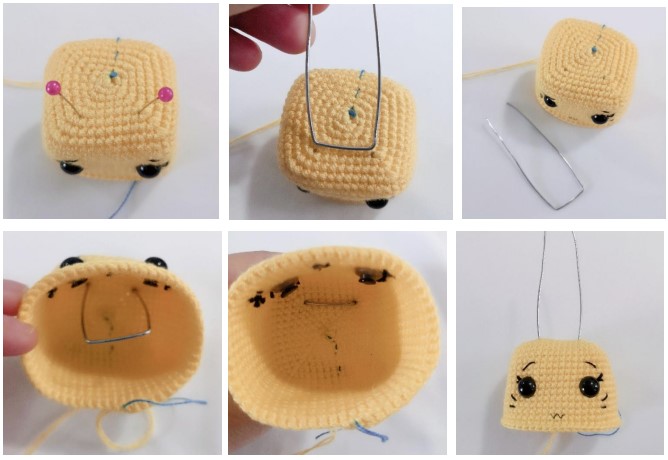
**We will continue with our weaving.
R22: 6X + (D3 + 11X) *3 + (D3 + 5X) (48)
R23: 5X + (D3 + 9X) *3 + (D3 + 4X) (40)
R24: 4X + (D3 + 7X) *3 + (D3 + 3X) (32)
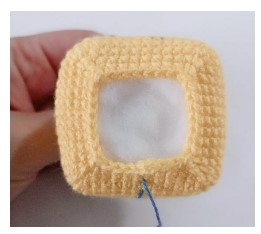
We will fill our heads.
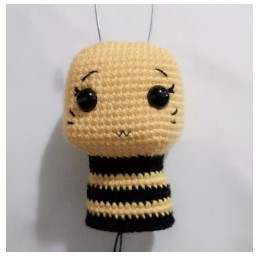
Change to black color
R25: FL 32X (32)
R26-27: 32X (2R) (32)
Change to yellow color
R28: (7X + A) *4 (36)
R29: 36X(36)
Change to black color
R30-31: 36X (2R) (36)
Change to yellow color
R32-33: 36X (2R) (36)
Change to black color
R34-35: 36X (2R) (36)
R36: 36X Rd (36)
R37: (4X + D) *6 (30)
R38: (3X + D) *6 (24)
R39: (2X + D) *6 (18)
R39: (X + D) *6 (12)
R40: Close**
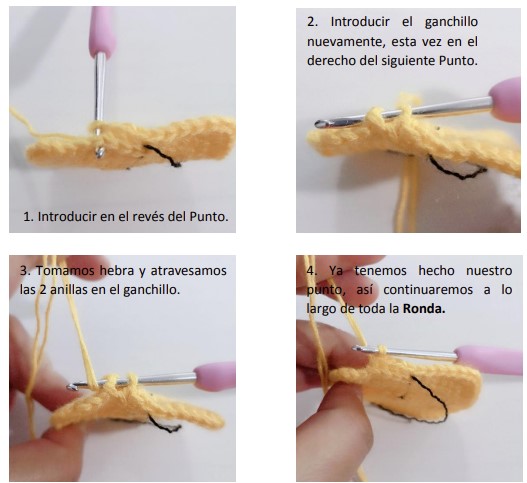
X Rd (Right Purl Low Crochet)
It is a point that makes it easier for us to create 90 degree angles as we knit. It performs a similar function as if we were using the BL (Back Loop). The difference is that if we use the X Rd it will give us more rigidity, the final finish will be neater and It allows us to give a more defined shape to the part of our amigurumi in which we use it.
What we do is introduce the hook backwards, that is, through the back of the stitch, we take it out and reinsert it this time in the next stitch, we take yarn over and make 1 single crochet. So on until the number of points for the round is complete.
Note: Be careful with the last point as you may miss it if you don’t pay attention. We will introduce the hook on the wrong side and we will introduce it again this time at the starting point of the round where we place our marker and close with a single crochet so we will have the total number of points in our round.
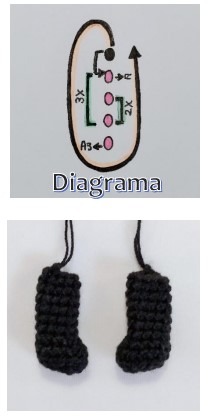
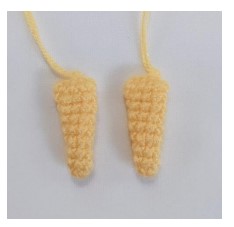
Legs x2
R1: 5Ch (3X + A3) + (2X + A) (10)
R2: A + 2X, 3A, 2X + 2A (16)
R3: 4X + 3D, 4X + D (12)
R4: 4X + 2D + 4X (10)
R5-10: 10X (6R) (10)
You can fill them a little, especially in the tip of the foot so we can give it shape, in the leg part it is not necessary to fill.
Arms x2
R1: AM with 5X (5)
R2: 4X + A (6)
R3: 6X (6)
R4: 5X + A (7)
R5: 7X (7)
R6: 6X + A (8)
R7-8: 8X(2R)(8)
R9: 1C. we will join the arm by knitting 4X (4)
**It is not necessary to stuff the arms.
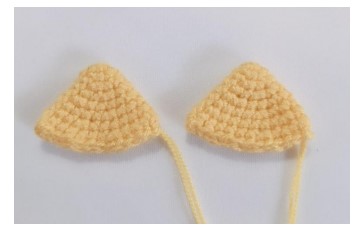
Ears
R1: AM with 6X (6)
R2: (A + X) *3 (9)
R3: (A + 2X) *3 (12)
R4: (A + 3X) *3 (15)
R5: (A + 4X) *3 (18)
R6: (A + 5X) *3 (21)
R7: (A + 6X) *3 (24)
R8: (A + 7X) *3 (27)
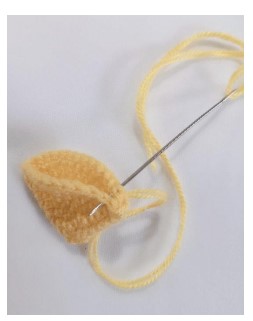
We will join the ears together with the help of a hand needle, to make it easier for us when attaching them to the head. And we will position them in the head between R4 and R12.
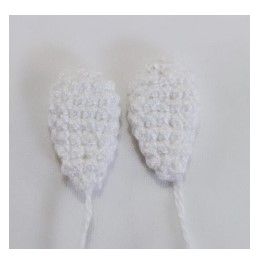
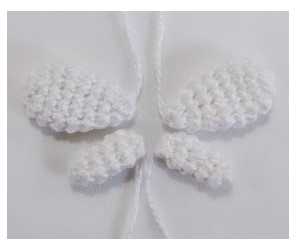
Big Wings x2
R1: AM with 6X (6)
R2: 6A (12)
R3-5: 12X(3R)(12)
R6: (R + 4X) *2 (10)
R7: (R + 3X) *2 (8)
R8: 8X (8)
*Close*
Little Wings 2
R1: AM with 5X (5)
R2: A+4X (6)
R3: 6X (6)
R4: A+5X (7)
R5: 7X (7)
*Close*
Join the large wing with the small one, and then sew them on the back of our kitten.
Line
R1: AM with 5X (5)
R2-12: 5X (11R) (5)
Mounting
We will sew the arms, ears, wings and tail to the body, with this we will have finished our Bee Kitten.
I hope you liked it!