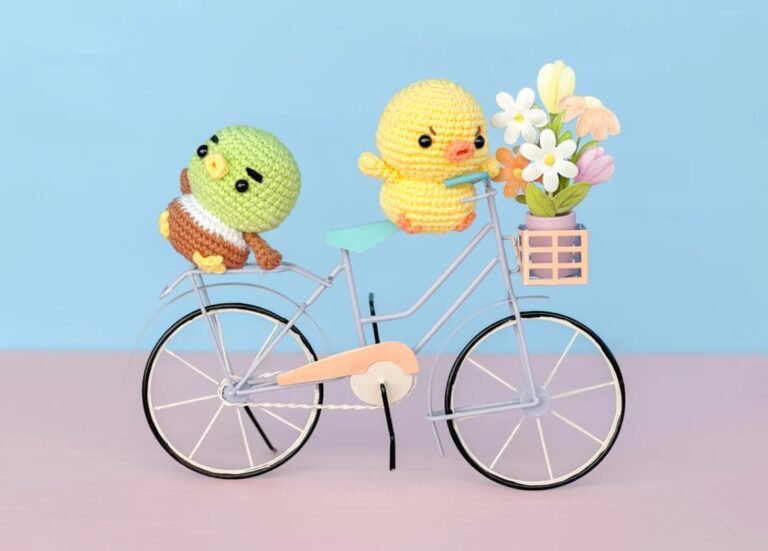
Meet Joey, the future new member of your collection of cute hand-knitted feathered amigurumis. With a somewhat grumpy personality, he is a striking and beautiful toy that everyone will love to have
Abbreviations
✅ V: Return.
✅ Pc: Chain.
✅ Pb: Low point.
✅ Pa: High point.
✅ Pr: Sliding point.
✅ FLO: Only on the front loop.
✅ Decrease: Invisible decrease.
✅ Increase: Increase.
Materials
✅ Light green, white, light brown, black and yellow #3 worsted weight yarn.
✅ 2.75 mm hook.
✅ Needle.
✅ Scissors.
✅ Point marker.
✅ 7 mm safety eyes.
✅ Fiber filling.
Instructions
Use a stitch marker and count the stitches after each round.
Use pins to sew the pieces together and check for uniformity.
Fluff the filling, separating it and introducing it little by little so that the amigurumi is more uniform. Fill it a little more just before closing it with the tips of the scissors to give it a firmer shape.
Head (in light green thread)
V1: Make a magic circle and (pb) x 6. [6]
V2: (Inc) x 6. [12]
R3: (Sc, inc) x 6. [18]
R4: (2 sc, inc) x 6. [24]
R5: (3 sc, inc) x 6. [30]
R6: (4 sc, inc) x 6. [36]
R7-10: Sc all around (4 laps in total). [36]
R11: (Inc) x 4, 10 sc, (inc) x 4, 18 sc. [44]
V12: Pb all around. [44]
R13: (20 sc, dec) x 2. [42]
R14: (5 sc, dec) x 6. [36]
R15: (4 sc, dec) x 6. [30]
R16: (3 sc, dec) x 6. [24]
R17: (2 sc, dec) x 6. [18]
Set the safety eyes between rows 10 and 11, 7 points apart with 5 spaces between them.
Fill the head and fill both cheeks well.
Switch to white thread and continue with the body.
Body (start with white thread)
V1: FLO – (inc) x 18. [36]
V2: Pb all around. [36]
Switch to light brown thread.
R3: (5 sc, inc) x 6. [42]
R4-5: Sc all around (2 rounds in total). [42]
R6: (5 sc, dec) x 6. [36]
R7: (4 sc, dec) x 6. [30]
R8: (3 sc, dec) x 6. [24]
R9: (2 sc, dec) x 6. [18]
Leave a 10-inch tail and fasten. Fill out the body a little more. Sew the hole using the thread needle and passing only through the front loops and close it.
Note: Sewing the hole closed at 18 stitches is not an error. This will allow the duck to have a flat bottom to sit on. I must insist on the importance of filling it well so that it does not end up wavy.
Wings (make two in light brown yarn)
R1: Pc 5. Starting in the 2nd sc from the hook, (sc) x 4. Work along the bottom of the sc. (Pb) x 4. [8]
V2-3: Sc all around (2 rounds in total). [8]
R4: (2 sc, dec) x 2. [6]
V5: Pb all around. [6]
Button up. Leave an 8-inch tail for sewing. Don’t fill.
Feet (make two in yellow thread)
V1: Pc 2. Pr in the 2nd pc from the hook. This will be the back of the duck’s foot. Add a bookmark here. *Sc 2, sc in the 2nd sc from the hook, sl st in the marked point.* This is the first toe.
Repeat from * to * two more times until you make a total of 3 fingers. Button up. Leave an 8-inch tail for sewing.
Beak (in yellow thread)
R1: Stc 5. Starting in the 2nd st from the hook, sc in the next 4 stitches. Now that you are at the end of the row, work along the bottom of the pc. Pb in the next 4 points. [8]
V2: Pb all around. [8]
Leave an 8 inch tail and use the invisible backing to fasten.
Assembly
Beak: Sew the beak between rows 10-11. Since it is shaped like a bowl, pinch it with your fingers.
Eyebrows: Cut 12 inches of black yarn and weave it through 2 loops above each eye, 2 stitches wide.
Wings: Use the beak as a reference point for the center of the body. Flatten the wings and sew them closed. Then sew them where the head meets the body – 16 stitches apart on the chest. A wing will cover the color change.
Feet: Sew the feet between rows 5-7 of the body, 5 stitches apart.