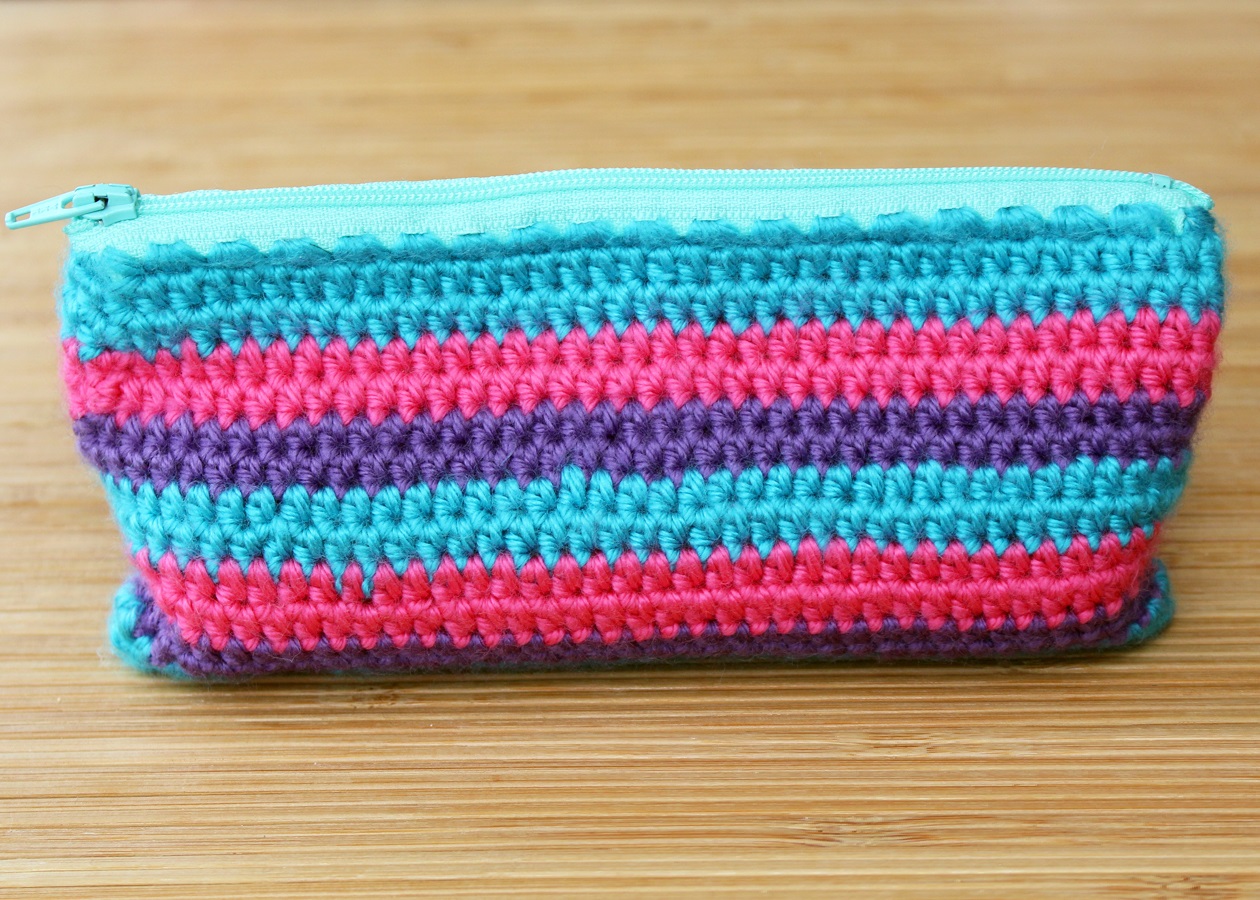
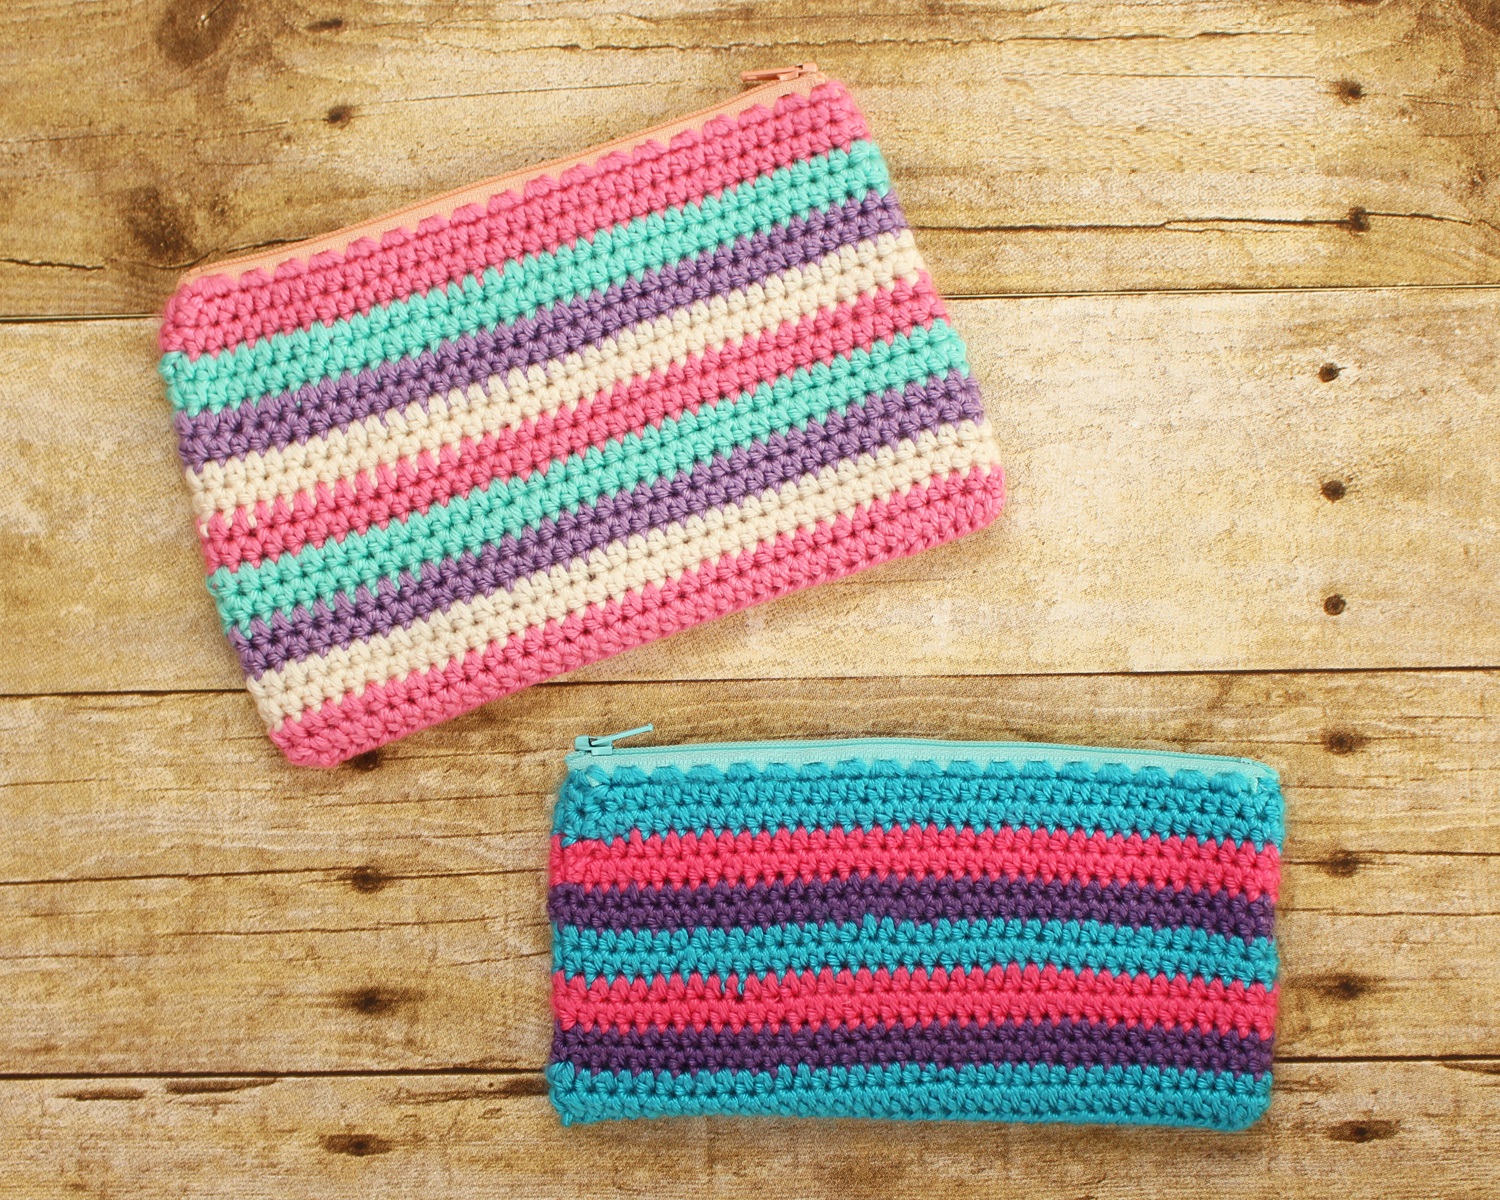
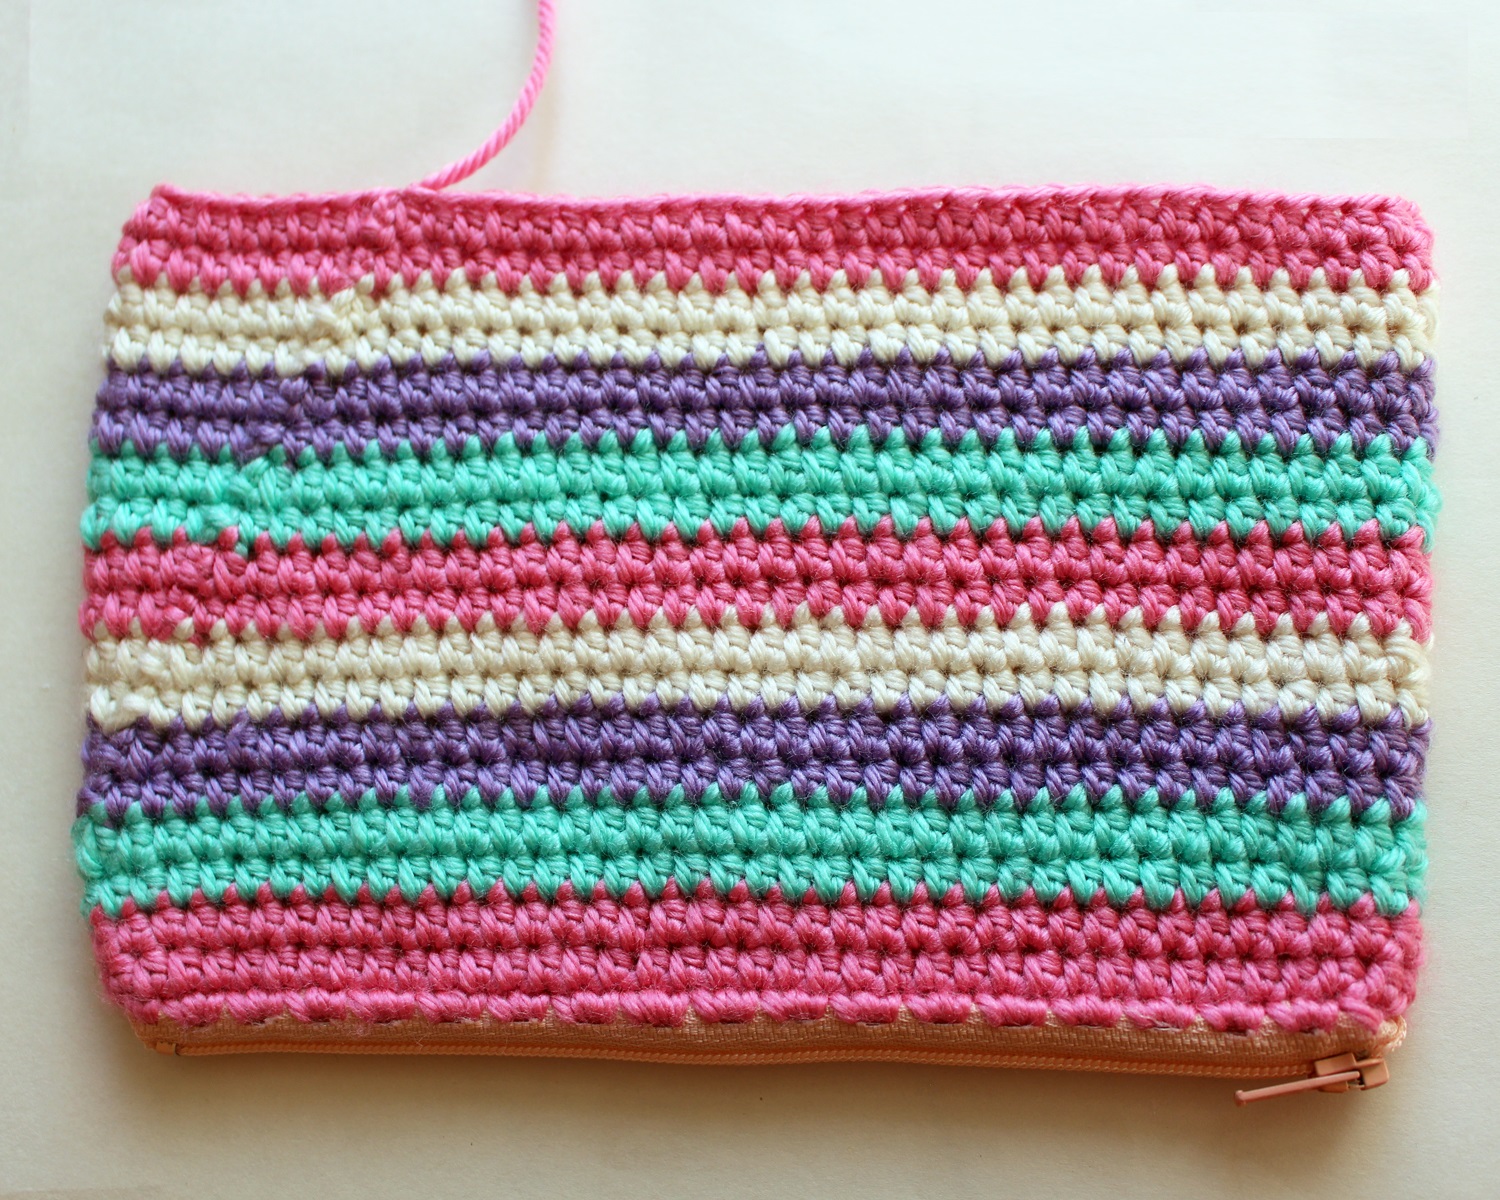
With a colorful striped design, this crochet bag is the perfect accessory for storing pencils, colors, etc. Practical and comfortable, it is a majestic piece that we know you will love to knit .
Abbreviations
Pc: Cadena.
Mpa: Medium high point.
Sc: Single crochet.
Pr: Sliding point.
Materiales
Hilo de color Minty, Lilac, Off White y Strawberry.
3.5mm hook.
Zipper.
Thread needle.
Rotary cutting click (optional).
Measurements
The size of your piece will depend on you.
Instructions for the Crochet Zipper Bag
Join – at the end of each round, make sure to join by making pr on top of the first stitch of the round, rather than in the pc space. This will create a more hidden seam.
Start each round – start each round at the same point on pc 2. Do not jump to the next point.
Color Changes – change color at the end of the round before joining. Complete the last hdc of the round until the last round of thread. Yarn over with the new color and pull through the last step of the mpa. Therefore, the color change will be like this: pass the yarn over, insert the hook in the last stitch, raise a yarn over, pass the yarn over with the new color, go through all the yarn overs.
In this pattern the stitches are not counted, since there are different size possibilities for the bag. Zippers of different lengths can be used, more rows can be added, zipper holes may not be at the same distance, etc.
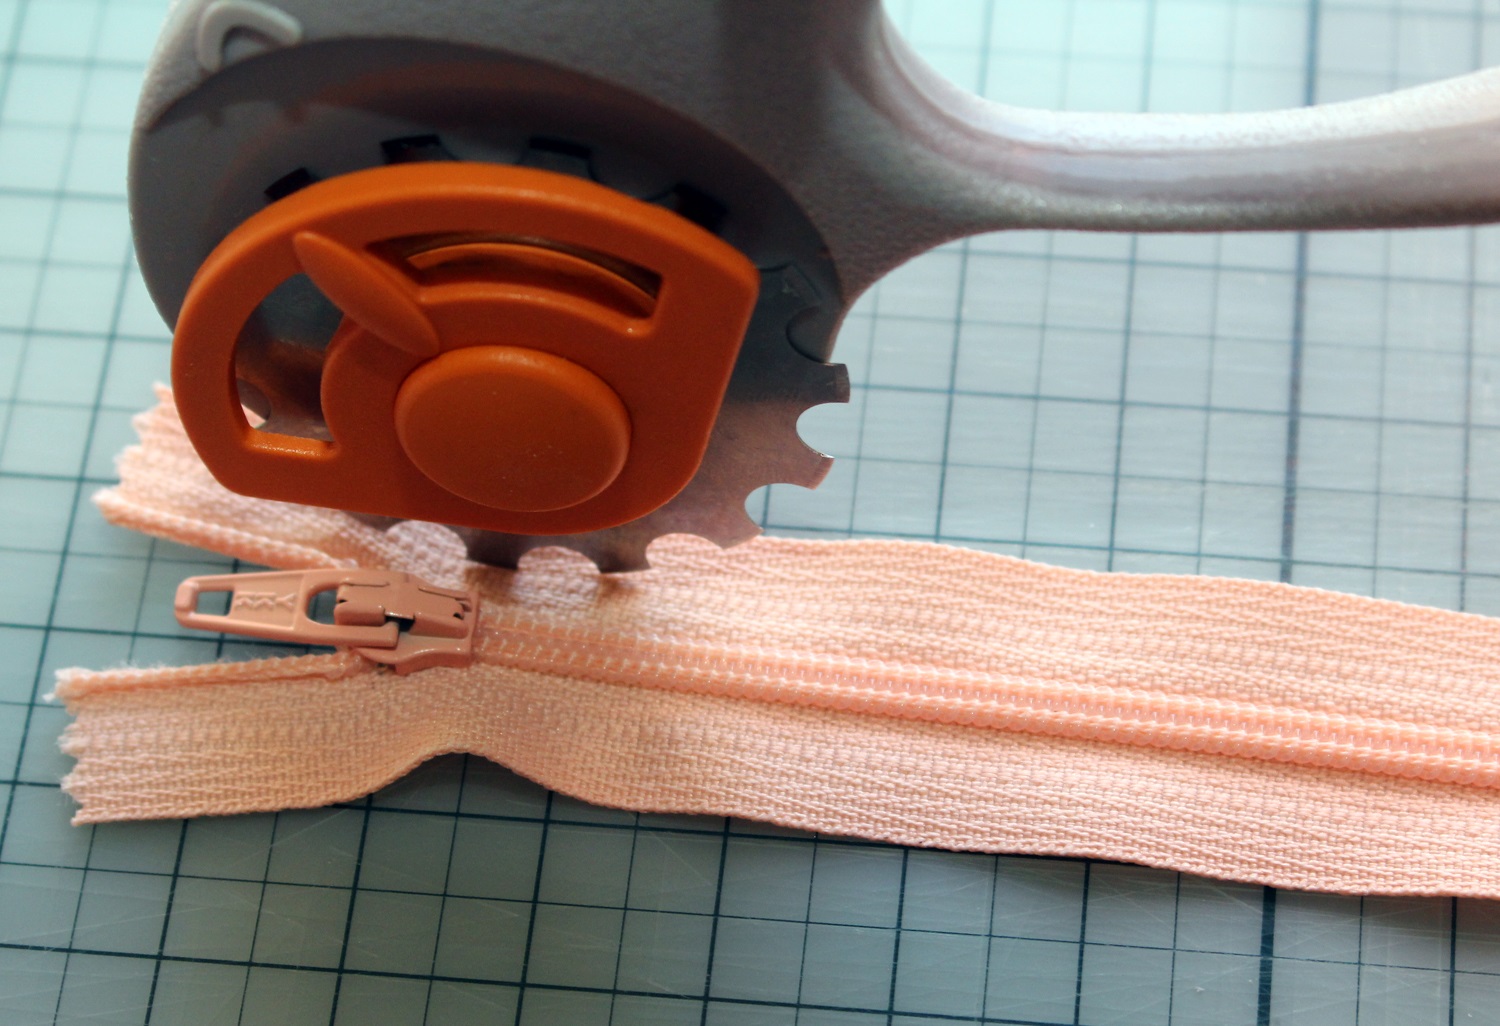
Step 1: Cut Zipper Holes and Knit Around
If you are using the rotary cutter, start at one end of the zipper and slide the cutter along the zipper fabric until you reach the other end. Repeat the operation on the other side of the zipper.
Make sure you start in the same place on each side of the zipper so the holes line up. The stitches will look nice and uniform if they match those on the other side.
If you don’t have a cutting blade, you can use a ruler and a small blade or your thread needle to make the holes.
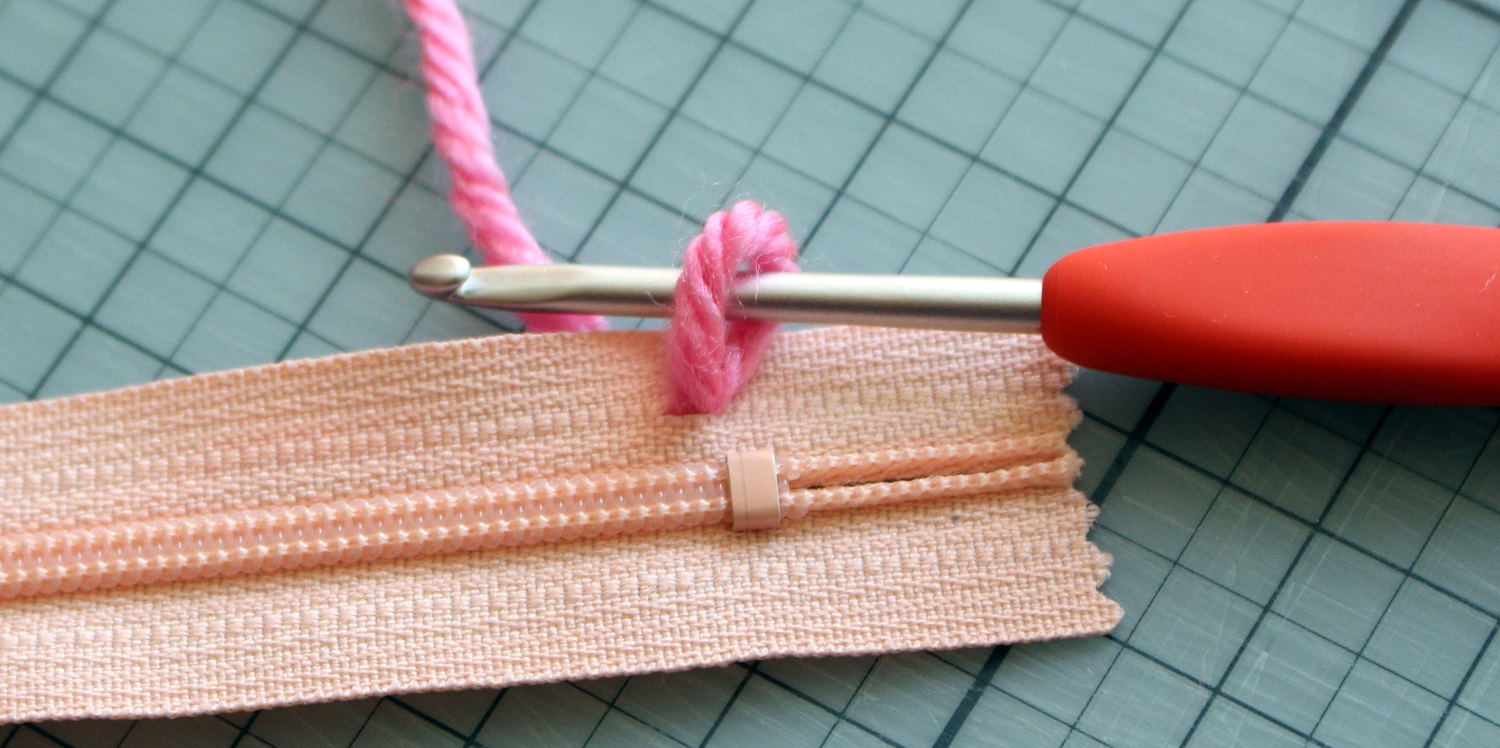
Step 2: Join the thread and sc around the zipper.
Next, insert the hook into a hole at the end of the zipper and make a loop with the thread. Pc 1 and make 2 sc in the same hole as Pc 1.
Continue making 2 sc in each hole along one side of the zipper.
When you zip through, you will have to cross to the other side of the fabric to continue your sc.
To do this, insert your hook into the next hole that lines up on the other side of the zipper, pull up a loop and make your sc.
Remember that you must make 2 sc in this hole and in each of the holes that cross to the other end of the zipper fabric.
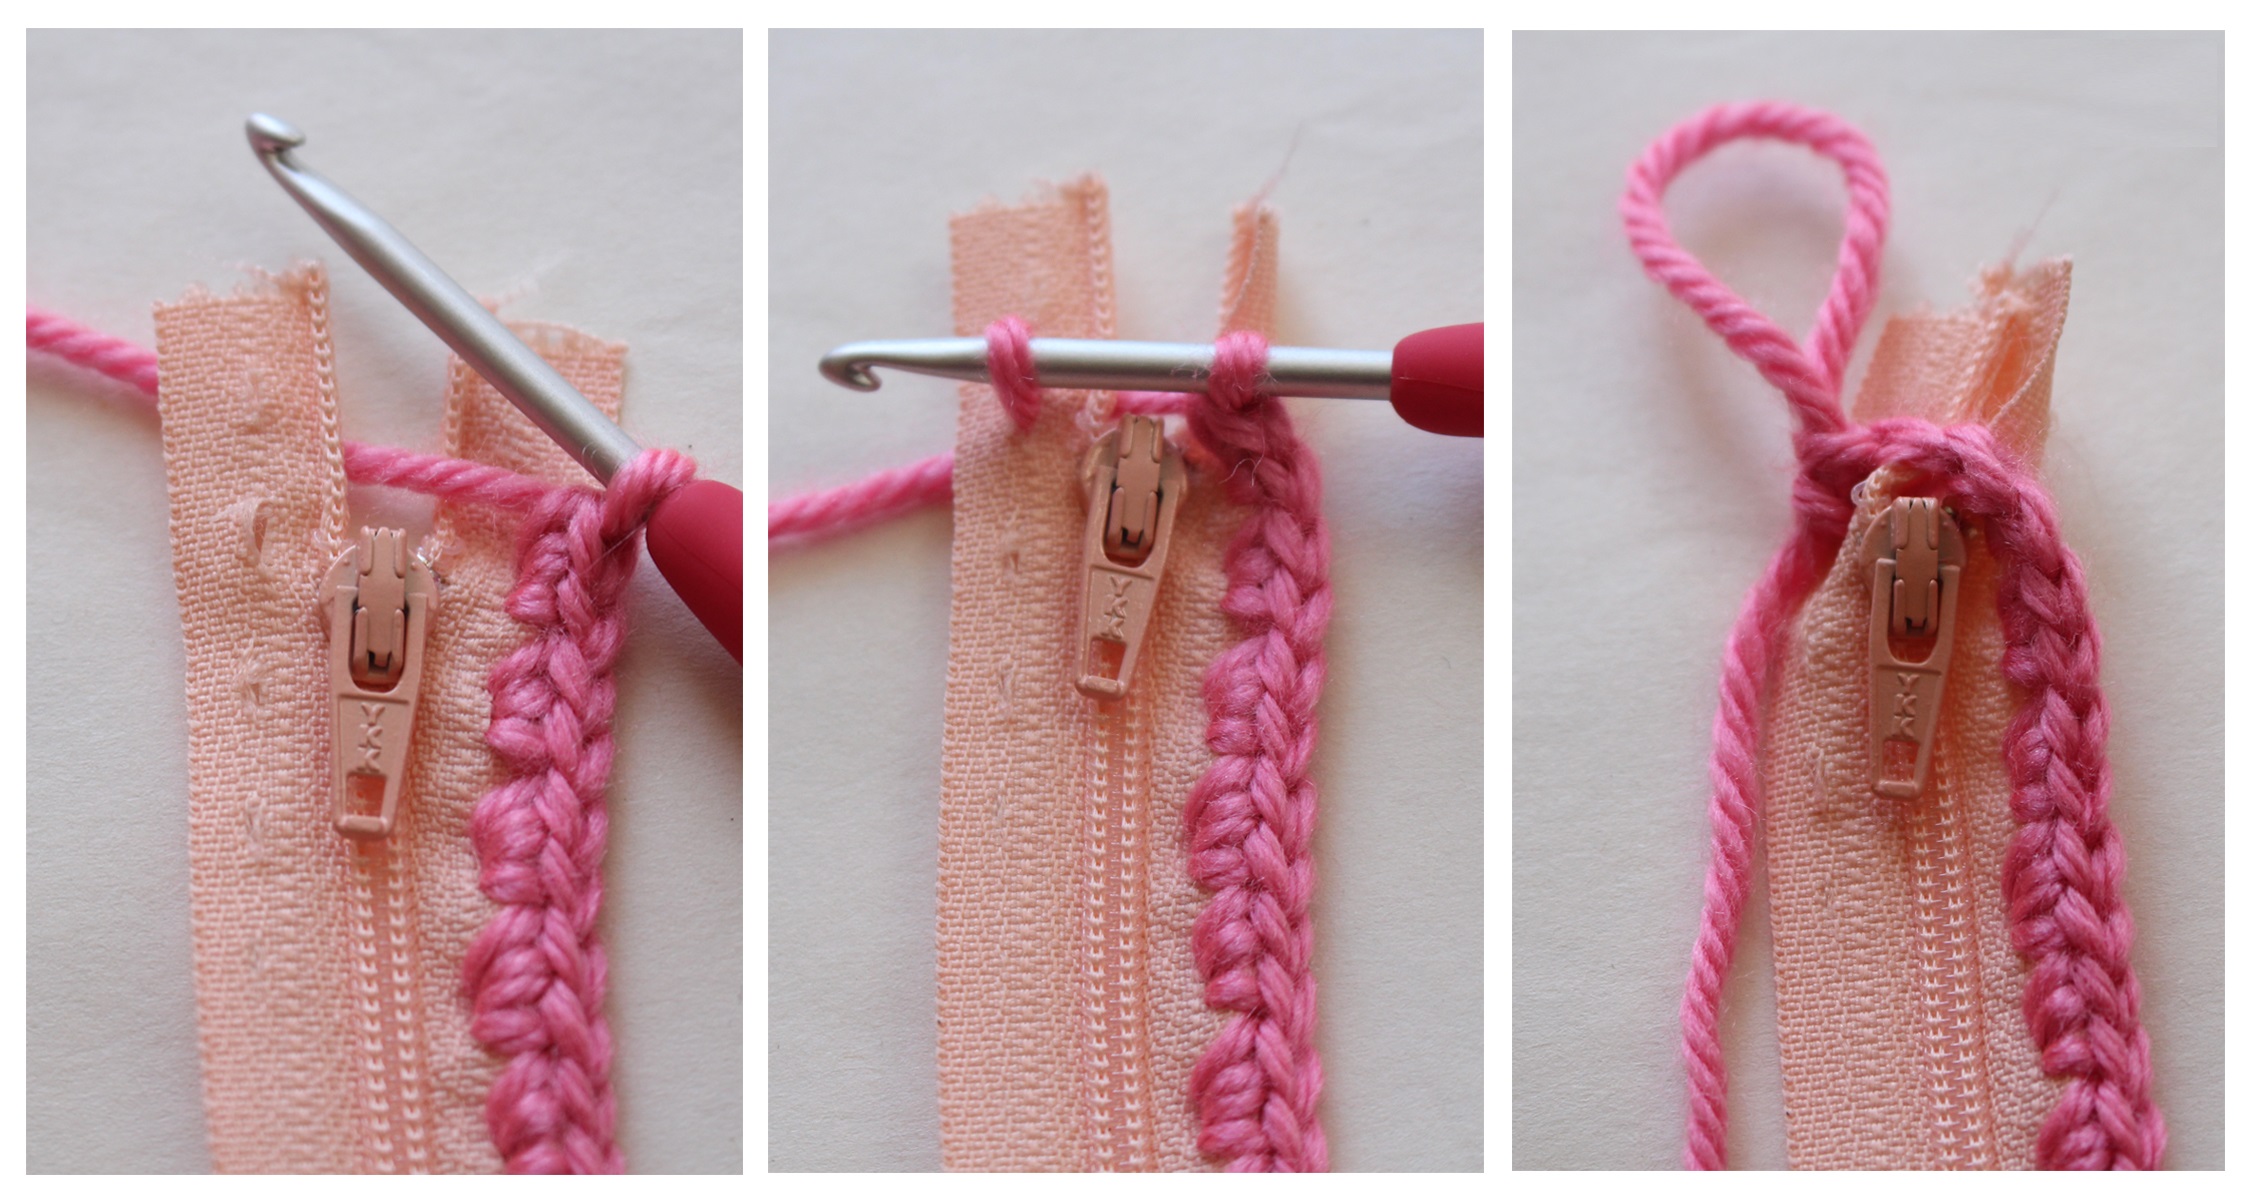
Continue to the other side of the fabric, just after the end of the zipper part. Pass a hole beyond the one that lines up.
Now, insert the hook into the next hole on the other side, make one sc plus one more sc in that hole.
Join with a sl st to the top of the first sc of the round and sc 2 (make sure you are joining in the sc and not in the space of sc 1 from the previous round).
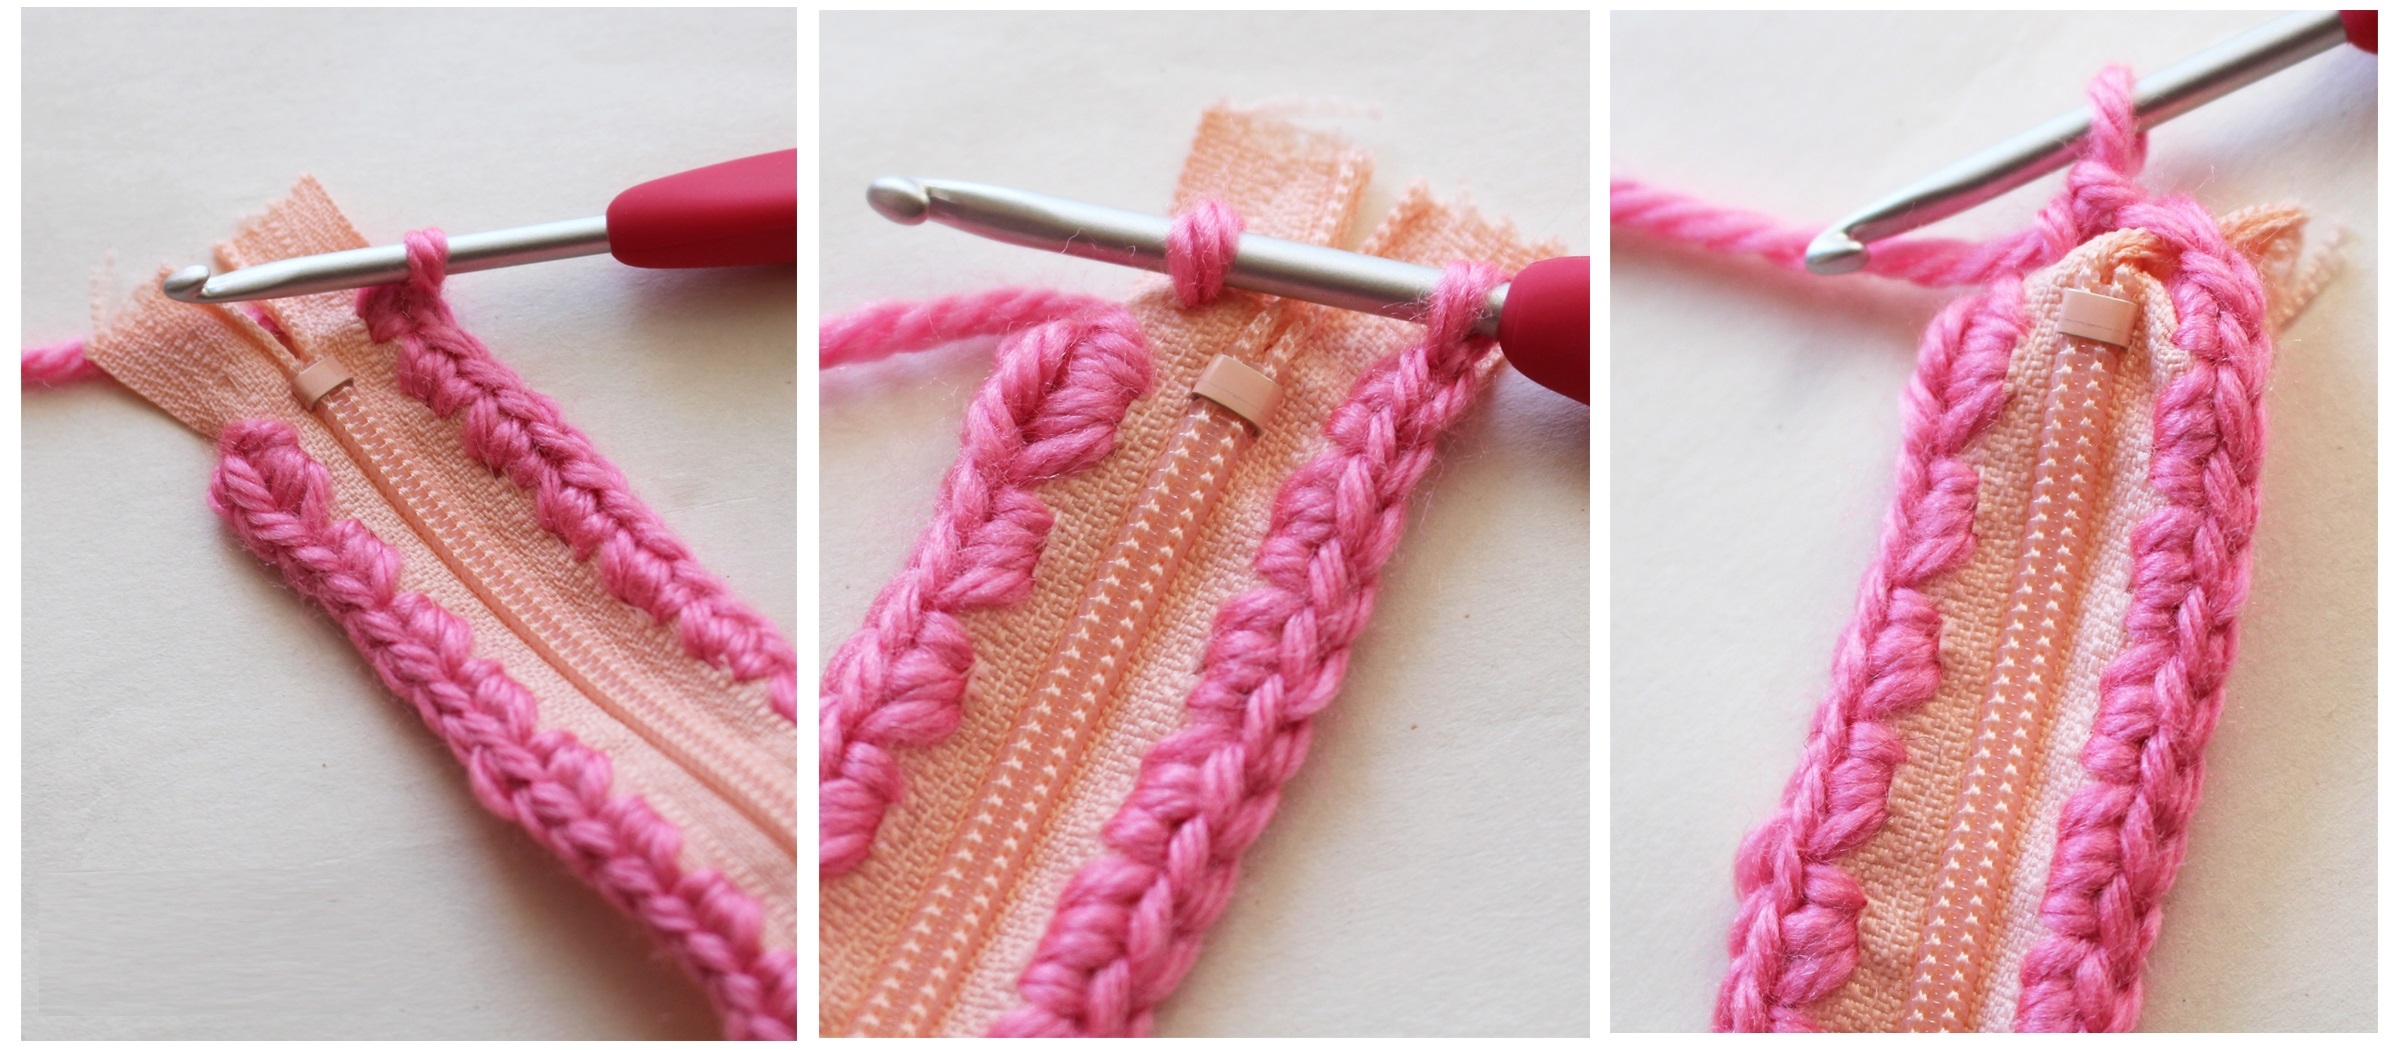
Step 3: Knit as many rows as you need to achieve the desired size of the bag.
Do as many rounds of mpa as you need to get the size bag you want.
After joining to the top of the first sc of the first round and making sc 2, you are going to make a hdc in each stitch around (starting in the same point of sc 2).
When you get to the end, join to the top of your first hdc and sc 2, then start your next round of hdc. Repeat, changing colors as necessary to achieve the desired look.
After completing a couple of rows of sc, you should turn it inside out to sew the end of the zipper so it doesn’t stick out. It’s easier to do this before the bag gets too big.
Use your thread needle to sew around each end of the zipper fabric to keep it together and not sticking out at the ends.
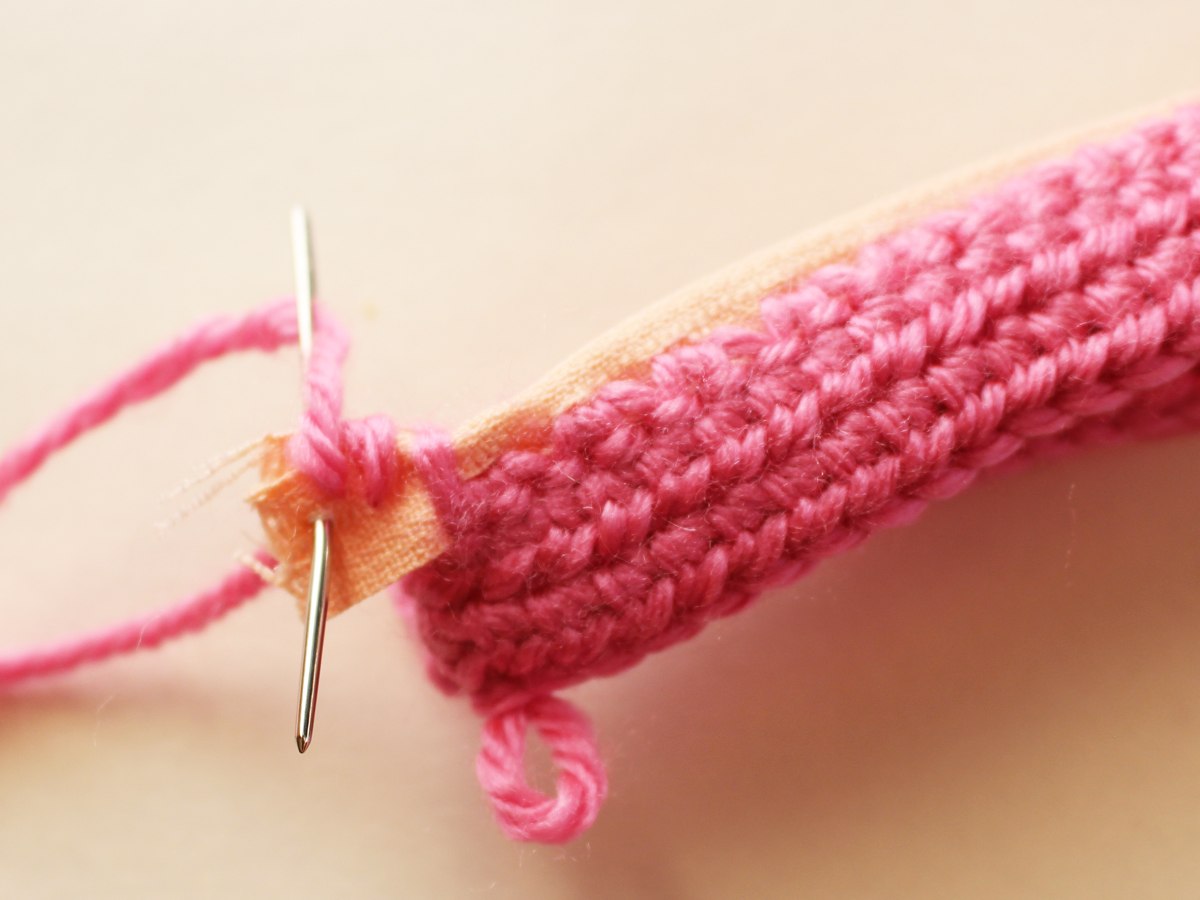
Step 4: Sew the bottom of the bag closed.
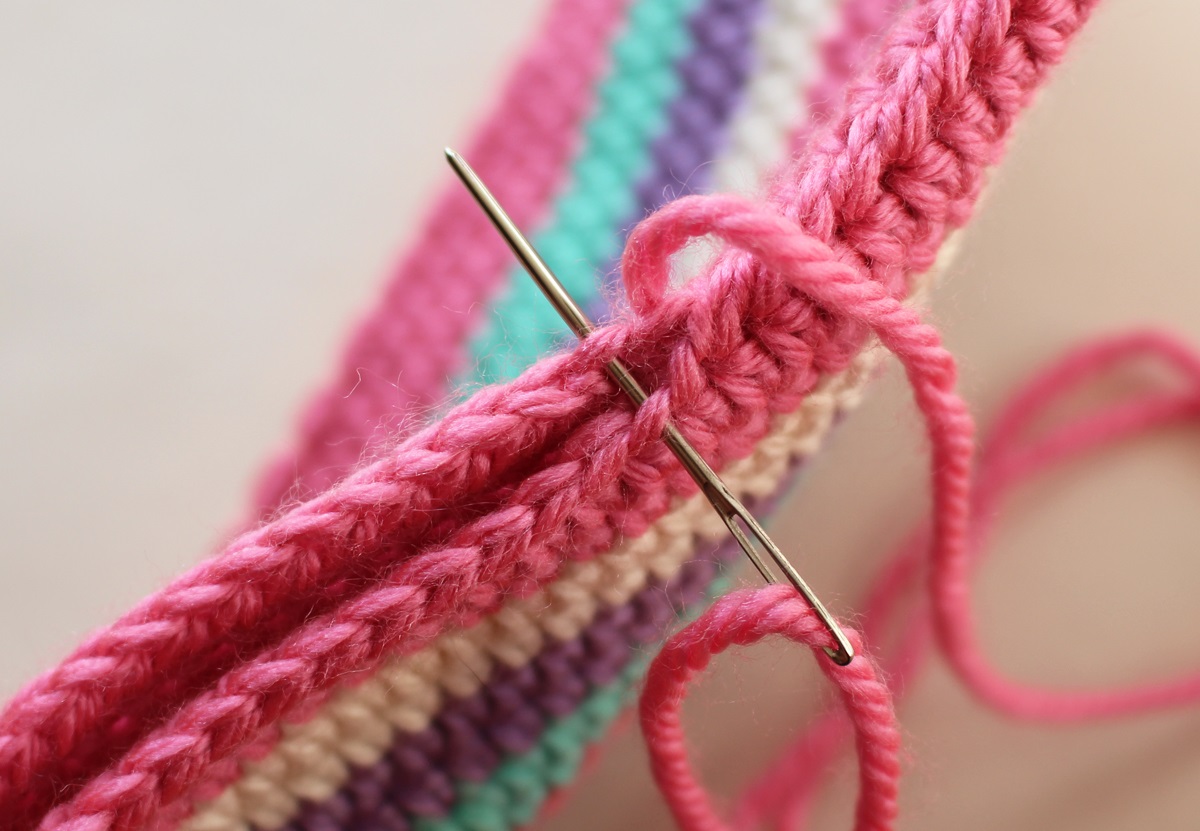
When you have reached the desired size of the bag, join with a tr to the top of the first hdc of the round. Fasten, leaving a long tail to sew the bag closed.
When you fasten, as the seam moves a little, the end may not match the side of the bag. Use your yarn needle and weave the yarn behind your stitches until you reach the corner of the bag.
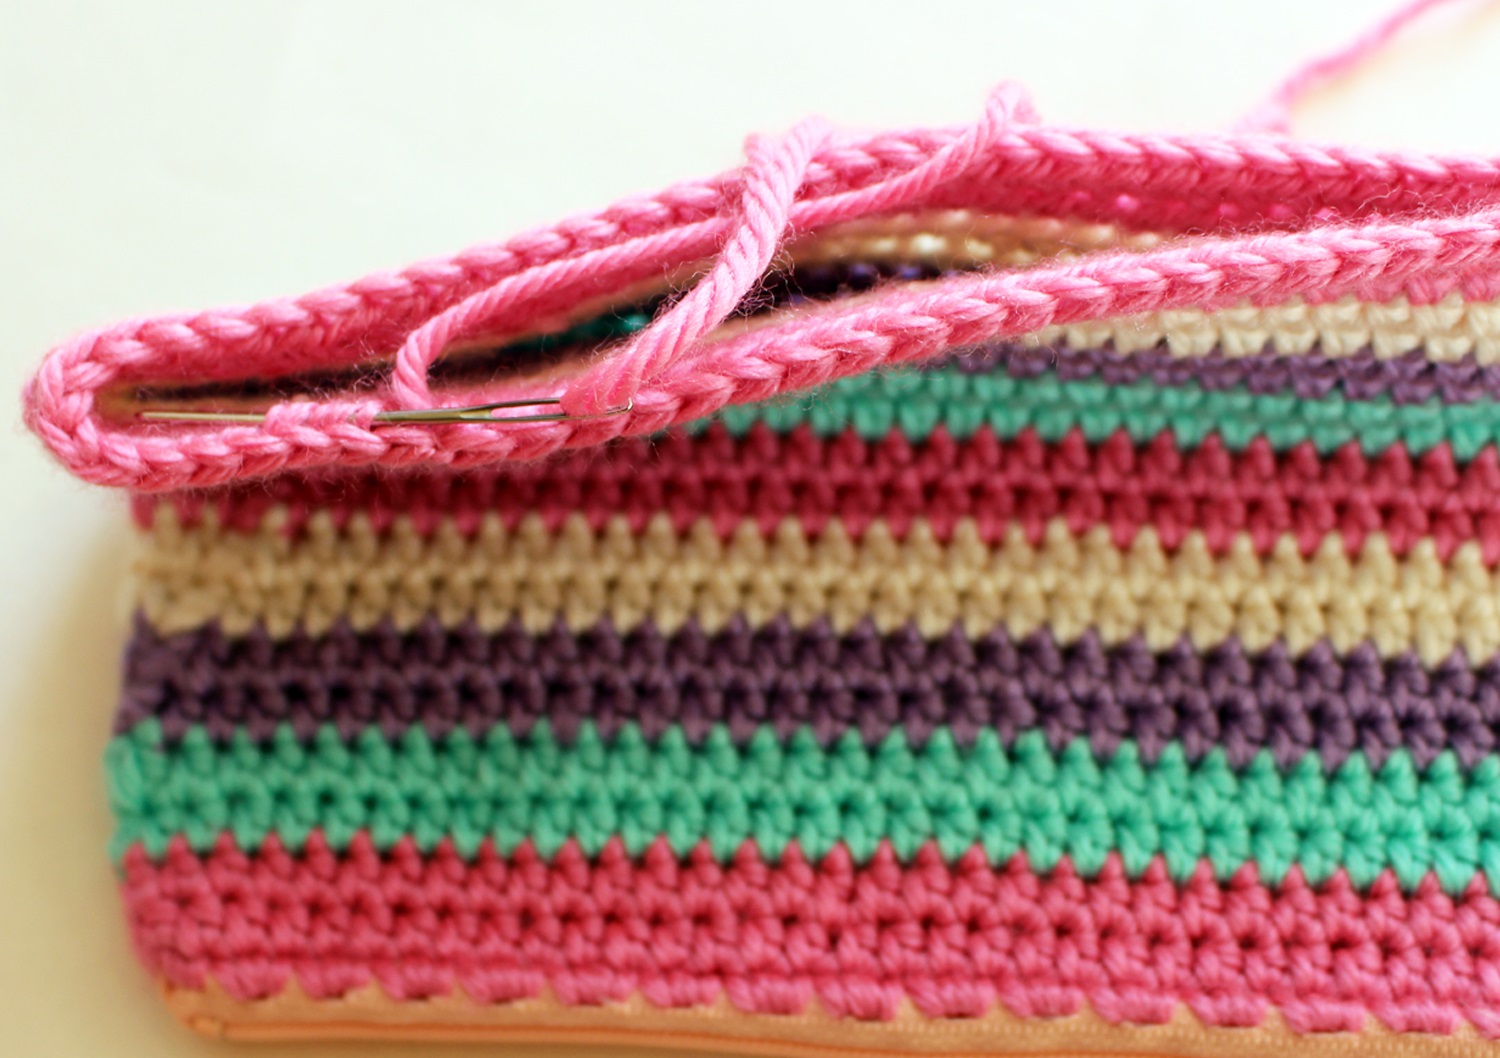
To close the bottom of the bag, use the wool needle and sew around the outer loops of each stitch. You can use a whip stitch to close it. When you get to the end, weave the tail and you’re done.