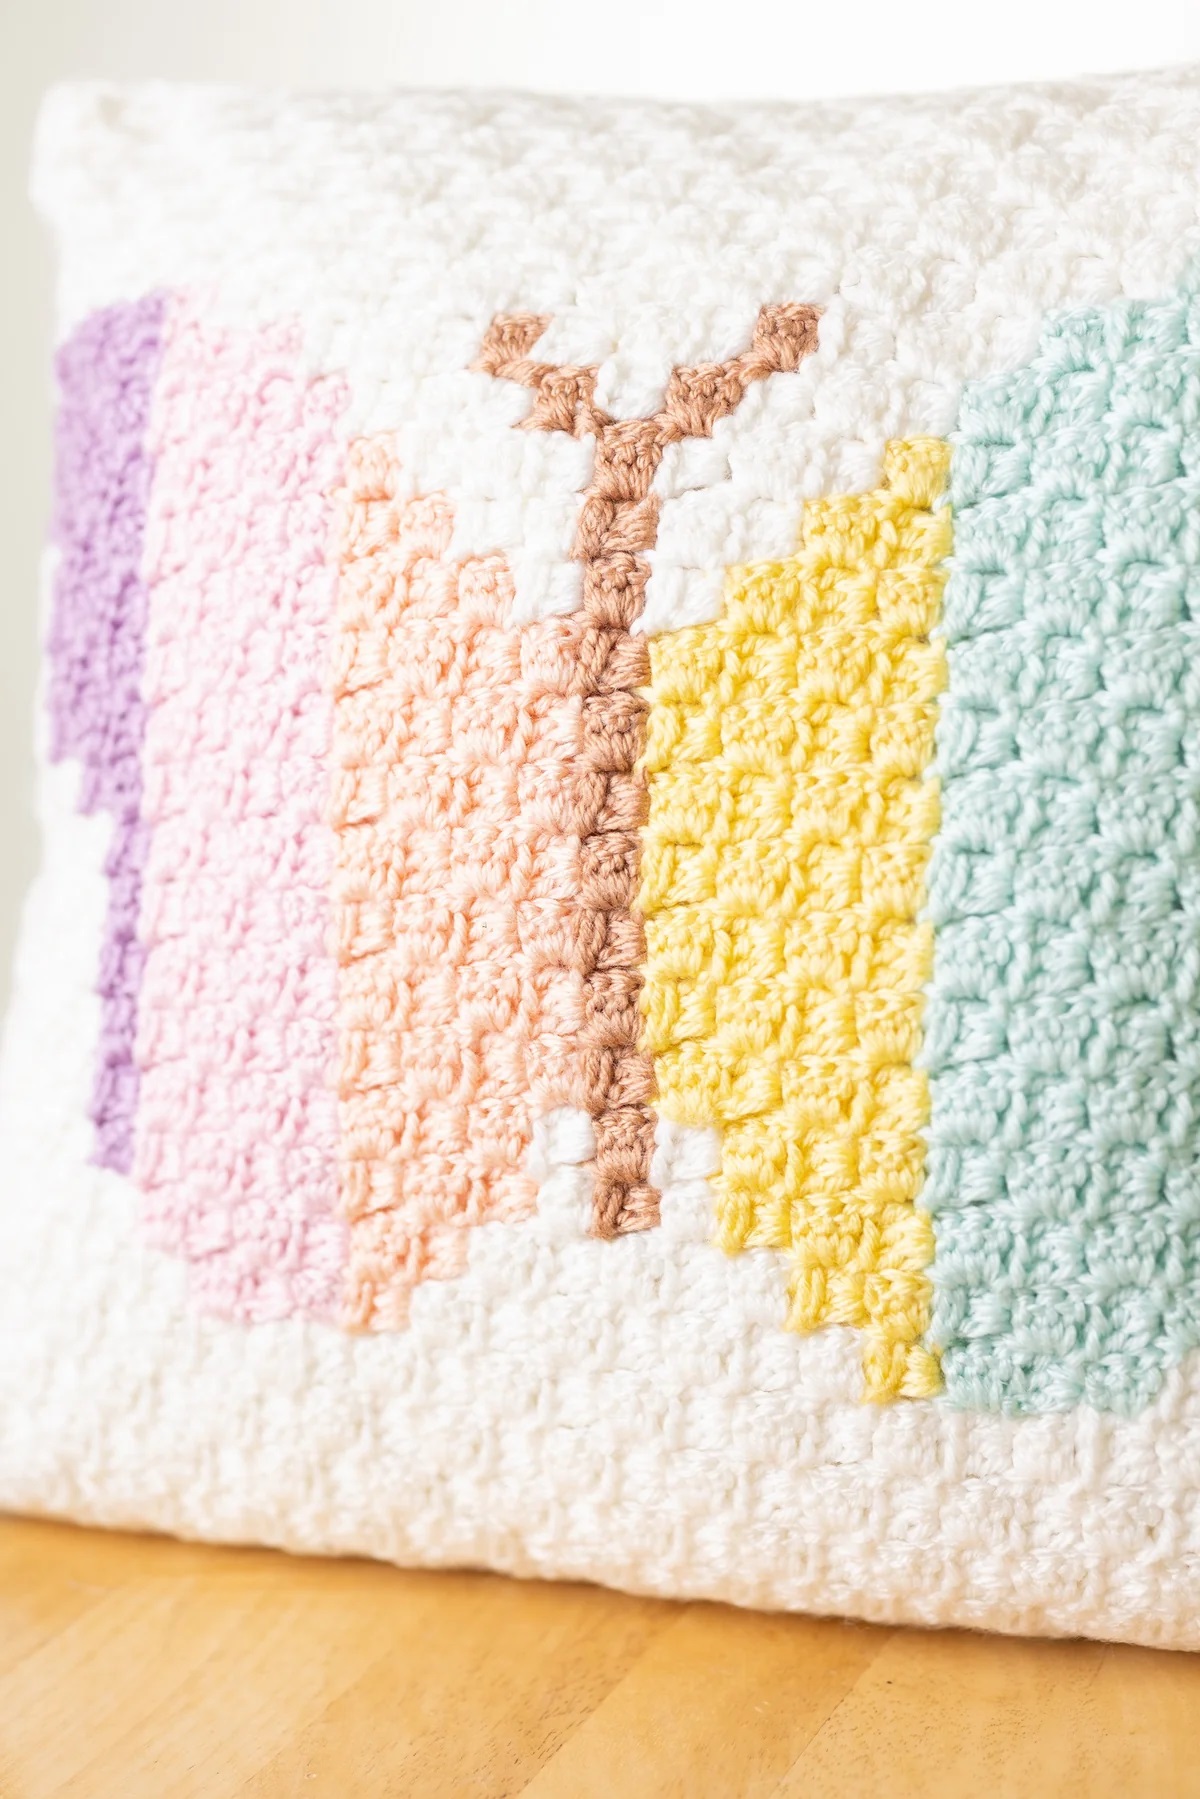
🦋 The art of crochet has conquered the world of crafts with its versatility and beauty. And if there is a creation that combines the delicacy of threads with the liveliness of colors, it is the rainbow butterfly cushion.
🦋 This charming crocheted accessory not only adds a touch of joy and sophistication to any space, but also awakens the imagination and transports us to a world of fantasy.
🦋 In this article, we will discover the secrets behind making a crochet rainbow butterfly cushion, from the necessary materials to the key techniques to achieve this wonderful design. Get ready to immerse yourself in the art of crochet and create a unique piece that will dazzle everyone with its charm and color!
Abbreviations
✅ Pc: Chain.
✅ Pb: Low point.
✅ Pa: High point.
✅ Pr: Sliding point.
Materials
✅ White (A) – 3 ovillos.
✅ Baby Blue (B) – 1 ovillo.
✅ Frost (C) – 1 ball.
✅ Lemonade (D) – 1 ball.
✅ Peachy (E) – 1 egg.
✅ Baby Pink (F) – 1 ball.
✅ Prism (G) – 1 ovillo.
✅ Clay (H) – 1 ball.
✅ G-6 (4mm) size hook.
✅ Blunt needle with big eyes.
✅ 14 inch x 14 inch (35.5 x 35.5 cm) cushion shape or fiber filling.
Measurements
✅ Cushion measures approximately 14 inches x 14 inches (35.5 x 35.5 cm), 27 x 27 squares.
Calibre
8 (3 pc, 3 dc) squares = approximately 4 inches (10 cm).
Instructions
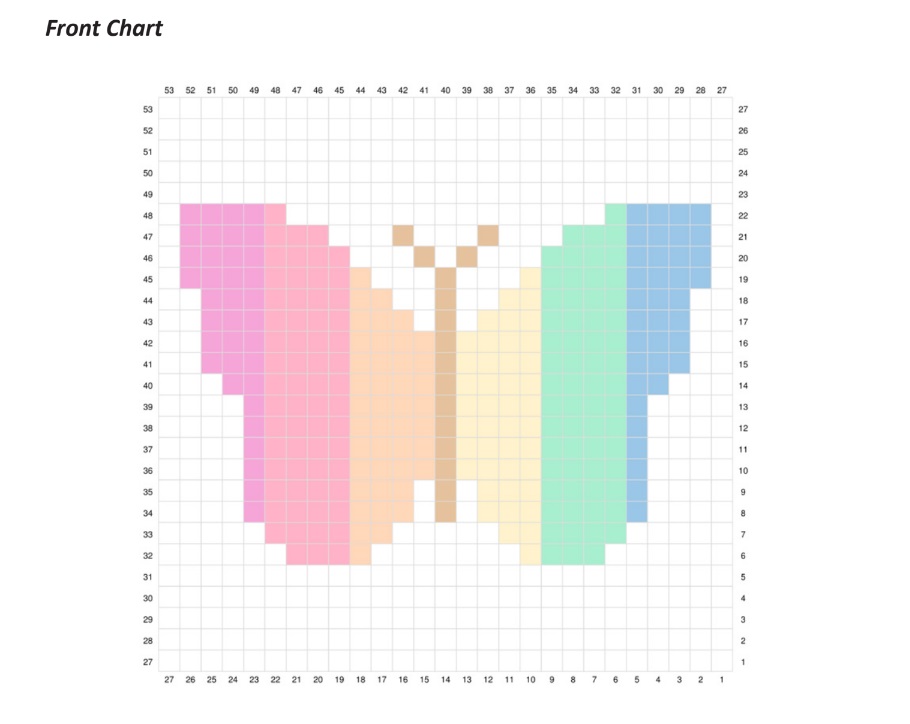
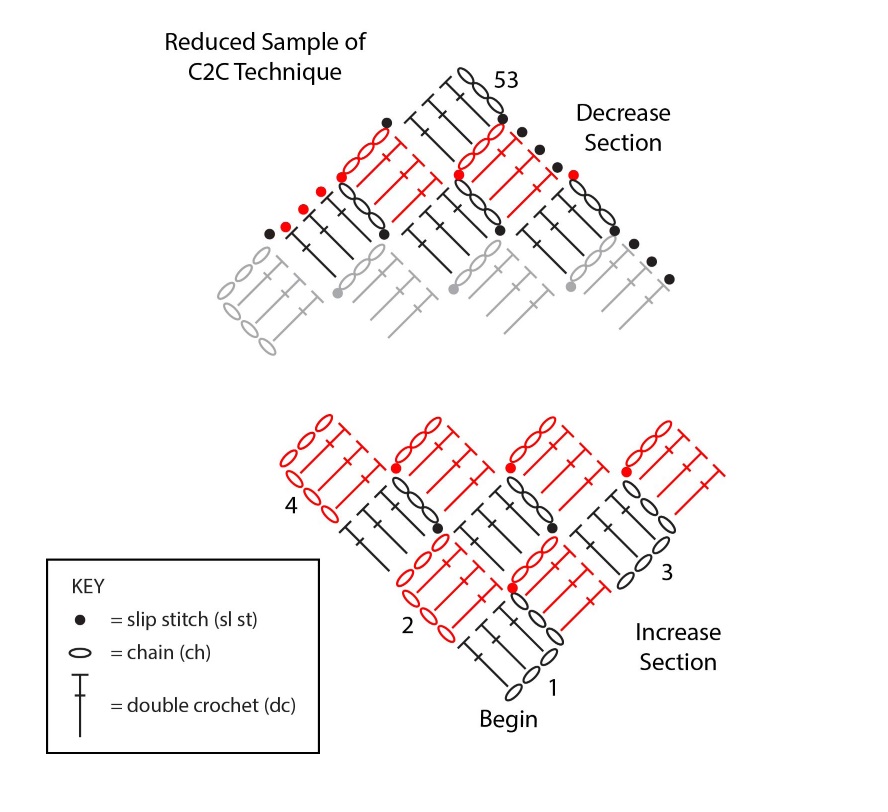
✅ The back and front are worked separately using the corner to corner (C2C) technique.
✅ The back is worked only with thread color A, following the written instructions.
✅ The color of the thread is changed to form the Butterfly pattern on the front, following the dot diagram.
✅ A border is worked around the outer edges of the front and back.
✅ The front and back are sewn together to form the cushion.
Rear
Working only with A, work in C2C technique, until completing all 53 rows.
Increase section
Row 1: With A, sc 6, dc in the 4th sc from the hook, dc in the next 2 sc (first square made), turn. (1 square)
Row 2: Pc 6, dc in the 4th pc from the hook, dc in the next 2 pc (new square made), (sl, 3pc, 3 dc) in the 3 pc space, turn. (2 squares)
Row 3: Sc 6, dc in 4th sc from hook, dc in next 2 sc, (str, 3sc, 3dc) in each 3 sc space across, turn. (3 squares)
Rows 4-27: Repeat row 3, working one more square on each row. (you will have 27 squares in row 27)
Decrease section
Row 28: Pr in each tr across to next 3 pc space, (pr, 3 pc, 3 tr) in each 3 pc space to last 3 pc space, tr in last 3 pc space, turn. (26 squares)
Rows 29-53: (1 square remaining in row 53).
Don’t button up.
Edge: Stc 1, work sc evenly spaced around the outer edge of the piece, working (sc, sc 1, sc) in each corner; Join with a sl st in the first sc. Button up.
Finish
Attach the front and back with the wrong sides together and the points matching.
Using A and the tapestry needle, weave the edges together around 3 sides, leaving the edges of the last side unstitched.
Insert the cushion form or fill it.
Sew the edges of the last side together.
Weave the ends.
Crochet Rainbow Butterfly