Round 1: 18 Pc (Photo 1). Connect with a sc to the first pc (Photos 2-7). Add a stitch marker to the pc you just made (Photo 8). Sc in the next 17 sts (18)
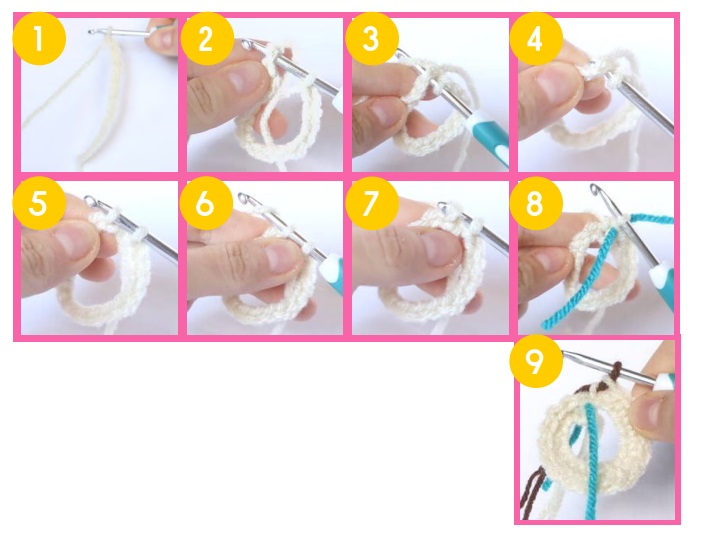
Round 2: Change to frosting color. Repeat *Inc in the next st, sc in the next 2 sts* around (Photo 9, Number of stitches: 24).
Round 3: Repeat *Inc, 3 sc* all around (30)
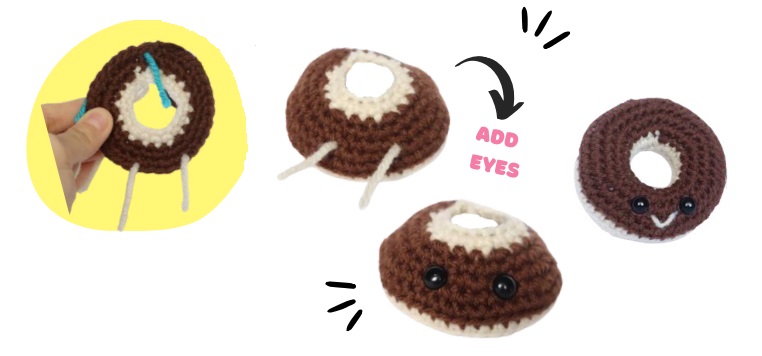
Add eyes
On the next round (round 4) we will add 2 stitch markers of different colors. These will mark where to place the eyes later.
Continue with the color of the icing
Round 4: *Inc, 4 sc* all around (36)
Add one stitch marker to the eye in st 17, add the second stitch marker to the eye in st 22.
Round 5: *Inc, 5 sc* all around (42)
Round 6: *Sc* all around (42)
Round 7: Change the color of the dough. In BLO (back loop only), *Pb* all around (42)
Add eyes here
Round 8: In both loops *sc* around (42)
Round 9: *Dec, 5 sc* all around (36)
Round 10: *Dec, 4 sc* all around (30)
Round 11: *Dec, 3 sc* all around (24)
Round 12: *Dec, 2 sc* all around (18)
Finish now, leaving a long tail to sew and close.
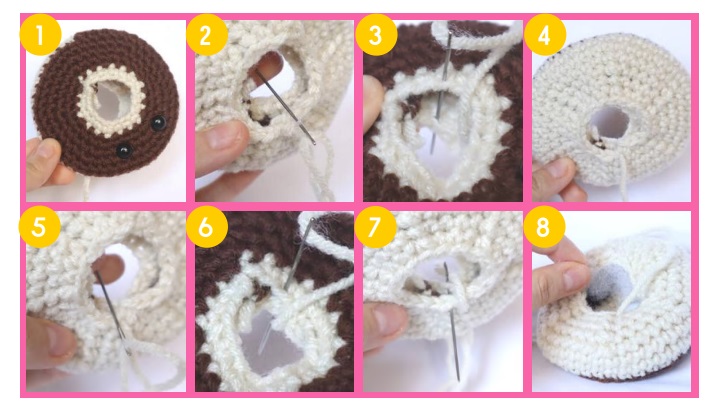
Seam closure
Place the end of the donut thread on a sewing needle.
Repeat the operation *Insert the sewing needle through the hole and bring it to the front of the donut (Photo 2). Insert the needle through a top and bottom stitch, making sure the stitches line up (Photos 3-4). The needle will now be at the back of the donut.*
Add filling to the donut after sewing 6 sts (Photo 8). Repeat this operation every 6 stitches.
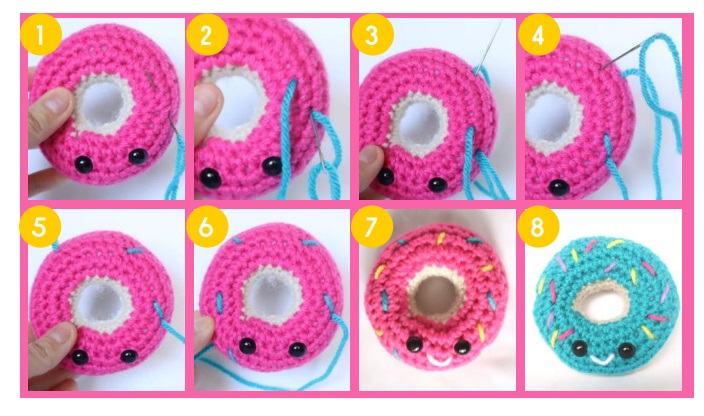
Sparkler colors
Insert the needle with the thread at any point on the bottom right of the donut and stick the needle out in any direction about 2 points away (Photo 1). Reinsert at the original insertion point (Photo 2). Pull out the needle towards the upper right (Photo 3). Insert the needle about 2 points apart in either direction (Photo 4). Repeat this process around the donut (Photos 5-6).
Add 1 or 2 colored sprinkles, but in slightly different directions. (Photos 7-8).
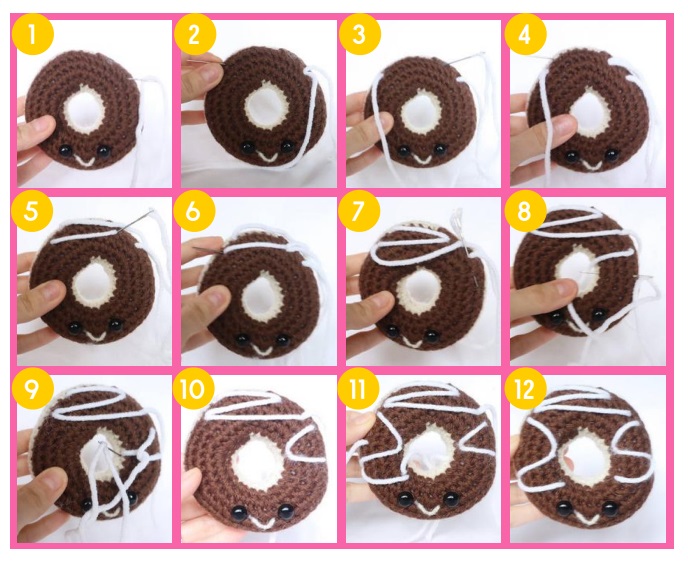
Glazed
Insert the needle with the white thread into the top right part of the donut (Photo 1). Pull the needle through the top left (Photo 2). Reinsert the needle at the top right as shown (Photo 3). Remove the needle from the upper left part, as indicated (Photo 4). Insert the needle into the bottom right part of the frosting (Photo 5).
Pull the needle through the left side of the frosting (Photo 6). Insert the needle into the right side of the donut, beyond the other points of the frosting (Photo 7). Pull out the needle 2 sts down (Photo 7). Insert the needle 2 sts down again, and pull the needle out where indicated, making sure the thread is UNDER the needle (Photo 8). Reinsert the needle at the same point (Photo 9). Repeat this operation on the left side of the donut. You can make more lines if you want! (Photos 10-12).
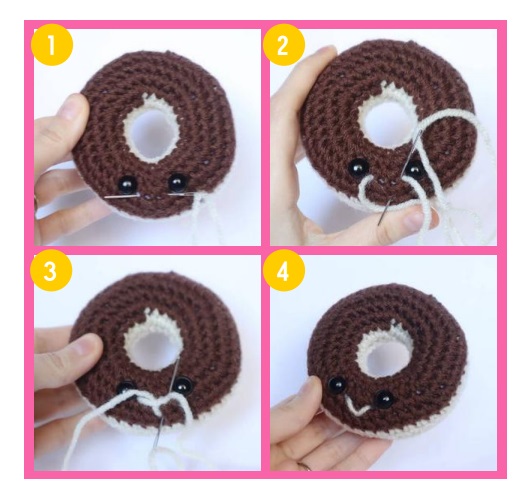
Smile: Use the thread of your choice
Insert the needle one point above the right eye and remove the needle one point above the left eye (Photo 1). Reinsert the needle into the original insertion point and pull the needle out through the center, as shown, making sure the smile thread falls UNDER the needle (Photo 2). Reinsert the needle into the same center st, making sure the smile strand is ABOVE the needle (Photo 3). Remove the needle through the original point (Photo 3). Firmly knot the two ends of the thread. Trim the excess thread (Photo 4).