Use the color Duck Egg Blue.
1.AM 6 (6).
2. [Inc]x 6 (12).
3.[Inc, sc]x 6 (18).
4.Sc, [inc, sc 2 ]x 5, inc, sc (24).
5.Sc, [inc, sc 3 ]x 6 (30).
6.Sc 2, [inc, sc 4 ]x 5, inc, sc 2 (36).
7-10. Pb 36 (36).
11.[Inc, sc 5 ]x 6 (42).
12-13. Pb 42 (42).
13.[Pb 5 ]x 6 (36).
14.Sc 2, [dec, sc 4 ]x 5, dec, sc 2 (30).
15. [Dec, sc 3 ]x 6 (24).
Fasten, leaving a tail for sewing. Insert the safety eyes between rows 11 and 12, with about 7 stitches between them.
Bodysuit
Use the color Vanilla Cream.
1.AM 6 (6).
2.[Inc]x 6 (12).
3.[Inc, sc]x 6 (18).
4.Sc, [inc, sc 2 ]x 5, inc, sc (24).
5.[Inc, sc 3 ]x 6 (30).
6-8. Pb 30 (30).
9.[Dec, sc 3]x 6 (24).
10-12. Pb 24 (24). Finish.
Legs (2)
Use the color Duck Egg Blue.
1.(In Blue) AM 6 (6).
2.[Inc, sc]x 3 (9).
3-6. Pb 9 (9). Finish off leaving a tail to sew.
Arms (2)
Use the color Duck Egg Blue.
1. AM 6 (6).
2.[Inc, sc 2 ]x 2 (8).
3-4. Pb 8 (8).
4. Dec, sc 6, (7).
5. Pb 7 (7).
Finish off leaving a tail to sew.
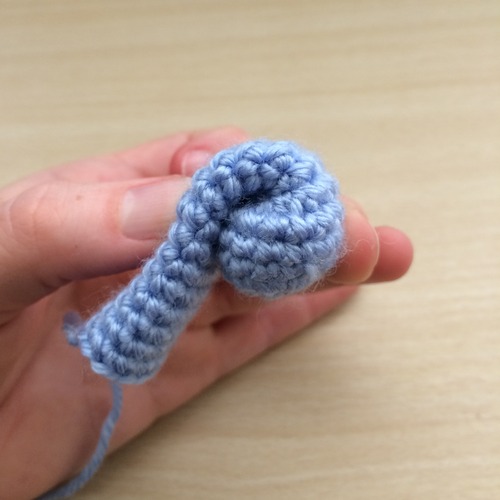
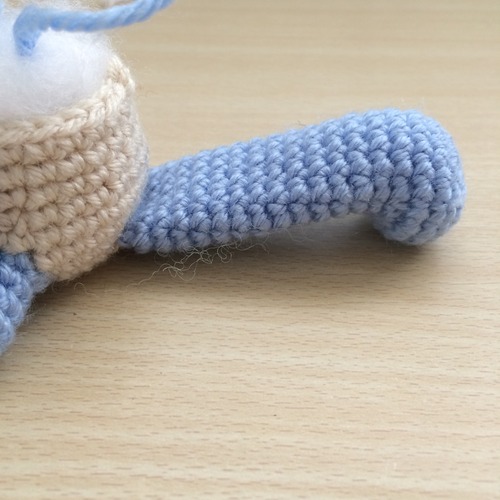
Line
Use the color Duck Egg Blue.
1. AM 6 (6).
2. [Inc]x 6 (12).
3.[Inc, sc]x 6 (18).
4-6. Pb 18 (18).
7.Dec 6, sc 6 (12).
8-20. Pb 12 (12).
Finish off leaving a tail to sew. Fill the end of the tail so that it maintains its round sphere shape, but make sure that the rest of the tail (row 8 onwards) can be flattened. This way you can create the swirl at the end of the queue.
Shell
Use the color Coffee Bean.
1.AM 6 (6).
2.[Inc]x 6 (12).
3.[Inc, sc]x 6 (18).
4.Sc, [inc, sc 2 ]x 5, inc, sc (24).
5.Pb 24 (24). Change to Paper White color.
5.FLO pb 24 (24). Finish off, leaving a tail to sew.
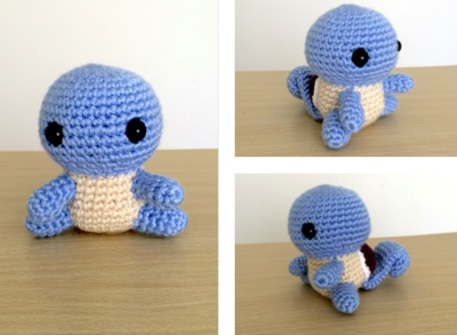
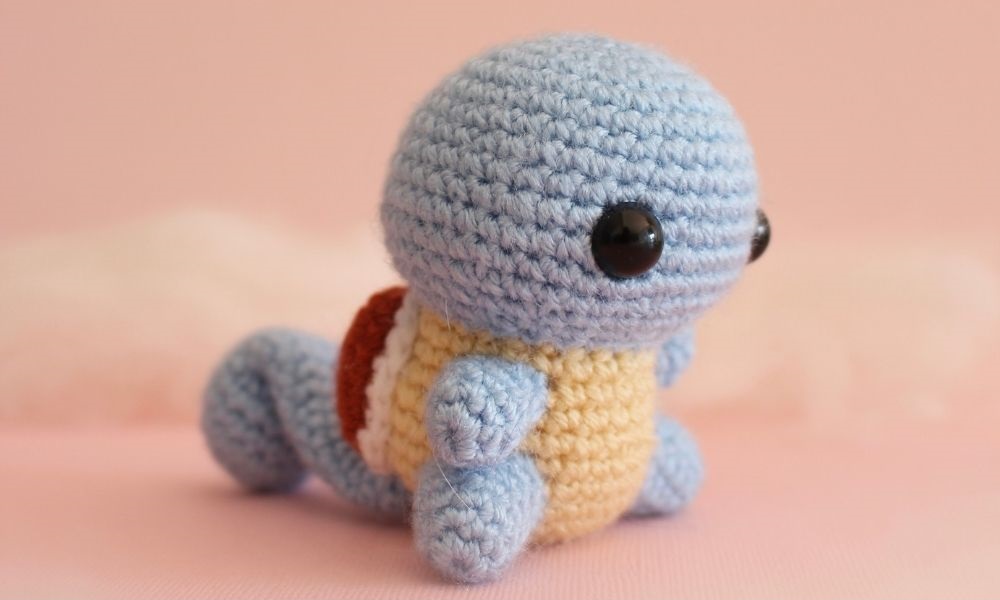
Assembly

Fill the head, body and legs. The tail doesn’t need any more padding than what it has at the end, and the arms are too small for that. When gluing the shell later, you can choose to fill it, but it is not necessary as it holds its shape well without it.
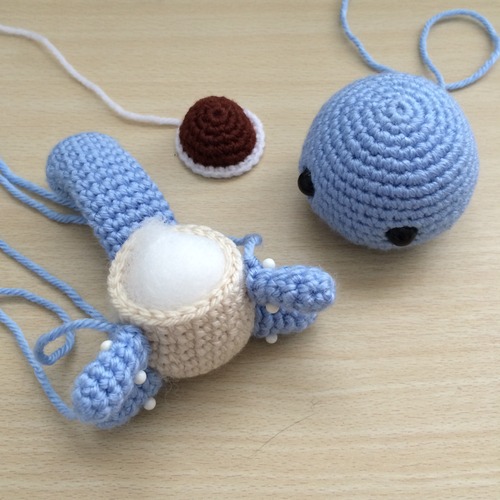
Next, pin all the elements together to make sure they fit before sewing them together. Place them in this order: legs, arms, tail, head and shell.
When attaching the tail, attach it to the base of the body first. Next, before cutting the thread that you are going to use to secure it, pass the needle through the inside of the tail again (to hide the thread) and pull it out about halfway up the tail. Curl the tail to the shape you want, and enter the point next to the one you just left, sticking the needle all the way around the end of the tail.
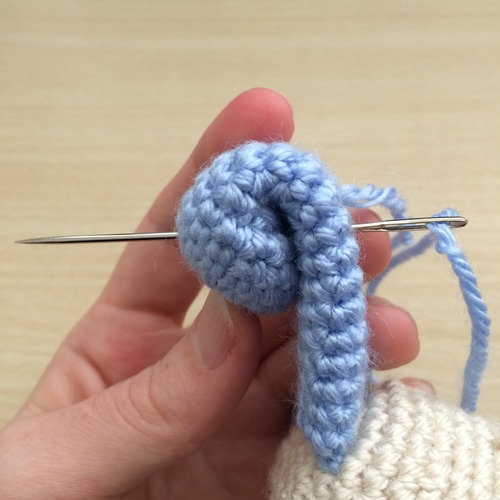
Pull the thread tightly and do the same backwards, so that the tail is now glued like this. If you pull the thread too hard, it will dent the curl, so loosen it a little. You should be able to reach a middle ground where the curl will hold without denting.
Pass the thread through the tail and body again to hide it again.
Lastly, attach the head and shell.
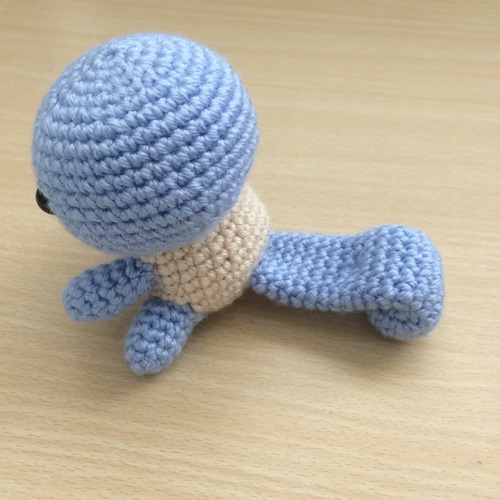
This is where you can stuff the shell if you want. The shell is placed last because it only fits between the head and tail, and if you put the head on first, the shell will get in the middle.