

Round 1: 6 sc in a AM. (6)
Round 2: *Inc* around. (12)
Round 3: *Inc, sc* all around. (18)
Round 4: *Inc, sc 2* all around. (24)
Round 5: *Inc, sc 3* all around. (30)
Round 6: *Inc, sc 4* all around. (36)
Round 7: *Inc, sc 5* all around. (42)
Round 8: *Inc, sc 6* all around. (48)
Finish now. Weave the ends together and set aside.
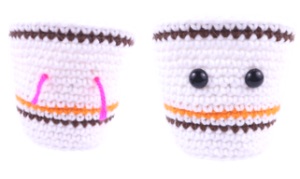
Ramen cup
Use white thread.

Round 1: 6 sc in a AM. (6)
Round 2: *Inc* all around. (12)
Round 3: *Inc, sc* all around. (18)
Round 4: *Inc, sc c 2* all around. (24)
Round 5: *Inc, sc 3* all around. (30)
Round 6: *Inc, sc 4* all around. (36)
Round 7: In the FLO, *sc* all around. (36)
Row 8-9: In both loops, *sc* all around. (36)
Round 10: Change to dark brown. *Pb* all around. (36)
Lap 11: Switch to white. *Pb 5* all around. (42)
Lap 12: Switch to orange. *Pb* all around. (42)
Round 13-16: Change to white. *Pb* all around. (42)
Now we will add 2 different colored eye stitch markers on round 16. These will mark where to put the eyes later. Add a dot marker at point 20 and point 25.
Round 17: *Pb* all around. (42)
Round 18: *Inc, sc 6* all around. (48)
Round 19-20: *Pb* all around. (48)
Add the eyes in the marked areas.
Round 21: Change to brown. *Pb* all around. (48)
Round 22: Change to white. *Sc* all around. (48)
Don’t finish yet. Continue with the next step:
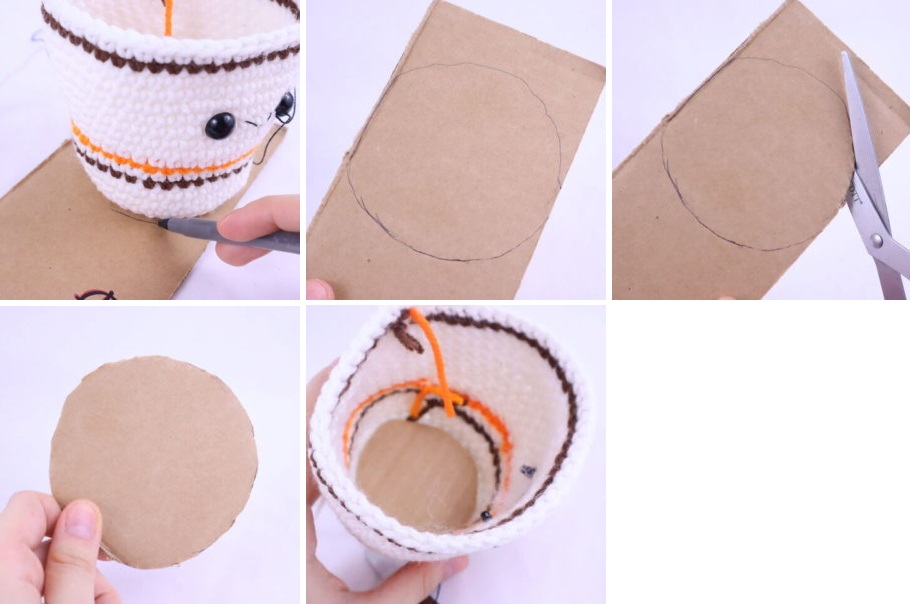
We have to add cardboard to the bottom so that the cup keeps its shape after adding the filling.
Step 1. Place the cup on the cardboard and trace around the bottom of the cup (photo 1).
Step 2. You will have a circle (photo 2). Cut around the circle with scissors (photo 3-4).
Step 3. Place the circle on the bottom of the cup (photo 5).
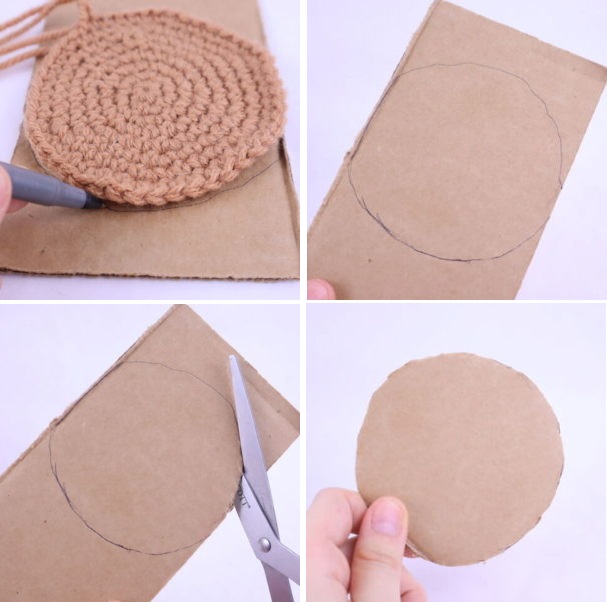
We also need to trace the “soup” part, since we will be adding this cardboard to the ramen later.
Step 1. Place the soup on the cardboard and trace the entire circle (photo 1).
Step 2. You will have a circle (photo 2). Cut around the circle with scissors (photo 3-4).
Step 3. Set the cardboard aside for now.
Ramen Cup (continued)
Use white thread.
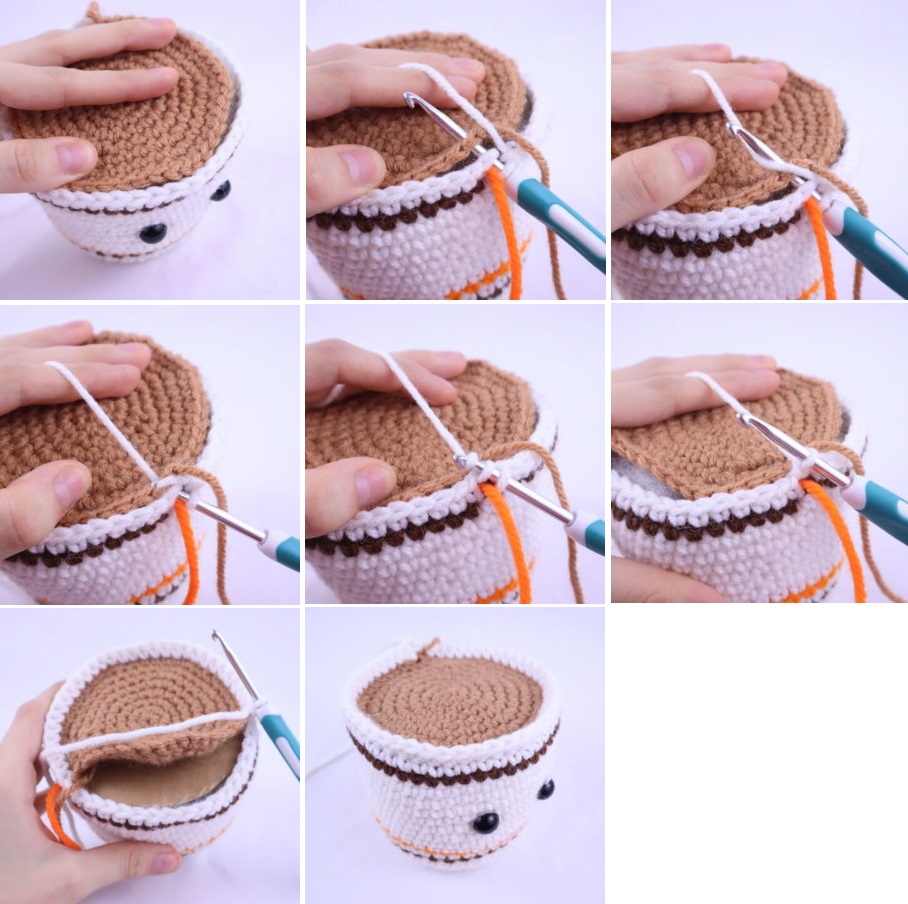
Round 23: Place the soup on top of the cup as indicated, making sure the dots line up (photo 1). Insert the hook through both the cup and the soup (photo 2). *Pb* all around passing through both points of the cup and the soup (photo 3-6). Add the cardboard when you are halfway done (photo 7). (48)
Round 24: *Sc* all around. (48)
Finish off. Weave the ends.
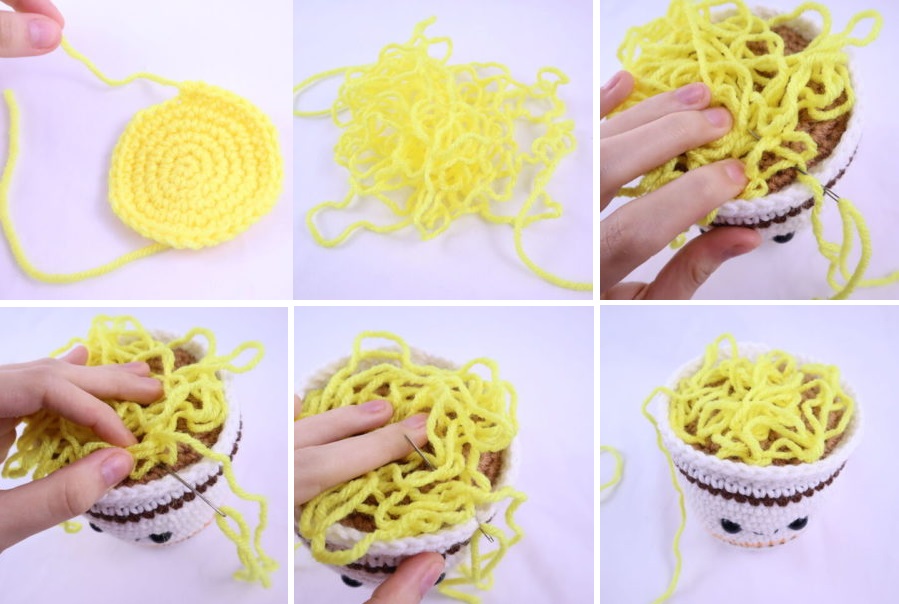
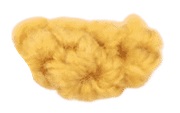
Noodles
This is an optional step, but to make the noodles look curly we can knit a circle and let it rest for a few hours or overnight. So when we untangle the circle, the wool will have the curly look of ramen noodles. If you prefer, you can skip this step and use a long piece of yarn.

Round 1: 6 sc in a AM. (6)
Round 2: *Inc* all around. (12)
Round 3: *Inc, sc* all around. (18)
Round 4: *Inc, sc 2* all around. (24)
Round 5: *Inc, sc 3* all around. (30)
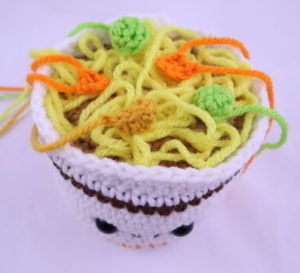
You will have a circle. You can let it rest for a few hours (or overnight) so that when we undo the stitches they look curly. Undo all the stitches (photo 2). Arrange the noodles on top of the soup and secure the noodle strips by sewing them together (photo 3-5). Do this until some of the noodles are secured.
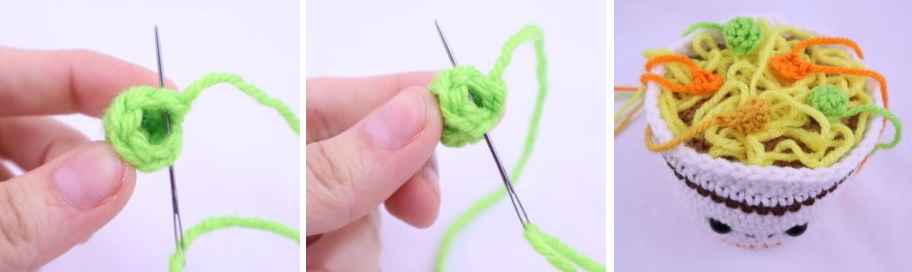
Peas (beam 2)
Use green thread.
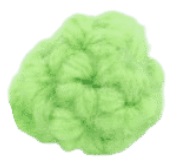
Round 1: 6 sc in a AM. (6)
Round 2-3: *Pb* all around. (6)
Finish off leaving a thread tail.
Sew the remaining stitches to close. Place the peas in the cup as shown and sew them together. Weave the ends together.
Carrots (bundle 2)
Use orange thread.
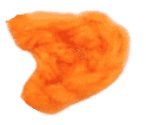
Row 1: 4 ch. Skip the next 3 ch’s. Pa on the last pc.
Finish off leaving a tail of thread. Place the carrots in the cup as shown and sew them together. Weave the ends together.

Corn
Use yellow thread.
Row 1: 4 ch. Skip the next 3 ch’s. Pa on the last pc.
Finish off leaving a tail of thread. Place the carrots in the cup as shown and sew them together. Weave the ends together.
Cover (optional)
Use white thread.
Round 1: 6 sc in a AM. (6)
Round 2: *Inc* all around (12)
Round 3: *Inc, sc* all around. (18)
Round 4: *Inc, sc 2* all around. (24)
Round 5: *Inc, sc 3* all around. (30)
Round 6: *Inc, sc 4* all around. (36)
Round 7: *Inc, sc 5* all around. (42)
Round 8: *Inc, sc 6* all around. (48)
Round 9: *Inc, sc 7* all around. (54)
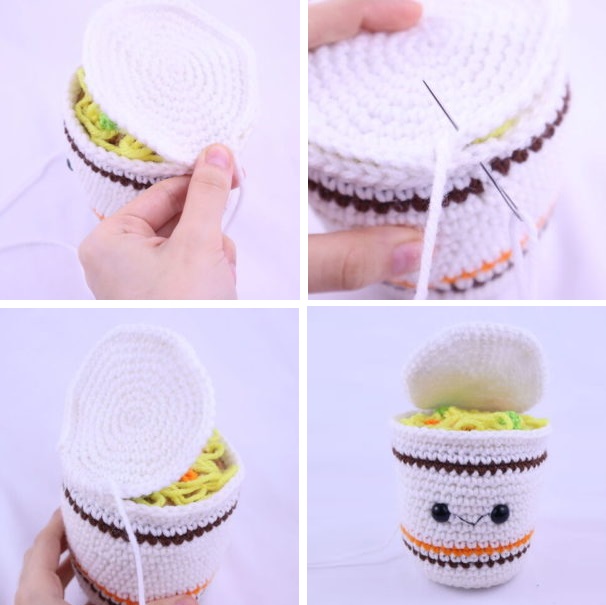
Finish off leaving a tail to sew. Line up the lid with the back dots on the mug (photo 1). Sew from the cup to the lid (photo 2). Sew a total of 11 stitches (photo 3). Once this is done, weave the ends.
smile
Use black embroidery thread.
Insert the needle with the thread one point above the right eye (photo 1). Take the needle out one point above the left eye (photo 2). Reinsert the needle into the original insertion point, and pull the needle out where shown, making sure the needle falls over the thread (photo 3). Insert the needle into the same area, but making sure the needle falls under the thread (photo 4). Remove the needle through the original insertion point (photo 4). Tie both ends of the thread in a firm knot and tuck it into the amigurumi to hide it. Cut the excess thread.


Congratulations on finishing