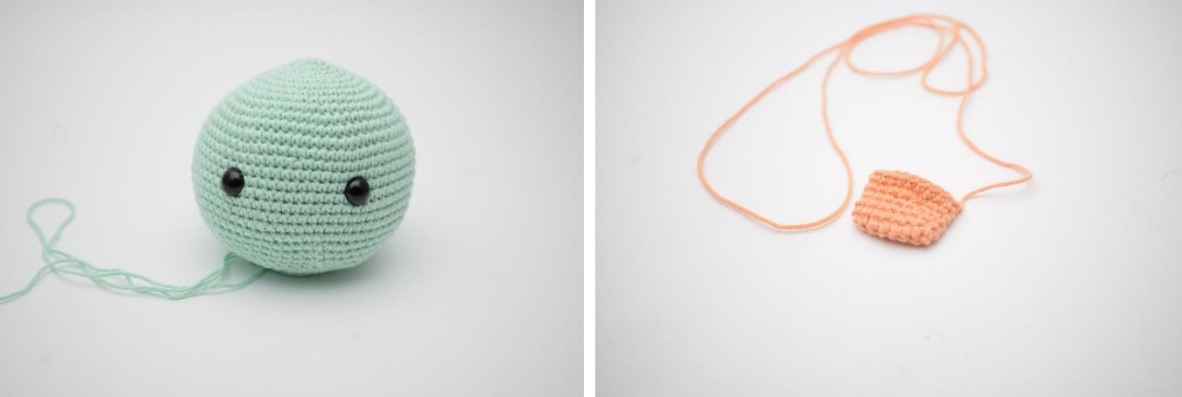
Beak
Use color B.
ch 8
R1: Crochet 1 sc in the 2nd ch from hook. Crochet 1 sc into the next 5 stitches. Crochet 3 sc in the last st. Now work from the back side of the starting ch. Crochet 1 single crochet into the next 5 stitches. Knit 2 sc in the last stitch. (16)
V2: Crochet all the way around sc. (16)
V3: Crochet all the way around to sc. (16)
V4: Crochet all the way around to sc. (16)
R5: Crochet 1 sc in the first 3 sts. Crochet 2 sc into the next 2 sts. Crochet 1 single crochet into the last 11 stitches. (18)
V6: Crochet all the way around to sc. (18) Leave a long piece for assembly.
Head
Use color A.
R1: Make a magic ring and weave 6 sc into the ring. (6)
V2: Work 2 sc in all sts until the end of the round. (12)
R3: Work ”1 sc in the next st, 2 sc in the stitch below.” Repeat from ” to ” until the end of the row. (18)
R4: Work ”1 sc in the next 2 sts, 2 sc in the stitch below”. Repeat from ” to ” until the end of the row. (24)
R5: Work ”1 sc in the next 3 sts, 2 sc in the next stitch”. Repeat from ” to ” until the end of the row. (30)
R6: Work ”1 sc in the next 4 sts, 2 sc in the stitch below”. Repeat from ” to ” until the end of the row. (36)
R7: Work ”1 sc in the next 5 sts, 2 sc in the next stitch”. Repeat from ” to ” until the end of the row. (42)
R8: Work ”1 sc in the next 6 sts, 2 sc in the next stitch”. Repeat from ” to ” until the end of the row. (48)
R9: Work ”1 sc in the next 7 sts, 2 sc in the next stitch”. Repeat from ” to ” until the end of the row. (54)
R10: Work ”1 sc in the next 8 sts, 2 sc in the next stitch”. Repeat from ” to ” until the end of the row. (60)
R11: Work ”1 sc in the next 9 sts, 2 sc in the next stitch”. Repeat from ” to ” until the end of the row. (66)
R12: Work “1 sc in the next 10 sts, 2 sc in the next st”. Repeat from ” to ” until the end of the row. (72)
R13-21: Crochet all the way around to sc. (72)
R22: Work “1 sc in the next 10 sts, work 2 sc together”. Repeat from ” to ” until the end of the row. (66)
R23: Work “1 sc in the next 9 sts, work 2 sc tog”. Repeat from ” to ” until the end of the row. (60)
R24: Crochet “1 sc in the next 8 sts, crochet 2 sc tog”. Repeat from ” to ” until the end of the row. (54)
R25: Crochet “1 sc in the next 7 sts, crochet 2 sc tog”. Repeat from ” to ” until the end of the row. (48)
R26: Work “1 sc in the next 6 sts, work 2 sc tog”. Repeat from ” to ” until the end of the row. (42)
R27: Work “1 sc in the next 5 sts, work 2 sc together”. Repeat from ” to ” until the end of the row. (36)
R28: Crochet “1 sc in the next 4 sts, crochet 2 sc tog”. Repeat from ” to ” until the end of the row. (30)
R29: Work “1 sc in the next 3 sts, work 2 sc together”. Repeat from ” to ” until the end of the row. (24)
R30: Crochet all the way around to sc. (24)
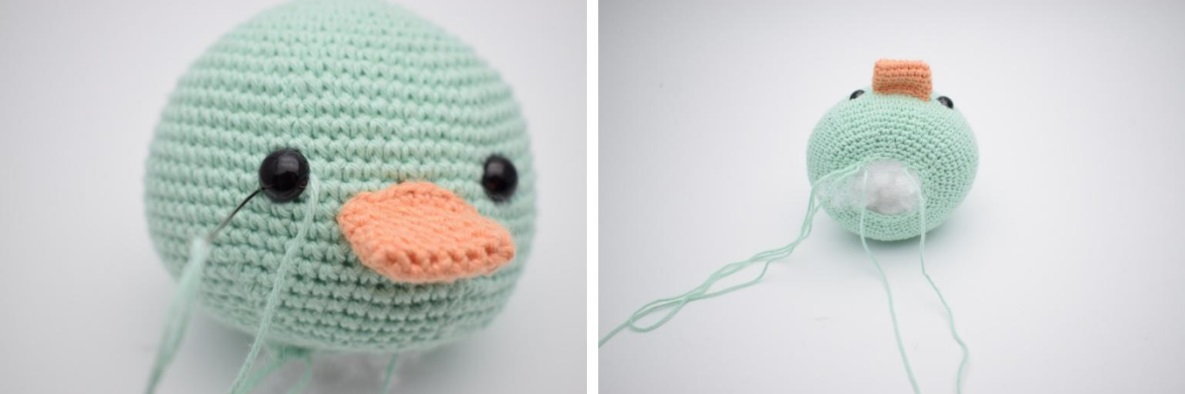
Do not cut the thread. The eyes are cast on between rows 16 and 17 with 12 sts apart.
Fill the head.
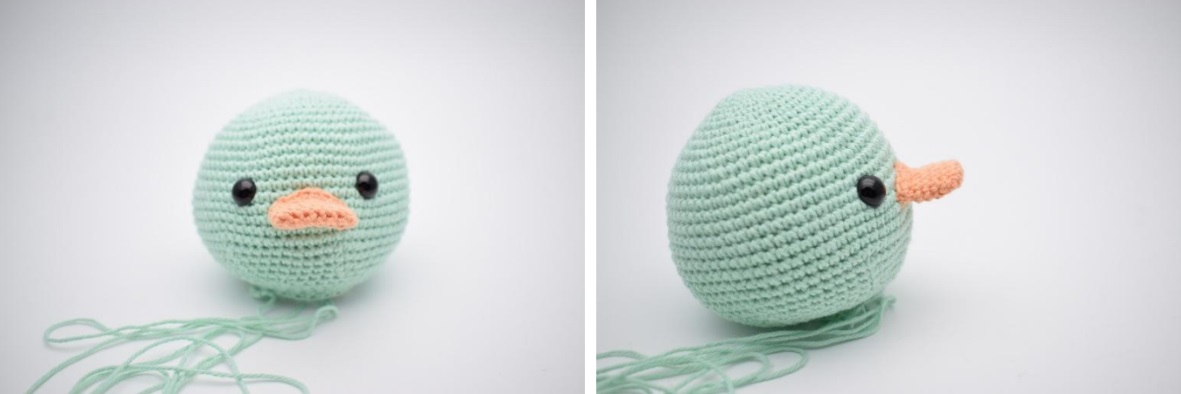
Assembly of beaks and eyes
1. The eyes are cast on between rows 16 and 17 with 12 sts apart.
2. Now the spout is mounted.
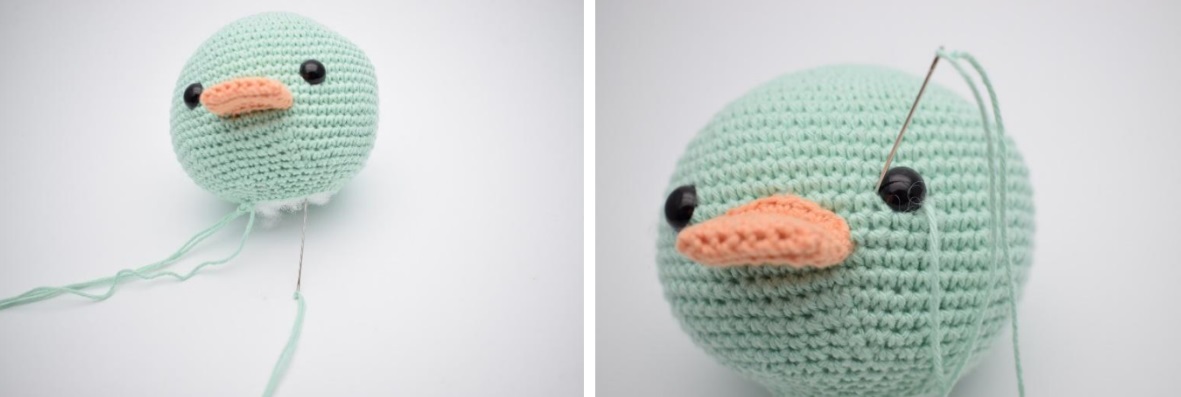
3. Sew the beak between the eyes a few rows a little lower.
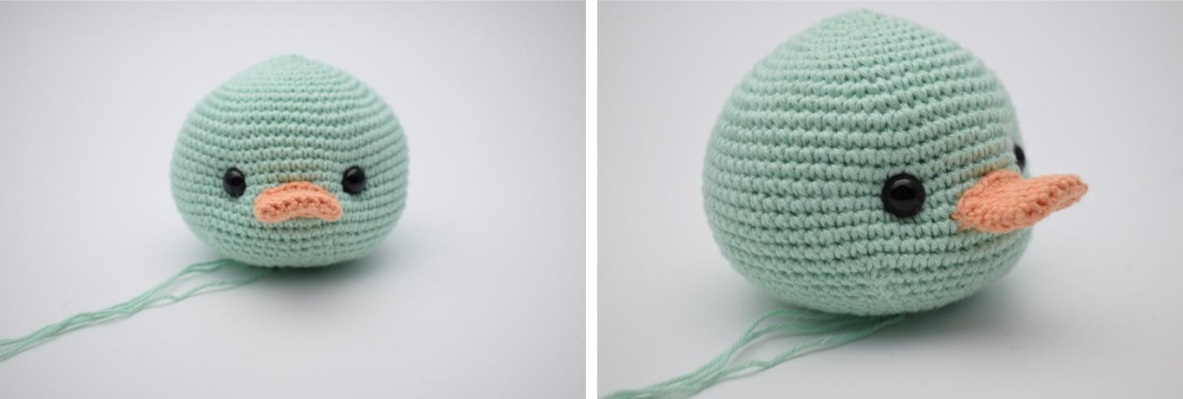
4. So.
5. If you want to shape the face and make indentations, this is done as follows: With color A, pull the needle through the head.
6. Pull it out the right side of one eye, then push it back in the other side of the eye.
7. Now pull the needle on the side of the other eye, and down on the other side of the eye.
8. Now pull the needle down through the head again. Now pull both ends and squeeze slightly until you have a slit. Tie a knot.
9. Now you have made the slits.
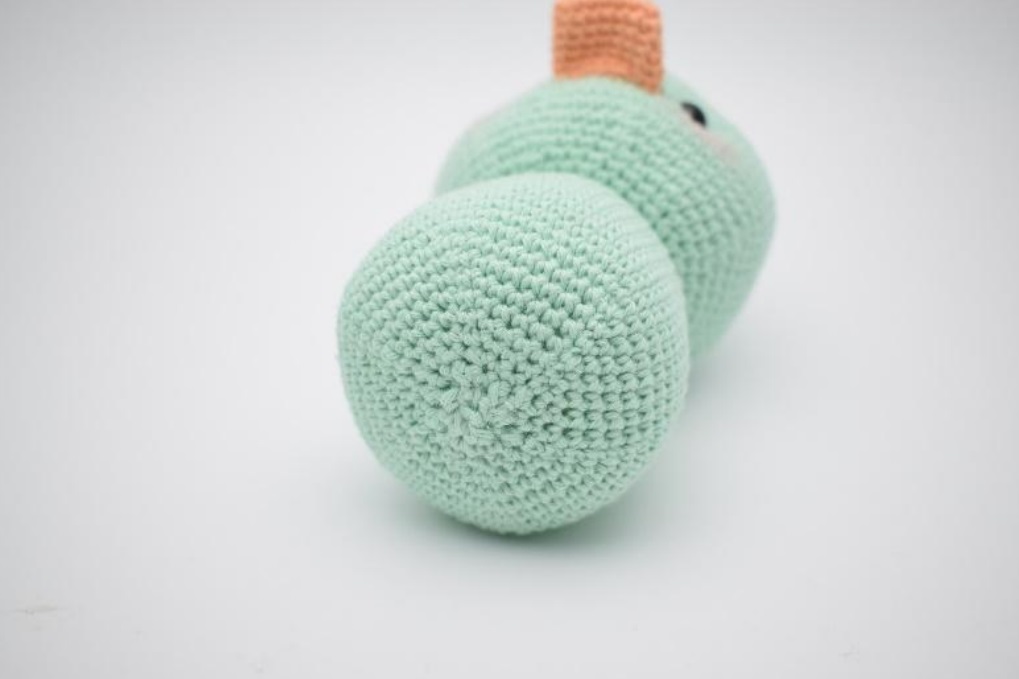
Bodysuit
Continue knitting the body.
R31: Work 2 sc in all sts until the end of the row. (48)
R32: Crochet all the way around to sc. (48)
R33: Crochet all the way around to sc. (48)
R34: Work ”1 sc in the next 7 sts, 2 sc in the next stitch”. Repeat from ” to ” until the end of the row. (54)
R35: Crochet all the way around to sc. (54)
R36: Crochet all the way around to sc. (54)
R37: Crochet all the way around to sc. (54)
R38: Work ”1 sc in the next 8 sts, 2 sc in the next stitch”. Repeat from ” to ” until the end of the row. (60)
R39-45: Crochet all the way around to sc. (60)
R46: Work “1 sc in the next 8 sts, work 2 sc tog”. Repeat from ” to ” until the end of the row. (54)
R47: Work “1 sc in the next 7 sts, work 2 sc tog”. Repeat from ” to ” until the end of the row. (48)
R48: Work “1 sc in the next 6 sts, work 2 sc tog”. Repeat from ” to ” until the end of the row. (42)
R49: Work “1 sc in the next 5 sts, work 2 sc tog”. Repeat from ” to ” until the end of the row. (36)
R50: Crochet “1 sc in the next 4 sts, crochet 2 sc tog”. Repeat from ” to ” until the end of the row. (30)
R51: Crochet “1 sc in the next 3 sts, crochet 2 sc tog”. Repeat from ” to ” until the end of the row. (24)
Fill the body before completely closing the hole. If you want you can put a bell with the filling.
R52: Crochet “1 sc in the next 2 sts, crochet 2 sc tog”. Repeat from ” to ” until the end of the round (18)
R53: Work “1 sc in the next st, work 2 sc tog”. Repeat from ” to ” until the end of the row. (12)
R54: Knit “2 sc together”. Repeat from ” to ” until the end of the row. (6)
Sew the hole and finish off the ends.
foot mount
With color A, weave 2 ribbons to assemble the feet.
V1: ch 5 Crochet 1 sc in 2nd ch from hook. Crochet sc to the end of the row. (4)
V2: Turn with 1 ch. Crochet sc until the end of the round (4)
V3: Turn with 1 ch. Crochet sc until the end of the round (4)
V4: Turn with 1 ch. Crochet sc until the end of the round (4)
V5: Turn with 1 ch. Crochet sc until the end of the round (4)
V6: Turn with 1 ch. Crochet sc until the end of the round (4)
- The feet are now ready to be assembled.
- Pull the small piece through the hole and fold it as shown in the photo.
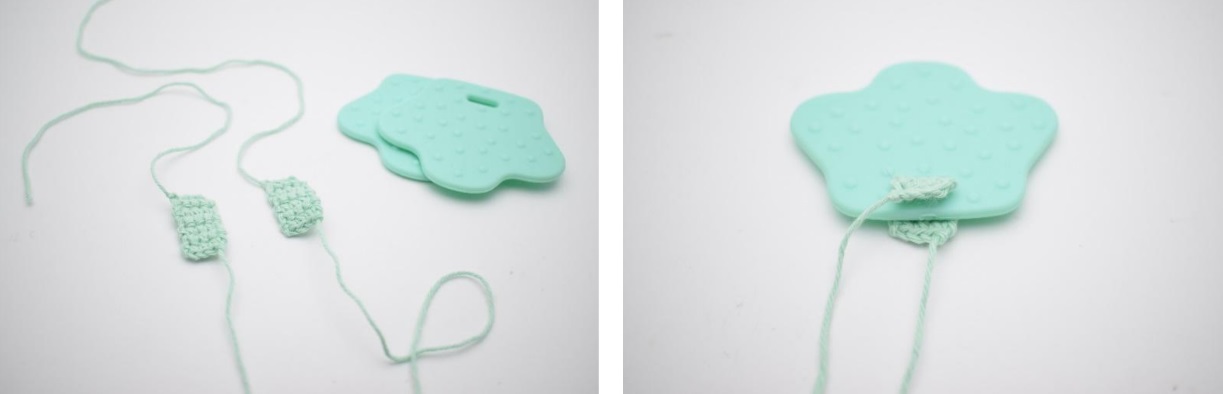
- Sew the piece.
- Sew it under the duckling.
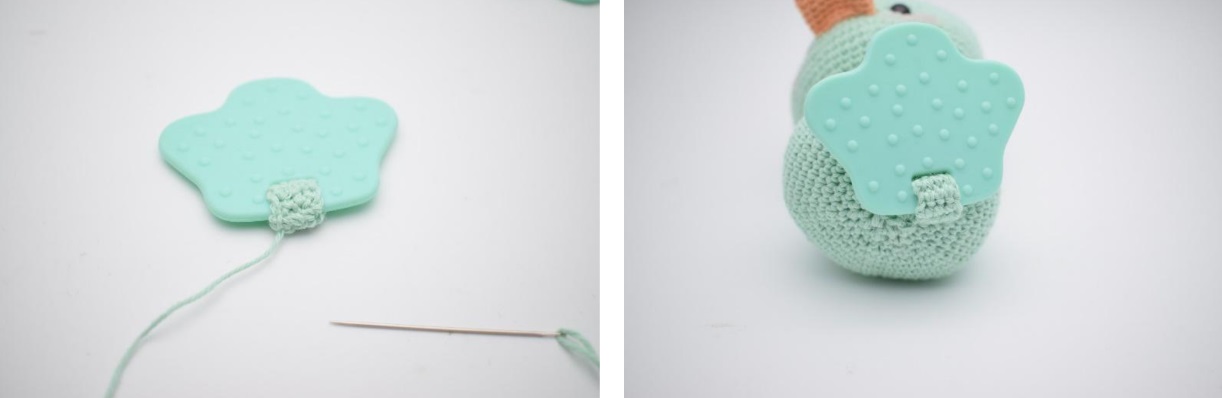
- Repeat this for both feet.
At
Make 2 with color A
R1: Make a magic ring and weave 6 sc into the ring. (6)
V2: Crochet 2 sc in all sts until the end of the round. (12)
V3: Crochet all the way around to sc. (12)
R4: Work ”1 sc in the next st, 2 sc in the stitch below.” Repeat from ” to ” until the end of the row. (18)
R5: Crochet all the way around to sc. (18)
V6: Crochet all the way around to sc. (18)
R7: Crochet all the way around to sc. (18)
R8: Work ”1 sc in the next st, 2 sc in the stitch below.” Repeat from ” to ” 4 times. Crochet “1 sc, in the next st, 2 sc tog”. Repeat from ” to ” 3 times. Crochet 1 sc in the last st.
R9: Work ”1 sc in the next st, 2 sc in the stitch below.” Repeat from ” to ” 3 times. Crochet “1 sc, in the next st, 2 sc tog”. Repeat from ” to ” 4 times. Crochet 1 sc in the last st.
R10: Work ”1 sc in the next st, 2 sc in the stitch below.” Repeat from ” to ” 4 times. Crochet “1 sc, in the next st, 2 sc tog”. Repeat from ” to ” 3 times. Crochet 1 sc in the last st.
R11: Crochet all the way around to sc.
R12: Crochet all the way around sc.
Fold the brim flat and knit the bottom.
- The wings are now ready to assemble.
- Sew a brim on the side, approx. 3 rows down on the body.
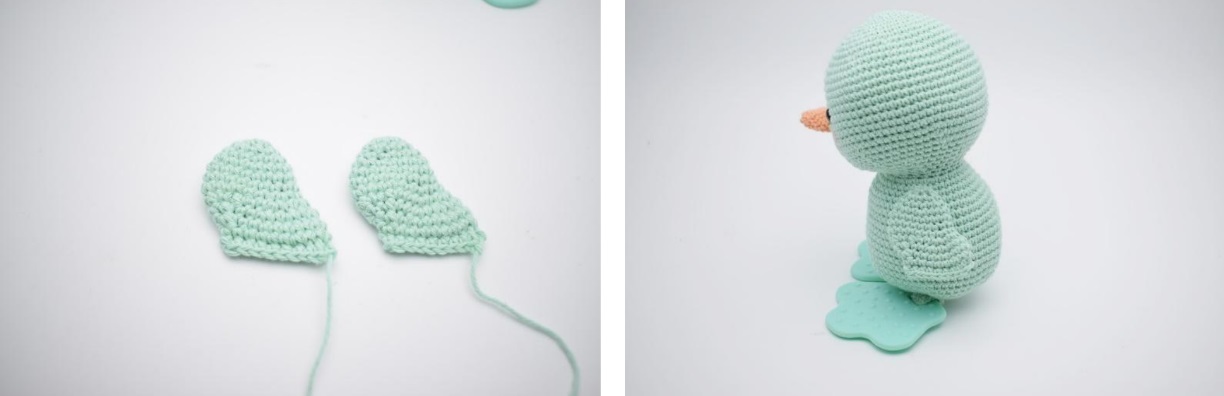
- Repeat in the other side.
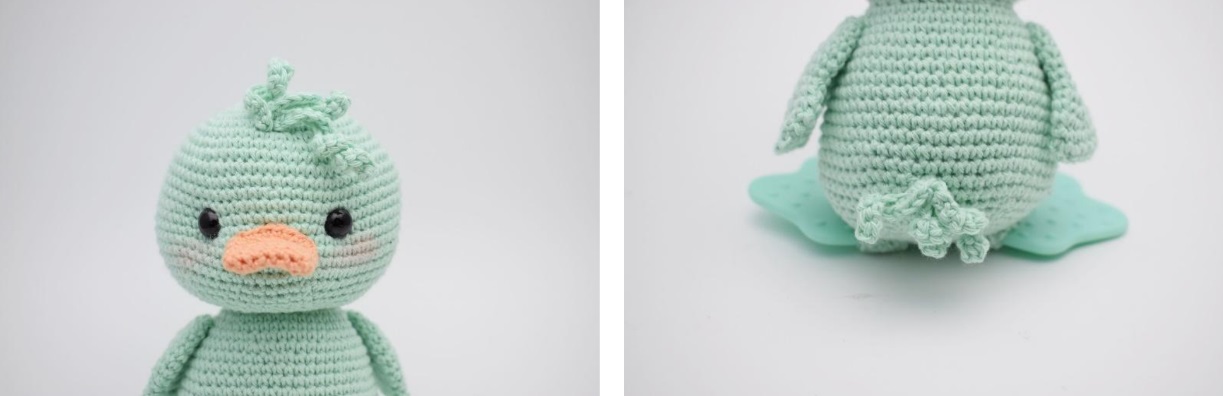
curls
The curls are woven with color A. 3 different sizes are woven for the fringe and 3 similar sizes for the tail.
Curls for bangs
R1: ch 13. Crochet 2 sc in 2nd ch from hook. Crochet 2 sc on all sts to the end of the round. Leave a long piece for mounting.
V2: ch 11. Crochet 2 sc in 2nd ch from hook. Crochet 2 sc on all sts to the end of the round. Leave a long piece for mounting.
R3: ch 9. Crochet 2 sc in 2nd ch from hook. Crochet 2 sc on all sts to the end of the round. Leave a long piece for mounting.
tail curl
R1: ch 9. Crochet 2 sc in 2nd ch from hook. Crochet 2 sc on all sts to the end of the row. Leave a long piece for mounting.
Do 3 of these.
- Sew the curls to the top of the head.
- As well as in the back.