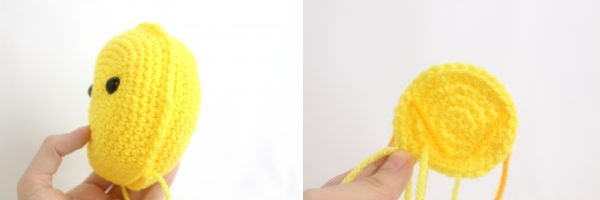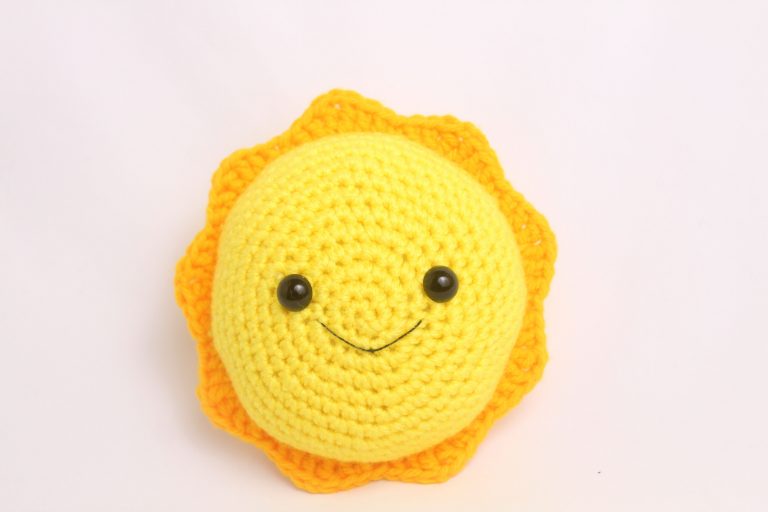
Start by creating the front and back of the sun, then join them together. As they come together, form the “triangles” of the sun. Next, add the smile.
Sun (do 2. Do the back part first and then the front part)
Use the color yellow.
To create the sun, make a front and a back piece. When you have both sides done, stitch them together, and create the sun peaks by stitching the two pieces together. Create the back of the sun first, then the front.
Round 1: 6 sc in AM (6).
Round 2: *Inc* around (12).
Round 3: *Inc, sc * all around (18).
Round 4: *Inc, sc 2* all around (24).
If you are doing the back of the sun, do “Back Turn 5”. If you are doing the front part of the sun, do “Front Round 5”.
Back row 5: *Inc, sc 3* all around (30).
On the next round, add eye stitch markers to mark where to place the eyes.
Front row 5: *Inc, sc in the next 3 stitches* 2 times. *Inc* in the next point. Sc in the next stitch and add a marker of a different color to the sc you just made. These marks where to place the eye. SC in the next 2 points. Repeat *inc in next stitch, sc in next 3* 2 times. Add a marker of a different color to the last sc you just made. *Inc in next stitch, sc in next 3 stitches* (30)
Round 5 – Eye markers (photo below)

Round 6: *Inc, sc 4* all around (36).
Round 7: *Inc, sc 5* all around (42).
Round 8: *Inc, sc 6* all around (48).
Round 9: *Inc, sc 7* all around (54).
Round 10-13: *Sc* all around (54).
The rear sun ends. If the front sun is setting, change to a darker yellow and continue with the assembly. Now add the security eyes in the marked areas of round 5.
Assembly
Line up the front and back of the sun as shown, with the correct sides facing out (Photo 1). Now insert your hook under both the front and back soles (Photo 2).

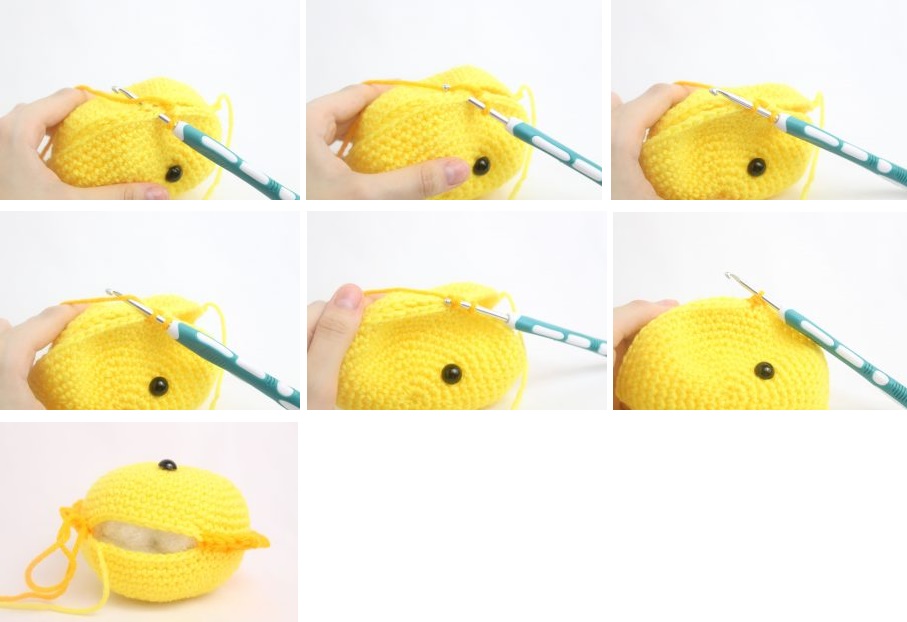
Repeat *Sc in the next stitch, dc in the next 2 stitches, tr in the next stitch, sc 1, tr in the same stitch, tr in the next 2 stitches* all around, under both sols, the front and the rear (Photo 3-8). Fill the sun before closing it completely (Photo 9).

This will create small triangles and join the two woven pieces together (Photo 10-12).

Smile
Use the black embroidery thread.
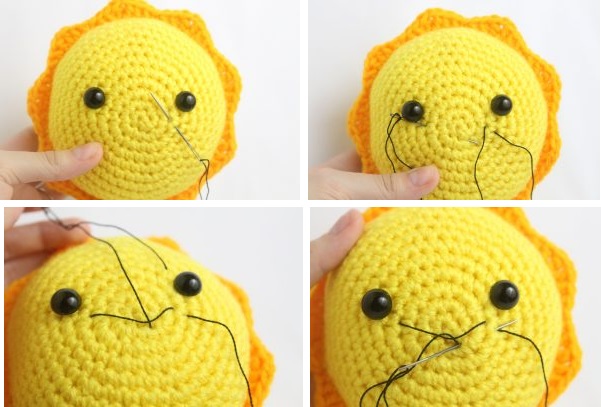
Insert the needle with the thread next to the right eye (Photo 1).
Reinsert the needle next to the left eye and take the needle out through the middle of the mouth (Photo 2). Make sure the smile is under the thread (Photo 3).
Re-insert the needle under the smile, but in the same stitch you took the needle out of (Photo 4).
Pull the needle back to the original insertion point. Tie a knot with both ends of the thread.

