
Arms (Make 2)
Start with a darker color.
Rnd 1. 4 sc in AM (4)
Rnd 2. *inc* x4 (8)
Rnd 3. 1 round of 8 sc (8)
Color change to a lighter color
Rnd 4. BLO 8 sc (8)
Rnd 5 -7. 3 rounds of 8 sc (8)
Stuff lightly, sc close with 4 sc and finish off.

Legs (Make 2)
Start with a darker color.
Rnd 1. 8 sc inside AM (8)
Rnd 2. *inc* x8 (16)
Rnd 3. 1 round of 16 sc (16)
Color change to a lighter color
Rnd 4. BLO 16 sc (16)
Rnd 5 1 round of 16 sc (16)
Hold the 1st leg but NOT the 2nd.
Starting the rest of the legs and body:
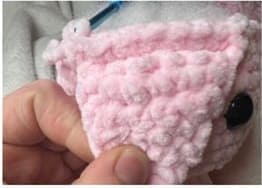
(The color change will be on the inside of the legs so it is hidden, see the photos below for reference, don’t forget to close the space between the legs as well)
V 1. Unirse con 1 pb, 6 pb, *aum* x3, 13 pb, *aum* x3, 6 pb (38)
V 2-3. 2 rounds of 38 sc (38)
R 4. 17 sc, *inc. x4, 17 sc (42)
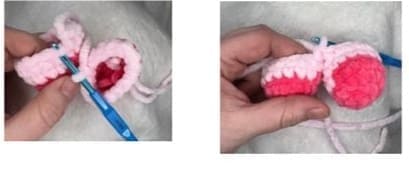
Now the tail will begin: ch 6 and insert your hook into the second ch from the hook. Place 3 sc in each ch for a total of 15 sc. PC in the same stitch.
V 5-6. 2 rows of 42 sc (42)
Make sure not to knit in the tail.
Rnd 7. 20 sc, *inc* x2, 20 sc (44)
Rnd 8-10. 3 rounds of 44 sc (44)
Rnd 11. 10 sc, dec, 22 sc, dec, 8 sc (42)
Rnd 12. *5 sc, dec* x6 (36)
Rnd 13-14. 2 rounds of 36 sc (36)
Rnd 15. *4 sc, dec* x6 (30)
Rnd 16-17. 2 rounds of 30 sc (30)
Rnd 18. *3 sc, dec* x6 (24)
Rnd 19. 1 round of 24 sc (24)
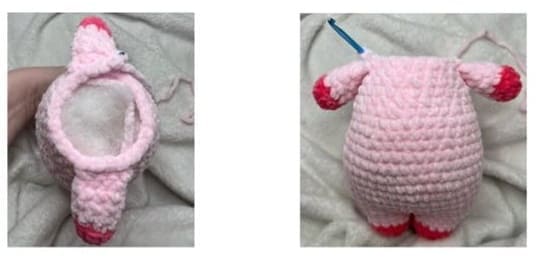
Now you will knit the arms onto the body.
Rnd 20. 8 sc, take one arm and weave in the body with 4 sc, 8 sc, take another arm and weave in the body with 4 sc (24)
NOTE: If you need to change the number of stitches to align the arms where you want them to be, you can. This is perfectly fine!
V 21. 1 vuelta de 24 pb (24)
V 22. *2 pb, dism* x6 18)
Head
Rnd 23. *inc* x18 (36)
Rnd 24. *5 sc, inc* x6 (42)
Rnd 25-31. 7 rows of 42 sc (42)
R 32. *5 sc, dec* x6 (36)
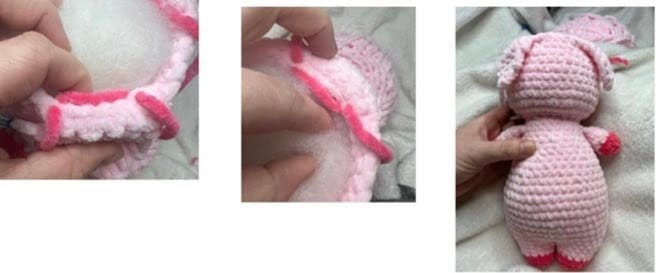
Start filling and shaping the head now and continue filling as you go. Make the head nice and round.
Now you will start with the ears: if you want, use a stitch marker or a piece of yarn to mark the BLO of the FLO you are going to knit, this will make it easier to find the BLO when moving on to the next round.
Rnd 33. 18 sc, FLO 6 sc: ch 1 & turn, 6 sc ch 1 & turn, dec, 2 sc, dec ch 1 and turn, 4 sc 1 and turn, dec, dec ch 1 and turn, dec then ch 1 and turn, then sc 1 and ch 1 then turn. SC around the side of the ear to return to the head. Sc 6 and repeat the underlined instructions for the second ear.
NOTE: If you need to change the number of stitches to get the ears where you want them to be, you can. This is perfectly fine!
The eyes are placed between rows 29 and 30 of the 7 total rows of 42 sc, with a separation of 5 to 6 pt. Just make sure they are at ear level.
Rnd 34. 1 row of 36 sc (36)
When you get to the ears, be sure to knit those stitches from the previous row in the BLO.
V 35. *4 pb, dism* x6 (30)
V 36. 1 vuelta de 30 pb (30)
V 37. *3 pb, dism* x6 (24)
V 38. *2 pb, dism* x6 (18)
V 39. *1 pb, dism* x6 (12)
V 40. *dism* x6 (6)
Rematar y coser para cerrar.
Snout
Rnd 1. 6 sc inside AM (6)
Rnd 2. *inc* x6 (12)
Fasten off and leave a long tail to sew on the nose.
- The nose is slightly sewn between the eyes.
- Leaving a stitch space on each side. Add the details of the eyebrows and the indentations of the muzzle.