
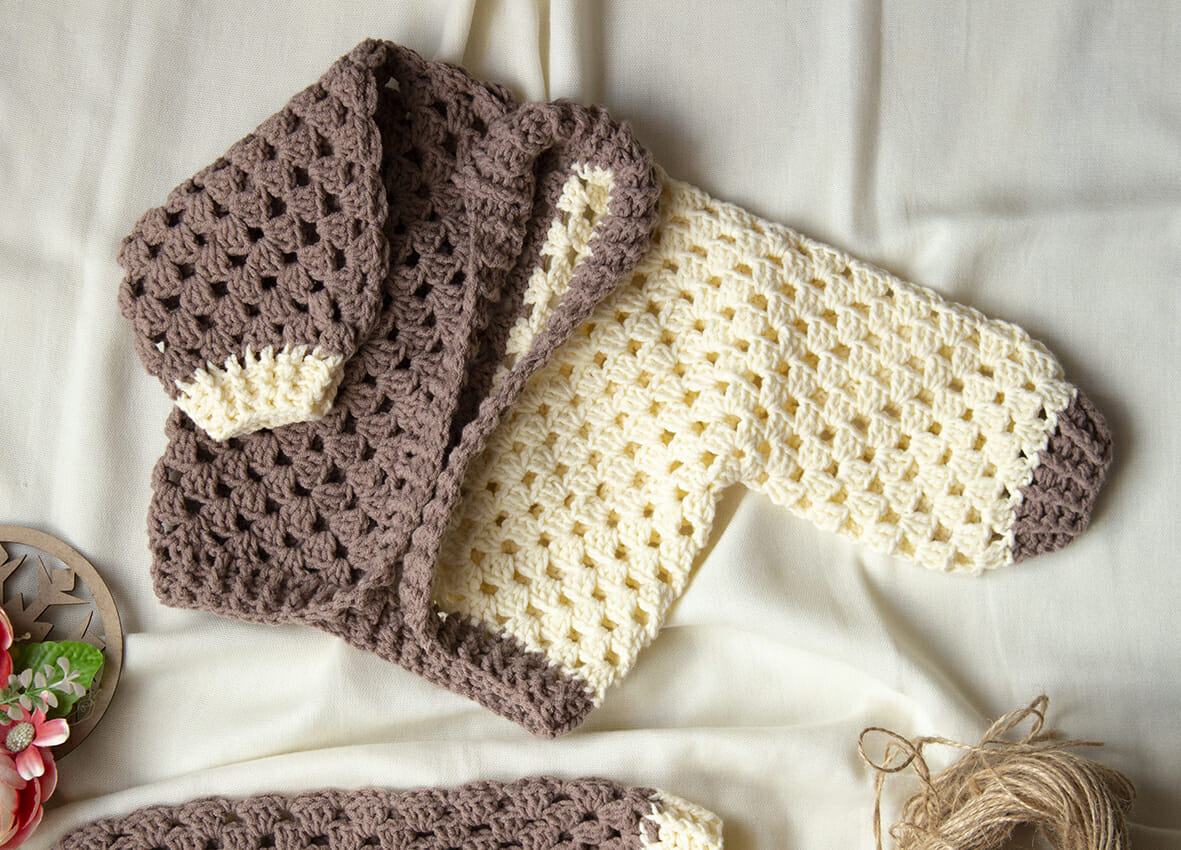
cardigan
- Granny Pieces: Make 2 (1 in Brown, 1 in Off-White)
- Pc 4 and sr in the first stitch to make a ring, or make a magic ring.
- Round 1: ch 1, *3 tr in the ring, ch 3* repeat *-* 6 times in total, sr in the first stitch.
- Round 2: ch 1, 3 dc around the last ch 3 space on round 1, ch 1, *(3 dc, ch 3, 3 dc) all around the next 3 ch space, ch 1* repeat *-* 5 times in total, 3 dc around the last space of ch 3, ch 3, sr in the first stitch.
- Round 3: ch 1, 3 tr around the last 3 ch-space of round 2, ch 1, 3 tr around the next ch-space, ch 1 *(3 tr, ch 3, 3 tr) all around the next ch-space 3, ch 1, 3 tr around next space, ch 1* repeat *-* 5 times in total, 3 tr in last space, ch 3, sr in last stitch.
- Row 4-11: Repeat the same steps, increasing in the same way as the granny square method.
- On round 12: Repeat the same steps until the last side. Chaining between every 3 tr, work around the pc on the other side of the cardigan as shown in size 1.
Make the sleeves (cuffs)
- Use the opposite color of the piece
- Row 1: Insert yarn into underarm side of sleeve in 1 tr, ch 1, *1 tr in first stitch, skip first stitch, 1 tr in next stitch, skip 1 pc space * repeat *-* all around the sleeve, pr in the first stitch.
- Round 2: Pc 1, *1 fpdc in the first stitch, 1 bpdc in the next stitch* repeat *-* all around, sr in the first stitch.
A cardigan
- When you are done with the 2 sides of the cardigan, line them up and insert the hook into the bottom of the back seam. Insert the yarn and make a pc, then insert the hook in the first stitch of both pieces and pr. Continue joining the back at all points and pc. Keep the last (3 tr+3 ch space) on both sides unattached.
neck/edge
- Tuck the Brown yarn into the 3 pc space on the right side of the back seam.
- Round 1:1 pc, 1 tr in the first 3 pc space (same space), 1 tr in the next 3 stitches, skip the middle seam, 1 tr in the next 3 stitches, 1 tr in the next 3 pc space (corner ), 1 tr in the next 3 ch space (first corner on the front side), *1 tr in the next 3 stitches, skip the 1 ch space * repeat *-* until you reach the next corner (3 ch space ch), 5 tr in the space of 3 ch. *1 tr in the next 3 stitches, skip the 1 ch space* repeat *-* until you reach the middle seam, 1 tr in the next 3 ch space, skip the seam, 1 tr in the next 3 ch space ch, *1 tr in the next 3 stitches, skip the 1 ch space* repeat *-* until you reach the next corner (3 ch space), 5 tr in this 3 ch space. *1 tr in the next 3 stitches,
- Rows 2-3: Pc 1, *1 fpdc in first stitch, 1 bpdc in next stitch* repeat all around, sr in first stitch.
- Pc 1, pull the thread and cut it. You can work 3 more rows in the neck part to enhance it.
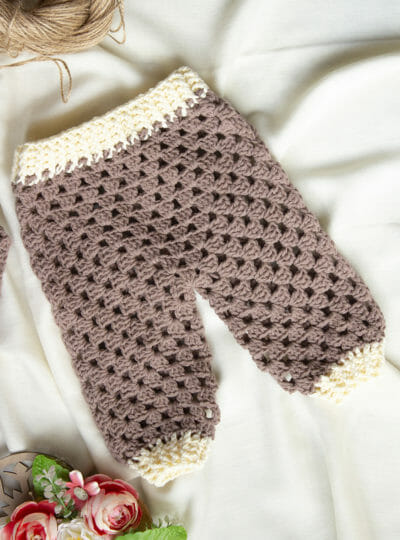
Pants
- Use the Brown thread.
- Pc 4 and pr in the first stitch to make a ring, or to make a magic ring.
- Round 1: ch 1, *3 dc around the ring, ch 3* repeat *-* 8 times in total, sr in the first stitch.
- Round 2: ch 1, 3 tr around the last 3 ch space of round 1, ch 1, *(3 tr, ch 3, 3 tr) all around the next 3 ch space, ch 1* repeat *-* 7 times in total, 3 tr around the last 3 ch space, 3 ch, sr in the first stitch.
- Round 3: ch 1, 3 dc around the last 3 ch-space of round 1, ch 1, 3 dc around the next ch-space, ch 1 *(3 dc, ch 3, 3 dc) all around the next 3-space ch, ch 1, 3 tr around the next space, ch 1* repeat *-* 7 times in total, 3 tr in the last space, ch 3, sr in the last stitch.
- Row 4-9: Repeat the same steps, increasing in the same way as the granny square method.
- Row 10: Repeat the same step, after making the first 2 sides, join side 3 to side 1 (using the same method as when joining the sleeves). Work sides 4, 5 and 6 as normal. Join side 7 to side 5 (using the same method as joining the sleeves). Work the last side as normal, sr in the first stitch. When making the last 3 ch (ch 1, sr around the 3 ch space from the other side, ch 1), sr in the first stitch.
- Round 11: Continue working around the waist. ch 1, 3 tr around the first 3 ch space, * ch 1, 3 tr around the next 1 ch space* repeat *-* until you reach the second 3 ch space, work 3 tr, ch 1, work 3 tr in the third 3 ch space, repeat *-* until you reach the last 3 ch space, ch 1, 3 tr in the last 3 ch space, ch 1, sr in the first stitch.
shape the waist
- Using the Off-White color, continue working from round 11.
- Round 12: Pc 1, *1 fpdc in the first stitch, 1 bpdc in the next stitch* repeat *-* in all stitches but skipping all spaces of 1 pc, pr in the first stitch.
- Rows 13-15: Pc 1, *1 fpdc in first stitch, 1 bpdc in next stitch* repeat *-* all around, sr in first stitch.
form the ankles
- Using the Off-White yarn, repeat the same steps as on the sleeve (wrists).
- Weave everything in and secure all the ends.
- Done, now enjoy your hand-woven set?