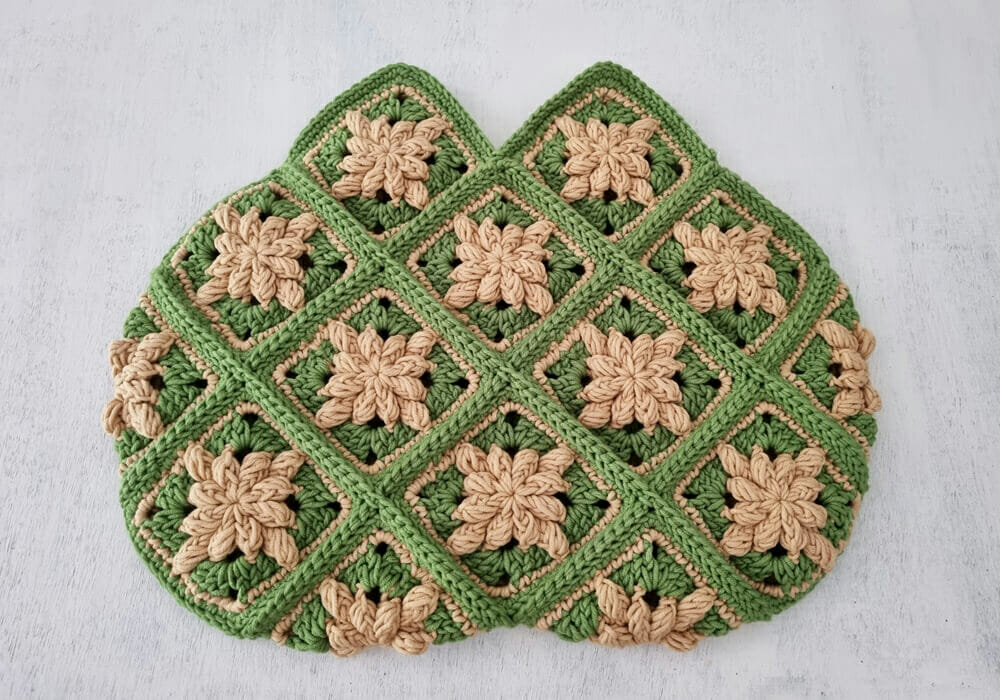
- The finished bag measures approximately 17″ wide and 13.5″ tall (from the top point to the bottom of the bag).
- Square motif: 4.5″ x 4.5″.
Caliber
- 15 sc x 15 rows = (4” x 4”).
Instructions for 3D Crochet Technique Bubble Flower Bag
- To start making the bag you will first have to make 24 square motifs.
- The granny square pattern is used to make this bag. The pattern has been adjusted with one more round of sc to make it more suitable for this bag.
- When you make these squares, you have to change the color 4 times to make a square.
- Since the bag is on the wrong side and is always inside, the thread must be brought to the wrong side when needed.
- Once the 24 squares are finished, they are joined with a pr seam. And a round of sc around the edge of the bag opening.
- Romanian cord is used as handles, woven separately and tied together last. As an option, leather handles can also be used.
Pattern
- With (C1) make a magic ring.
- Round 1: Stc 1 (on this round the initial st does not count as a stitch) 12 dc in the ring, tr to the first stitch (12 dc).
- Round 2: With (C1), sc 1 (on this round the initial sc does not count as a stitch), fp bobble in the first stitch, [3 dc in the next stitch, fp bobble in the next stitch, sc 3, fp bobble in next stitch] 3 times, 3 dc in next stitch, fp bobble in next stitch, dc 3, tr to first (8 fp bobbles/12 dc).
- Round 3: Join the thread (C2), sc 3 (on this round sc 3 counts as dc), dc in the next stitch, sc 1, skip the next stitch, dc in each of the next 2 stitches, *( 2 dc, dc 3, 2 dc) in the space of dc 3, dc in each of the next 2 stitches, dc 1, skip the next stitch, dc in each of the next 2 stitches; repeat * until the end, after working the last dc, tr to the top of the initial 3rd pc (32 dc).
- (On this round all fp bobble working over chain 1 and around the post of skipped stitches one row below)
- Row 4: Join the yarn (C1), sc 1 (does not count as a stitch) sc in the first stitch and in the next stitch, fp bobble in the next stitch one row below, sc in each of the next 4 stitches, 3 sc in sc space, *sc in each of the next 4 stitches, fp bobble in the next stitch one row below, sc in each of the next 4 stitches, 3 sc in 3 sc space; repeat * until around, after working last sc, pr to first stitch (4 fp bobbles/44 sc).
- Row 5: With (C1), sc 1, work sc around the square, making sure to work 3 sc in each corner stitch (middle stitch in 3 sc in the corner), sl st to first stitch. Fasten, weave the ends.
Union of squares
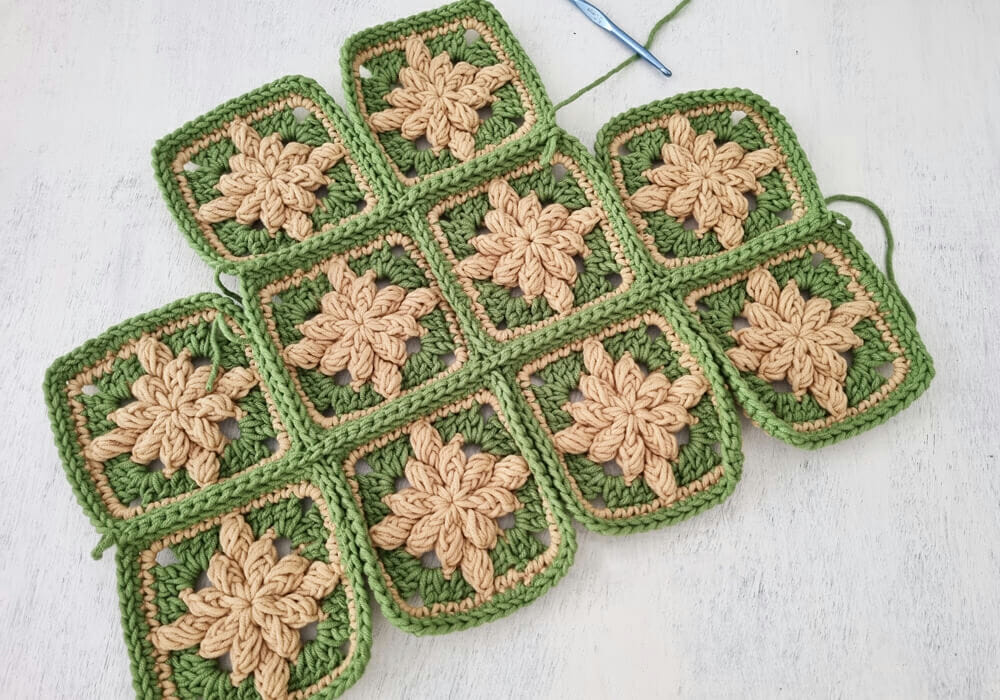
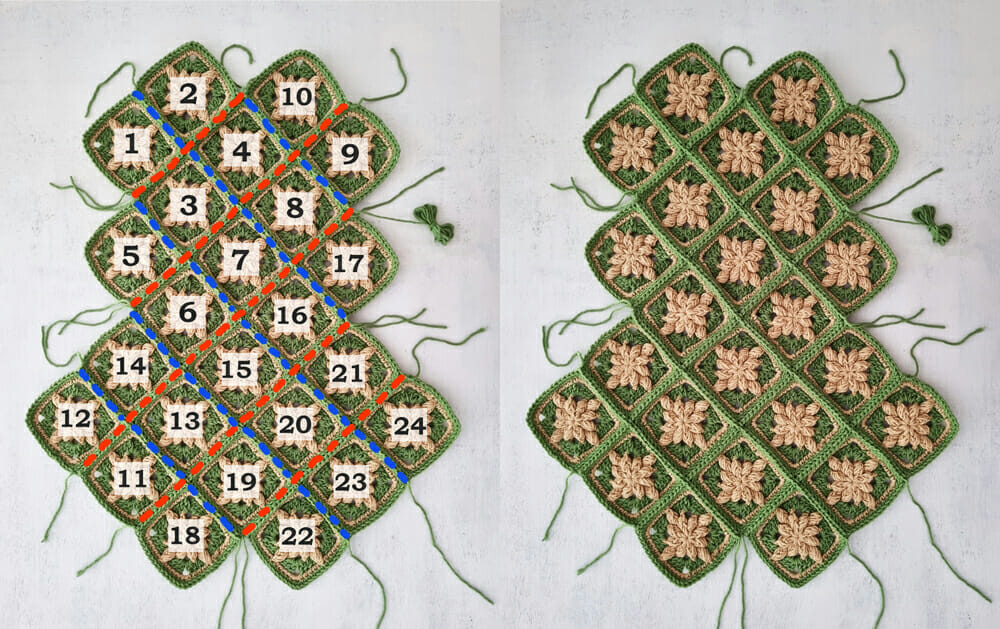
- Arrange the 24 squares as indicated in the diagram below.
- Start joining the squares using pr. The first image shows the numbers in order of how I put the squares together (the numbers are in order for a left-hander).
- After you finish joining the red dotted lines diagonally, start joining the opposite diagonal (blue dotted lines) and complete the join.
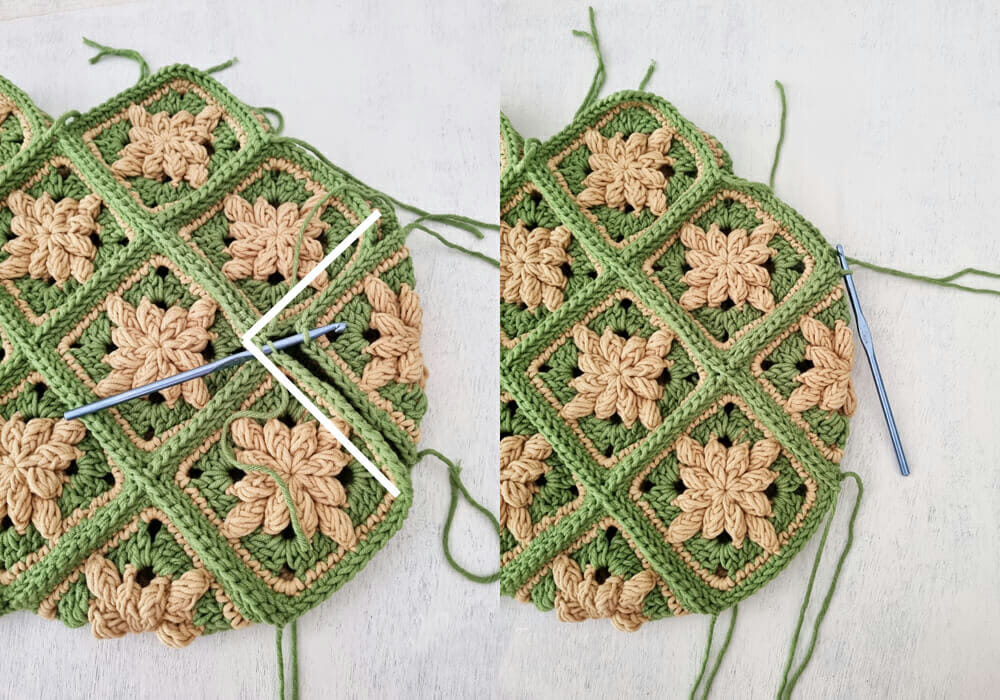
How to Knit Slip Stitch Seam

- Place the two squares with the correct side facing up. Insert the hook into the back loop of each square (image 1). Pull through a loop (picture 2), *insert hook into back loop of each square (picture 3), thread through (picture 4), pull back through stitch and hook loop (picture 5); Repeat * this method to join all the squares.

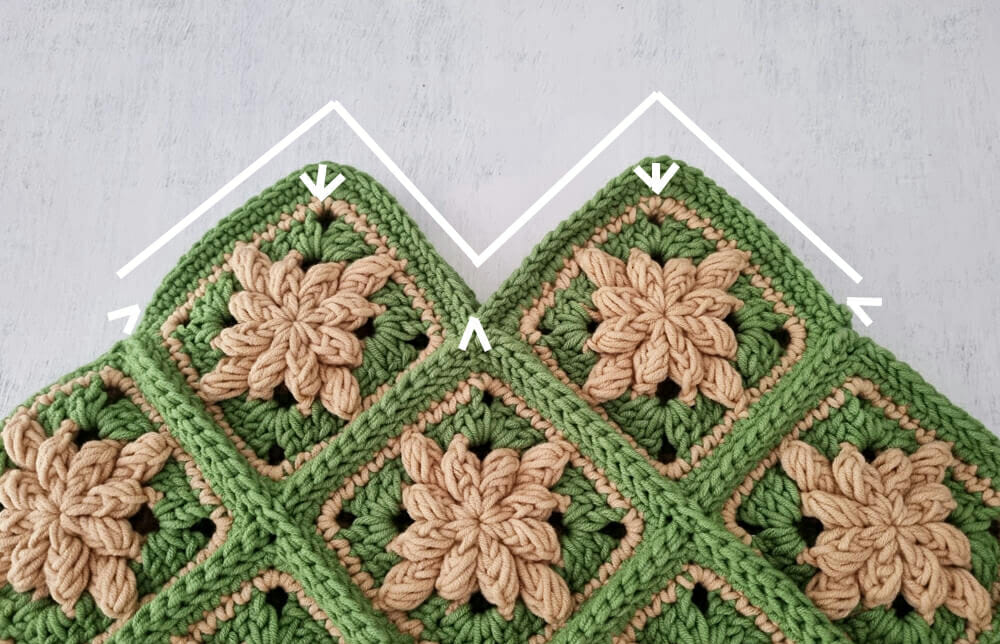
- After putting all the squares together, fold the piece in half as shown in the image above (right side out). Fold the side granny square and join it as well (bottom image). Finally, weave all the ends.
borders
- With the thread (C2) start knitting around the edge, there are 4 top stitches and 4 bottom stitches at the opening. Start on one side of the bag and join the thread at the bottom point. Work sc evenly around the opening. Make sure to work sc2tog in the bottom stitches (see image below) and 3 sc in the top stitch (the center point of the 3 stitches). Once you have worked the last sc, make a sl st to the first stitch. Cut the thread and knit the end.
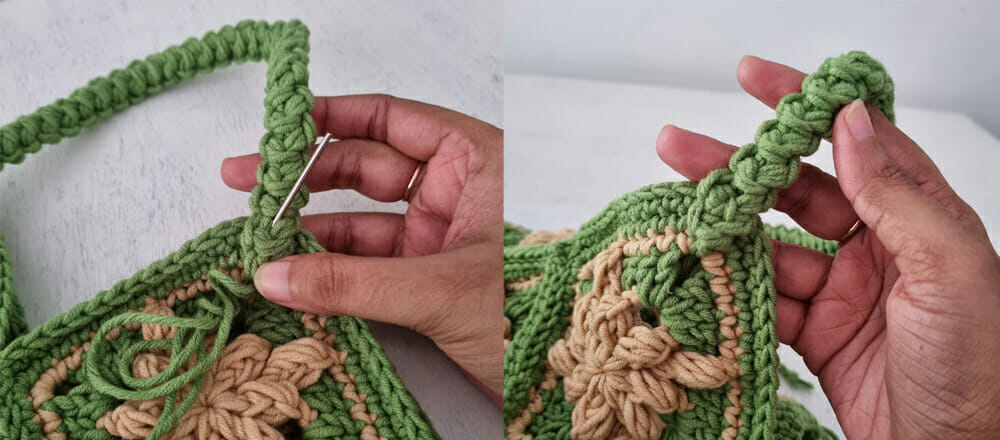
Woven handles
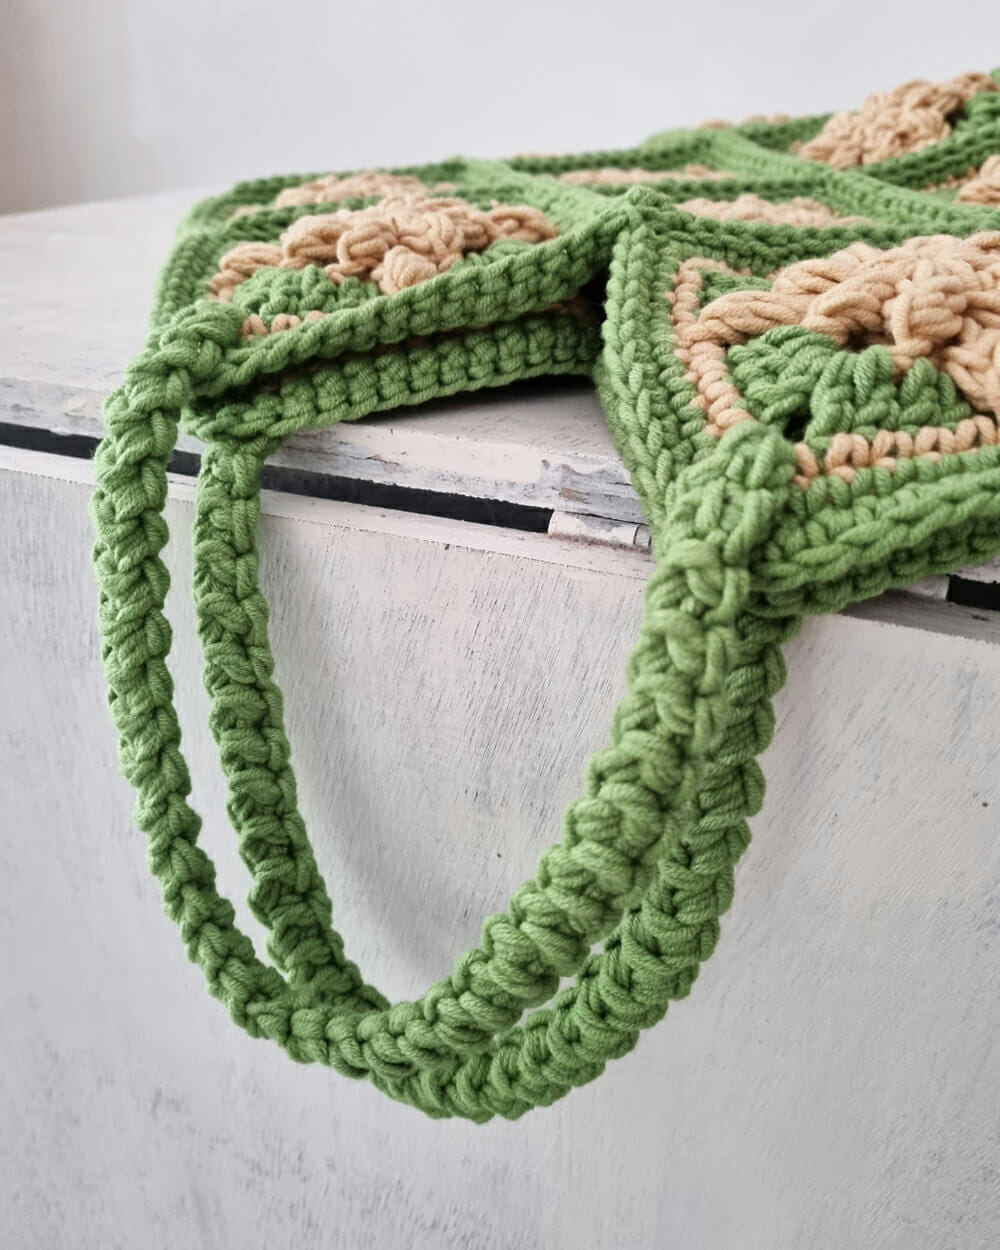
- Weave the Romanian cord and attach it to the bag last. You already know that the handles are very elastic when the bag is full. But the Romanian cord is stronger and more durable than normal chain handles.
- When weaving the Romanian cord for the bubble flower bee square bag.
- When weaving the Romanian cord for the bubble flower bee square bag.
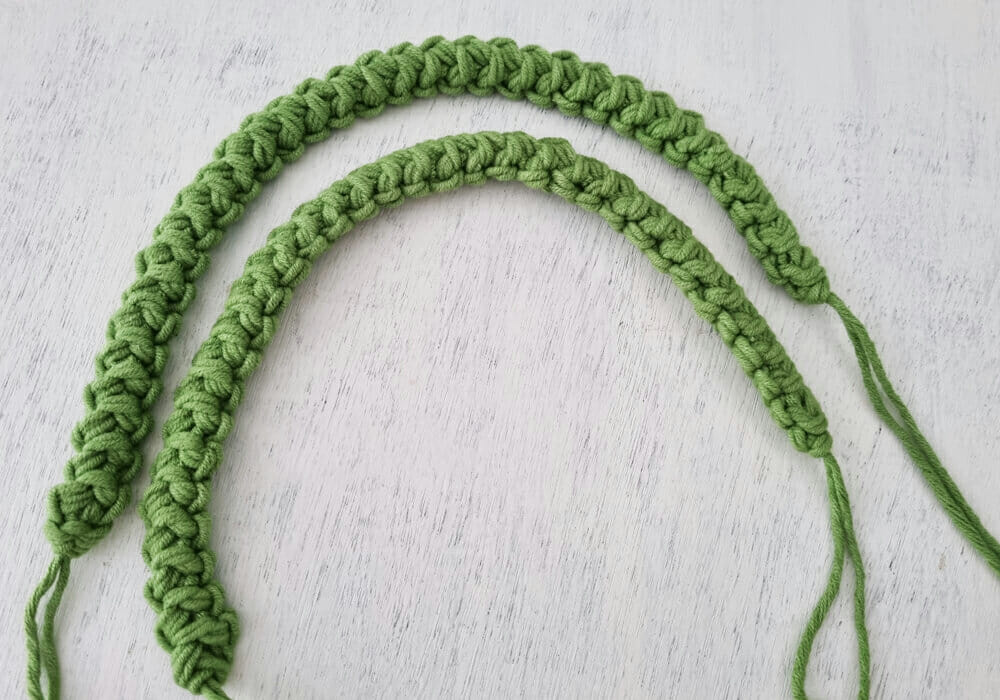
- I have put two strands together to make it stronger and used a larger US J-10/6mm hook.
- Remember that you must work the stitches without squeezing.
- It is difficult to count the stitches on the cord so pay attention to the length of the strap as you knit.
- I made 12.5″ long straps for my bag, you can make it shorter or longer if you want.
When starting and finishing the strap, remember to leave 8″ or 10″ of thread tail to sew on the handles. - Finally, sew the handles to the bag using the thread tails on the handles.