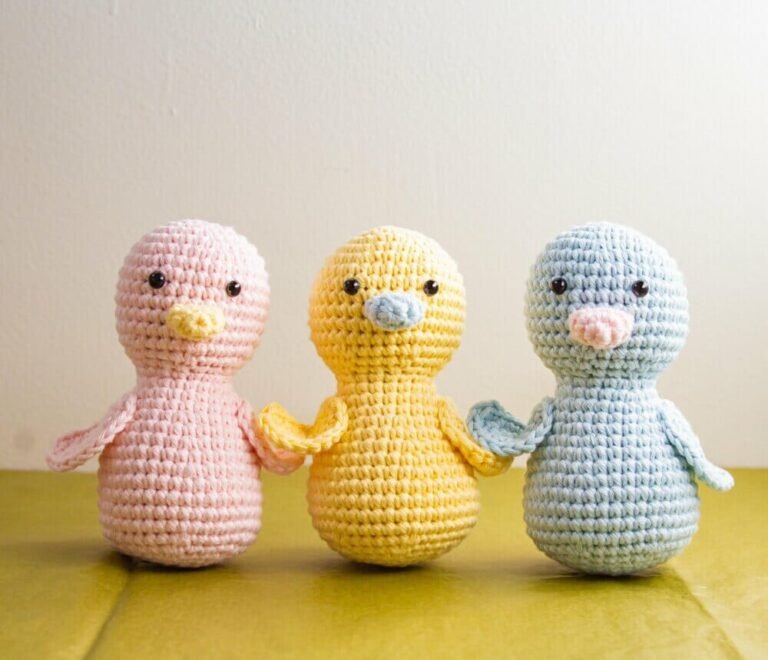
Instructions for the Adorable Ducklings Amigurumi
Head and body: Using the thread of the main color and the 3.00 mm hook, start by making an Am.
Round 1: 6 sc in Am [6].
Round 2: (Inc in each st) x 6 [12].
Round 3: (Sc; Inc) x 6 [18].
Round 4: (2 Sc; Inc) x 6 [24].
Round 5: (3 Sc; Inc) x 6 [30].
Round 6: (4 Sc; Inc) x 6 [36].
Rows 7-12: sc in each st around [36].
Round 13: (4 SC; Dec) x 6 [30].
Fly 14: (3 SC; Dec) x 6 [24].
Fix the safety eyes between rows 8 and 9, with 5 separation points.
Round 15: (2 SC; Dec) x 6 [18].
Round 16: (5 Sc, Inc) x 3 [21].
Round 17: (6 Sc, Inc) x 6 [24].
Round 18-19: sc in each st around [24].
Round 20: (3 Sc; Inc) x 6 [30].
Round 21: sc in each st around [30].
Round 22: (4 Sc; Inc) x 6 [36].
Round 23: sc in each st around [36].
Round 24 : (5 Sc; Inc) x 6 [42].
Rows 25-28: sc in each st around [42].
Round 30: (5 SC; Dec) x 6 [36].
Round 31: (4 SC; Dec) x 6 [30].
Fill in the head and body as you work.
Round 32: (3 SC; Dec) x 6 [24].
Round 33: (2 SC; Dec) x 6 [18].
Round 34: (Sc; Dec) x 6 [12].
Round 35: (Dec) x 6 [6].
Firmly stuff the head and body with fiberfill. Thread the tail end of the yarn onto a tapestry needle, insert the needle in and out of the remaining stitches, pull to close, and knit the end.
Wings (Make 2) : The wings are worked in rows. PC 1 at the beginning of the row does not count as a Pt.
Round 1: Pc 2, work 3 SC in the second Pc from the hook. 1 Pc and turn [3].
Round 2: Inc in each st along. 1 Pc and turn [6].
Round 3: (Sc, Inc) x 3. 1 Ch and round [9].
Round 4: (2 sc, inc) x 3. [12].
Do not turn after row 4. Crochet 8 sc evenly on the other side of the brim. close leaving a long tail to sew. The finished wing shape is similar to a half circle.
Peak: Using a contrasting color thread, start by making an Am.
Round 1: 6 sc in Am [6].
Round 2: (2 sc, inc) x 3 [9].
Round 3: sc in each st around [9]. Make a Pr in the next Pt and go over it, leaving a tail to sew. Do not stuff the beak.
Mounting
Place the wings on the sides of the body, using the eyes as the center point. Make sure the curved edge of the brim is facing the front of the body. The wings are attached to the body only at the top only, leaving the bottom open, so they can flap.
Place the beak between the eyes on rows 10-12. Sew tight.