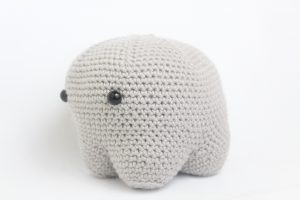
Paws
Use the gray thread.
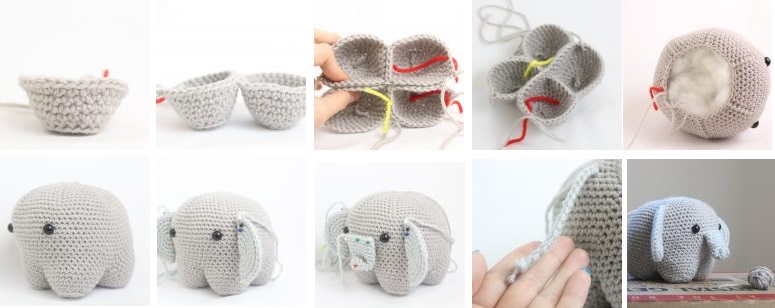
We start by creating two individual legs. Next, we knit them together to create a pair of legs. Next, we make another pair of two single legs and knit them together. Then, we join the two pairs of legs. After this, the legs are joined together to form the body. The legs and body are one continuous piece.
Legs (bundle 4)
Use the gray thread.
Round 1: 6 sc in AM.(6)
Round 2: *Inc* all around (12)
Round 3: *Inc, sc* all around. (18)
Round 4: In the BLO, *sc* all around. (18)
Round 5: *Inc, sc 2* all around. (24)
Round 6-7: *Sc* all around. (24)
Round 8: *Inc, sc 3* all around. (30)
Continue until round 9 for the first leg only. If you are doing the second leg, skip round 9 and continue with round 10.
Round 9: *Sc* all around. (30)
Finish the first leg here. Set the first leg aside and make the second leg.
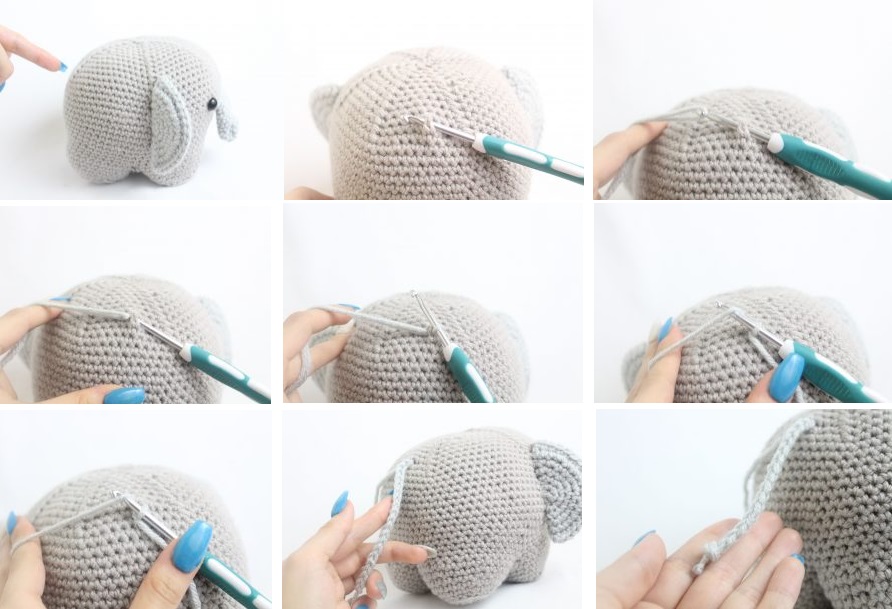
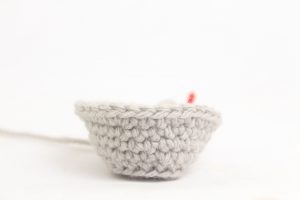
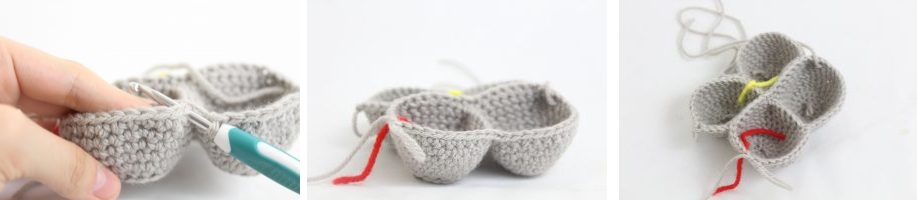
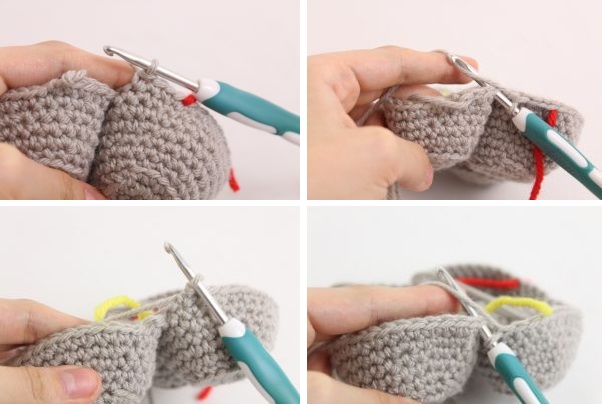
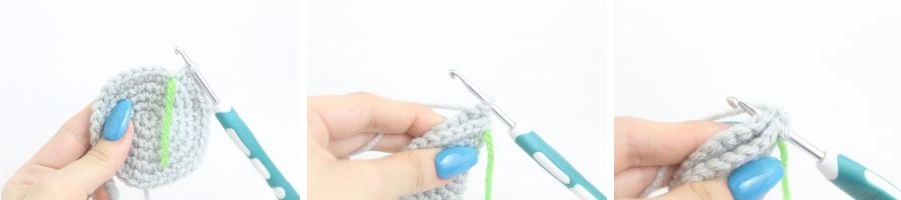
Round 10: SC in the next 12 stitches (photo 1). Now take the first leg you made and line it up with the second leg, making sure the points line up (photo 2). Insert the hook into both points of the first and second leg (photo 3).
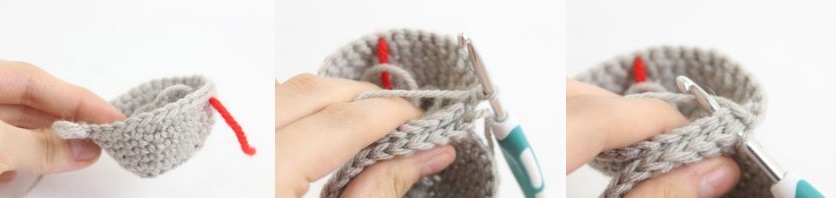
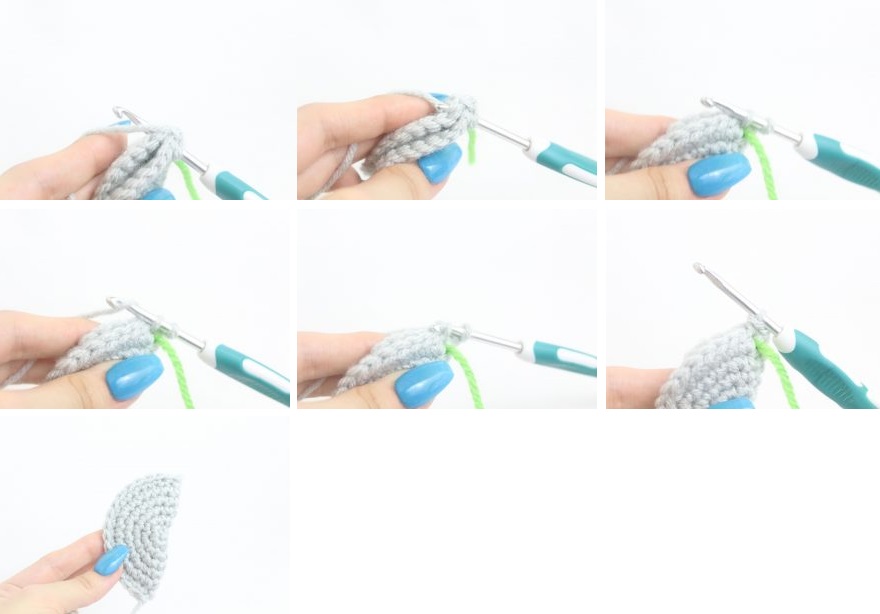
Sc in both stitches of the leg together for a total of 6 stitches (photo 4-9).
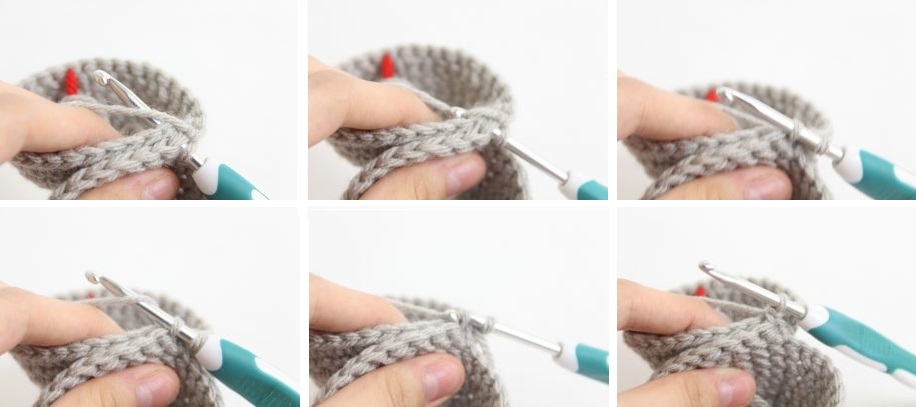
Now we are back on the second leg. Sc in the next 12 stitches (photo 10-12) (stitch count: 48 stitches on both legs, 6 stitches connecting the legs together).
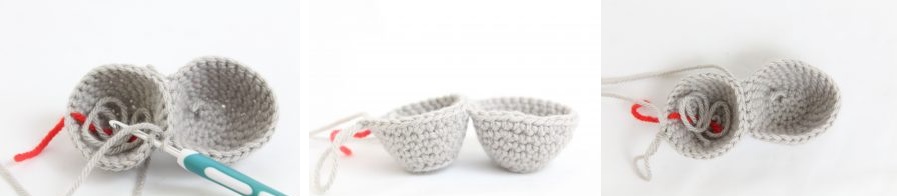
Finish the first pair of legs. Don’t finish off the second pair of legs. Continue on lap 11.
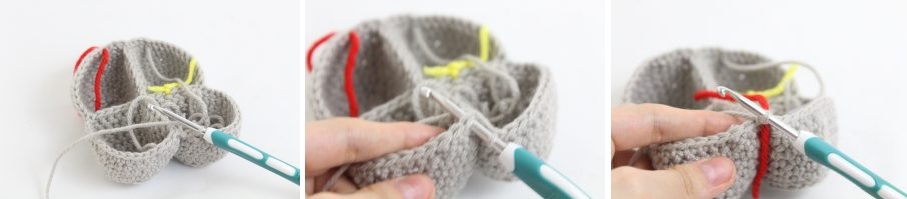
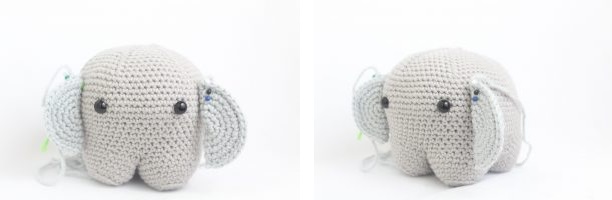
Round 11: SC in the next 4 stitches (photo 1). Now align the two pairs of legs side by side, making sure the points line up as shown. The points where we have joined the legs will be in the center, vertically (photo 2). SC in the next 8 stitches (photo 3).
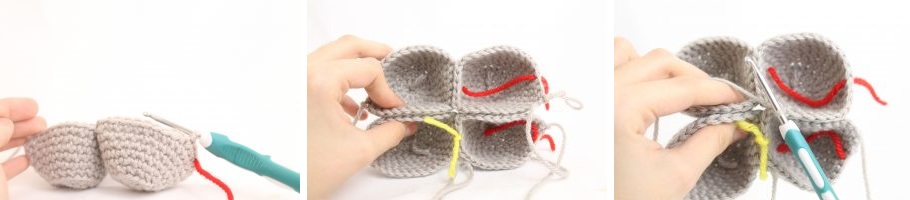
Now we find the line where we join the legs. SC in the next 8 stitches (photo 4). Now, continuing with the second pair of legs that we have made, sc in the next 16 stitches (photo 5). Now we find the other leg (photo 6).

SC in the next 12 stitches (photo 7-9). (64)
Round 12: sc in the next 4 (photo 1). Now we come to the next leg. SC in the next 16 stitches (photo 2). Now we find the next leg (photo 3). SC in the next 16 stitches (photo 4).
Now we find the next leg (photo 5). Sc into the next stitch on that leg and move the stitch marker to the sc you just made (photo 6-7). This marker will now mark the laps.
Round 13-15: *Pb* all around. (64)
Round 16: *Inc, sc 9* 6 times, sc in the last 4 stitches. (70)
Round 17-18: *Pb* all around. (70)
Round 19: SC in the next 32 stitches, repeat *Inc in the next stitch, sc 1 in the next stitch* 6 times, SC in the next 26 stitches. (76)
Round 20-26: *Sc* all around. (76)
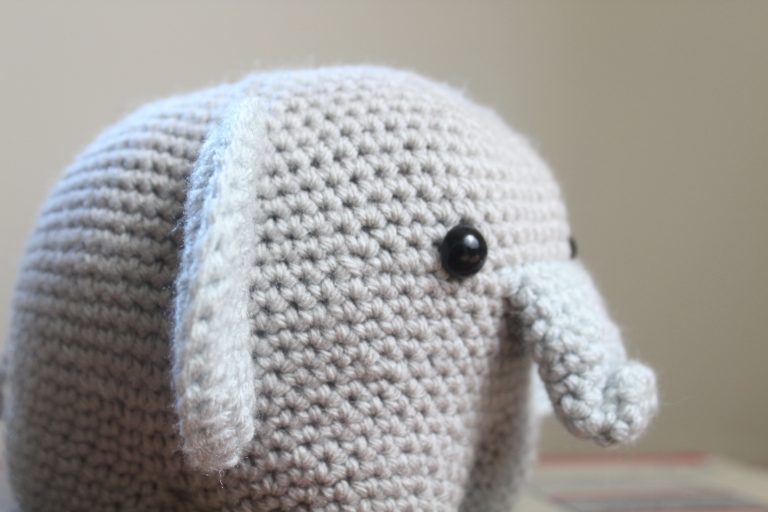
Insert the safety eyes between rows 21-22, 13 stitches apart.
Round 27: Repeat *Dec, sc in the next 10 stitches* 6 times, sc in the last 4 stitches. (70)
Round 28: Repeat *Dec, sc in the next 9 stitches* 6 times, sc in the last 4 stitches. (64)
Round 29: Repeat *Dec, sc in the next 8 stitches* 6 times, sc in the last 4 stitches. (58)
Round 30: Repeat *Dec, sc in the next 7 stitches* 6 times, sc in the last 4 stitches. (52)
Round 31: Repeat *Dec, sc in the next 6 stitches* 6 times, *Dec* 2 times. (44)
Round 32 : *Dec, sc in the next 5 stitches* 6 times, *Dec* 1 time. (37)
Round 33: *Dec, sc in the next 4 stitches* 6 times, sc in the last stitch. (31)
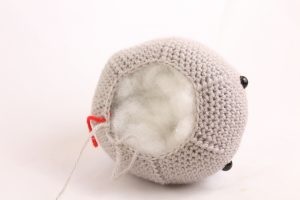
Fill in here. Keep refilling after each round.
Round 34: *Dec, sc in the next 3 stitches* 6 times, sc in the last stitch. (25)
Round 35: *Dec, sc in the next 2 stitches* 6 times, sc in the last stitch. (19)
Round 36: *Dec, sc in the next stitch* 6 times, sc in the last stitch. (13)
Round 37: *Dec* 6 times, sc in the last stitch. (7)
Finish off. Set the body aside for now.
Ears (bundle 2)
Use the gray thread.
Round 1: 6 sc in AM. (6)
Round 2: *Inc* all around. (12)
Round 3: *Inc, sc * all around. (18)
Round 4: *Inc, sc 2* all around. (24)
Round 5: *Inc, sc 3* all around. (30)
Round 6: *Inc, sc 4* all around. (36)
Continue with assembling the ears.
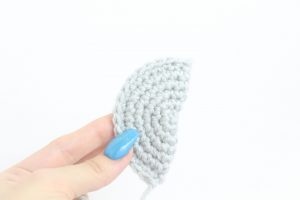
Ear assembly
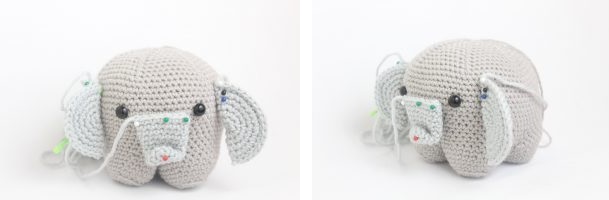
Fold the ear in half, making sure the points line up next to each other (photo 1-2). Pass the hook under both points (photo 3).
Now sc in the next 18 stitches together, this will turn the circle into a semi-circular ear (photo 4-10).
Pin each ear to the elephant as shown, the flat part of the ear will be on the elephant and the round part will be on the outside (photo 11-12). Sew each ear.
I don’t know
Use the gray thread.

Round 1: 6 sc in AM. (6)
Round 2: *Inc, sc* all around. (9)
Round 3-4: *Sc* all around. (9)
Round 5: *Inc, sc 2* all around. (12)
Round 6-7: *Sc* all around. (12)
Round 8: *Inc, sc 3* all around. (fifteen)
Round 9-12: *Pb* all around. (fifteen)
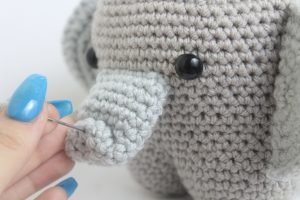
Finish off, leaving a long tail to sew. Don’t stuff the nose. Pin the nose as shown in the image. Completely sew the nose.
When fully sewn, bring the thread tail to the area of the trunk where it is folded and sew the folded piece. Tie the ends of the string into a tight knot and weave the knot around the elephant to hide the ends.
Line
Use the gray thread.
Find the perfect spot for the line. I placed it on the upper part of the back (photo 1). Insert the hook into that area (photo 2).
Now pull the gray thread through the area where you inserted the hook (photo 3-5).
Make a sl st a total of 20 times and finish off (photo 6-8). Tie a knot with the tail towards the end of the pc. This will make a nice tail.