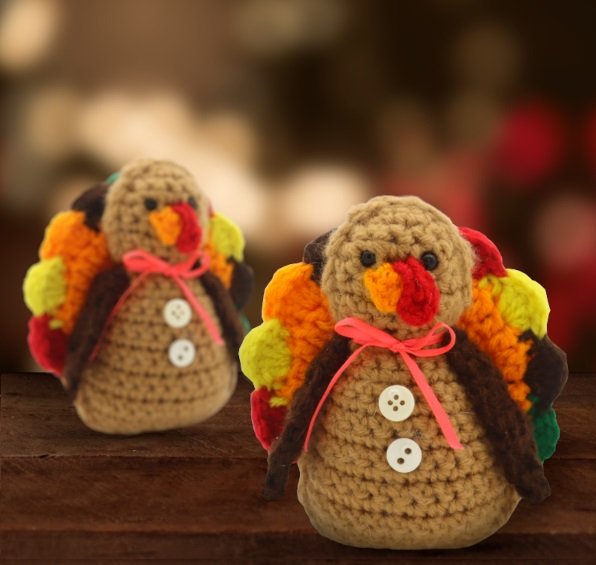
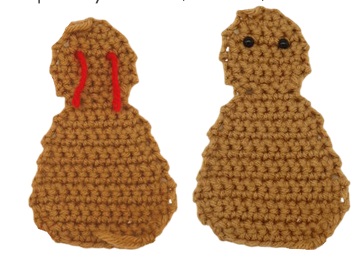
We will make two flat pieces of the turkey body, then place them together. We will join them to form 1 body.
Row 1: Pc 3. Inc in the 2nd pc from the hook, inc in the last stitch. (4).
Row 2: Pc 1 and turn. *Inc* in next stitch, sc in next 2 stitches, *inc* in last stitch. (6)
Row 3: Pc 1 and turn. SC in the next 6 points. (6)
In row 4, we will add safety eye stitch markers only on the first piece we make.
If you are making the second piece, do row 4, but do not add the stitch markers.
Row 4: Pc 1 and turn. Inc in next stitch, sc in next stitch. Add a stitch marker to the stitch you just made. This will mark where to place the eye later. SC in the next 2 points. Sc in the next stitch and add a stitch marker in the stitch you just made. Inc in the last stitch. (8)
Row 5-7: Pc 1 and turn. SC in the next 8 stitches. (8)
Row 8: *Dec* 1 time, sc in the next 4 stitches, *dec* 1 time. (6)
Row 9: *Dec* 1 time, sc in the next 2 stitches, *dec* 1 time. (4)
Row 10: Pc 1 and turn. *Inc* in next stitch, sc in next 2 stitches, *inc* in next stitch. (6)
Row 11: Pc 1 and turn. *Inc* in next stitch, sc in next 4 stitches, *inc* in next stitch. (8)
Row 12: Pc 1 and turn. *Inc* in next stitch, sc in next 6 stitches, *inc* in next stitch. (10)
Row 13-15: Pc 1 and turn. Sc in the next 10 points. (10)
Row 16: *Inc* in the next stitch, sc in the next 8 stitches, *inc* in the next stitch. (12)
Rows 17-18: Pc 1 and turn. SC in the next 12 stitches. (12)
Row 19: *Inc* in next stitch, sc in next 10 stitches, *inc* in next stitch. (14)
Rows 20-21: Pc 1 and turn. Sc in the next 14 stitches. (14)
Row 22: *Dec* 1 time, sc in the next 10 stitches, *dec* 1 time. (12)
Row 23: *Dec* 1 time, sc in the next 8 stitches, *dec* 1 time. (10)
Row 23: *Dec* 1 time, sc in the next 6 stitches, *dec* 1 time. (8)
Redo the first piece you just made. Add the safety eyes to the first piece.
Don’t finish the second piece you made, instead continue with the next step.
Bodysuit
Use light brown thread.
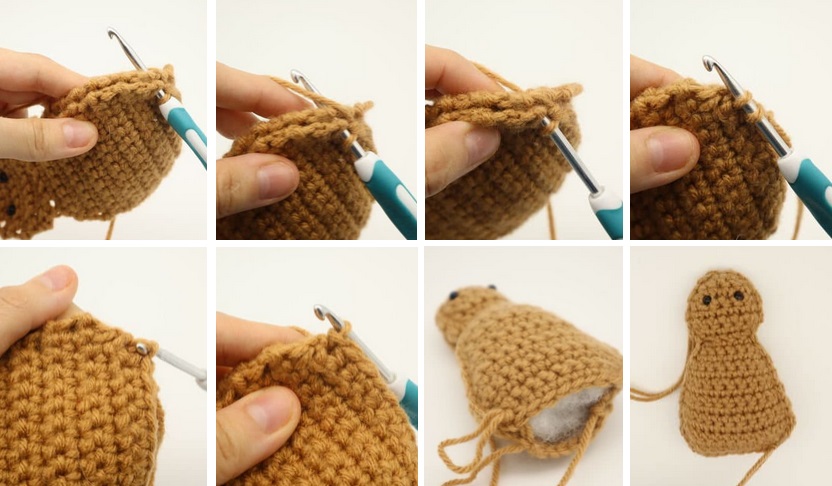
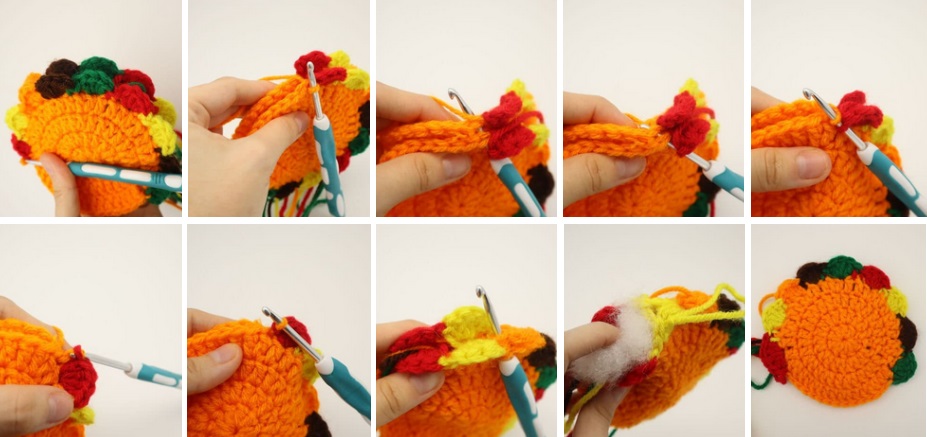
Align both pieces together, making sure the correct sides are facing out and the eyes are facing out. The points must be aligned. Insert the hook into the next stitch, making sure to go through both loops (photo 1). Loop (photo 2) and pull the thread through (photo 3). You will have 2 loops on the hook (photo 4). Make a sl st by passing the left loop under the right loop (photo 5-6). Continue doing 1 sl all around the turkey until the fabric is almost closed. Stuff the turkey well before closing it completely (photo 7) and continue knitting to close it. Once this is done, finish off and weave the ends (photo 8).
Feathers (make 2 pieces, one front and one back)
Use the orange thread.
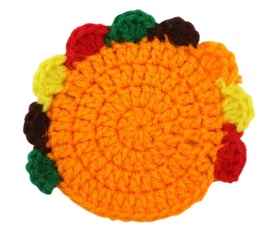
Round 1: Sc 4. Dc 9 times in the 1st sc. This will create a lot of high points in a circle, like when we make a magic ring. Join the top of the 3 pc that we made first by doing a pr. From now on, this step will be called “merge.” (10)
Round 2: Pc 3, dc in the same point. Pa on the next point. Repeat *2 dc in each stitch* 9 times. (twenty)
Round 3: Join the top of pc 3 with a sl st. Stc 3, dc in the same stitch, dc in the next stitch. Repeat *2 dc in next stitch, dc in next stitch* 9 times. (30)
Round 4: Join the top of pc 3 with a sl st. Stc 3. dc in the same stitch, dc in the next 2 stitches. Repeat *2 dc in next stitch, dc in next 2 stitches* 9 times. (40)
On the next round we will make the turkey feathers by making 4 dc in the same stitch, what is known as “clusters of double crochets”. I alternated the colors of each group, but you can keep them the same color to weave fewer extremes.
For my first pen piece, I started with red, yellow, orange, brown, green, red, yellow, brown, and then green.
First piece of pen
Round 5: Join to the top of pc 3 with a sl st. Changes to red. Dc 3, dc 3 times in that same point, sc in the next 2 points.
Change to yellow, dc 3 times in next stitch, sc in next 2 stitches.
Change to orange, dc 3 times in next stitch, sc in next 2 stitches.
Change to brown, dc 3 times in next stitch, sc in next 2 stitches.
Change to green, dc 3 times in next stitch, sc in next 2 stitches.
Change to red, dc 3 times in next stitch, sc in next 2 stitches.
Change to yellow, dc 3 times in next stitch, sc in next 2 stitches.
Change to brown, dc 3 times in next stitch, sc in next 2 stitches.
Change to green, dc 3 times in next stitch, sc in next 2 stitches.
Finish off the first piece of the feather.
When you make your second feather piece, you will reverse this order. Start with green, brown, yellow, red, green, brown, orange, yellow and red. We reverse it so that when we weave the feathers together, the colors match when looking at them in different ways.
Second piece of the pen
Use orange thread.
Join to the top of pc 3 with a pr. Change to green. Dc 3, dc 3 times in that same point, sc in the next 2 points.
Change to brown, dc 3 times in next stitch, sc in next 2 stitches.
Change to yellow, dc 3 times in next stitch, sc in next 2 stitches.
Change to red, dc 3 times in next stitch, sc in next 2 stitches.
Change to green, dc 3 times in next stitch, sc in next 2 stitches.
Change to brown, dc 3 times in next stitch, sc in next 2 stitches.
Change to orange, dc 3 times in next stitch, sc in next 2 stitches.
Change to yellow, dc 3 times in next stitch, sc in next 2 stitches.
Change to red, dc 3 times in next stitch, sc in next 2 stitches.
Don’t finish off the second feather piece you just made. Instead, it changes to orange.
To join the pieces of the feathers
Line up the two pieces of feathers so the colors match (photo 1). Introducing the hook through both points (photo 3), tr into the next 13 points together. You’ll need to switch to the next feather color when you find it (photo 8), so if you’ve been following my colors, switch to green now. Pra on the next 6 points.
Change to brown, pr in the next 6 points.
Change to yellow, pr in the next 6 points.
Change to red, pr in the next 6 points.
Change to green, pr in the next 6 points.
Change to brown, pr in the next 6 points.
Change to orange, pr in the next 6 points.
Lightly stuff the feathers (photo 9).
Change to yellow, pr in the next 6 points.
Change to red, pr in the next 6 points.
Finish off now and leave a long tail to sew.
Pin the feathers to the back of the turkey, making sure they are facing up. Using the end of the thread, sew the feathers to the back of the turkey.
Arms (bundle 2)
Use dark brown thread.

Row 1: Pc 6. Dc in the 3rd pc from the hook. Dc in the next 2 points. (3)
Rows 2-4: Pc 2 and turn. Pa in the next 3 points. (3)
Row 5: Pc 2 and turn. Dc in next stitch, skip next stitch, dc in next stitch. (2)
Row 6: Pc 2 and turn. Skip the next stitch and dc in the next stitch. (1)
Finish off, leaving a long tail to sew. Pin the arm to the side of the turkey and sew. Weave the ends together.
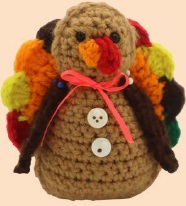
Beak
Use orange thread.

Row 1: Sc 4. Sc in the 2nd sc from the hook, sc in the next 2 sc. (3)
Finish off, leaving a long tail to sew. Pin the beak and sew it on.
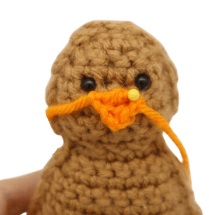
Booger
Use network thread.
Row 1: Pc 4. Pr 3 times in the 2nd pc from the hook, tr in the next 2 pc. (5)
Finish off, leaving a long tail to sew. Pin as shown and sew.
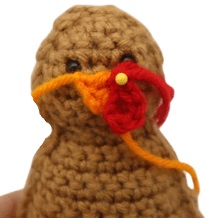
Optional: You can tie a small bow around the neck of the toy turkey and sew on 2 small white buttons.