
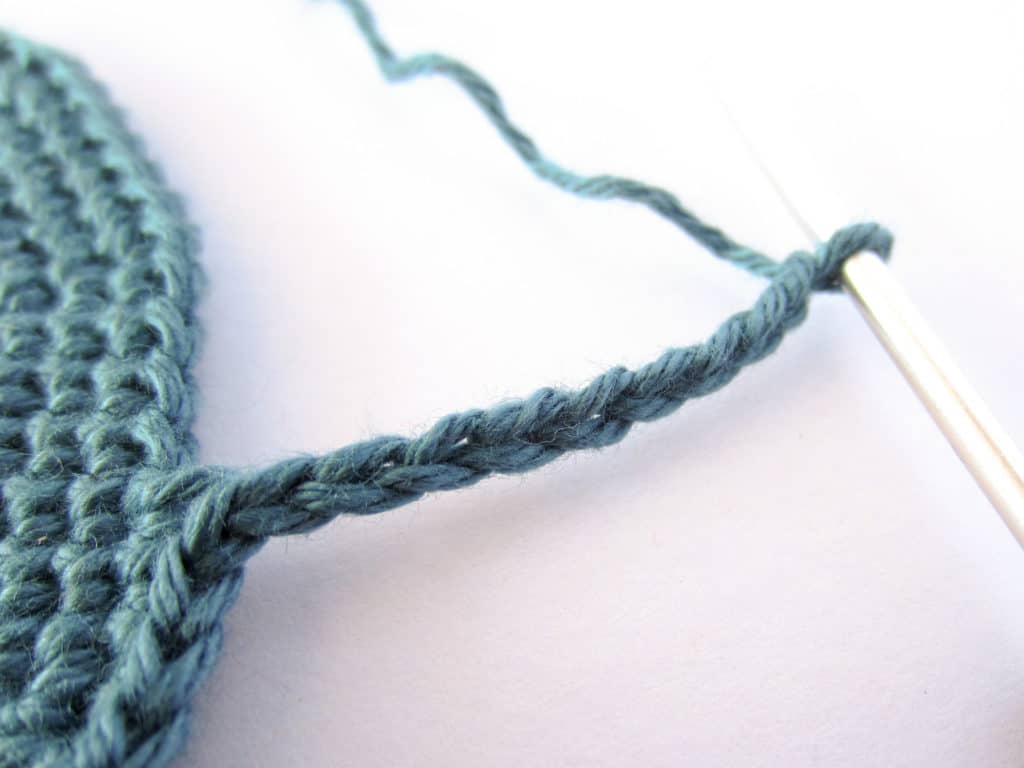
Crochet the wings of the fly in Light Apricot color in rows of chain stitch, slip stitch and single crochet. Both wings are knitted in the same way. Knit 2 wings.

- Crochet the wings in rows with Light Apricot yarn .
- Row 1: 4 chain stitches (4 stitches).
- Row 2: 1 sc in the 2nd stitch from the needle, 2 sc (3 stitches).
- Row 3: 1 turning chain, 3 sc (3 stitches).
- Row 4: 1 turning chain, 1 inc, 2 sc (4 stitches).
- Row 5: 1 turning chain, 3 sc, 1 inc (5 stitches).
- Row 6: 1 turning chain, 1 inc, 4 sc (6 stitches).
- Row 7: 1 turning chain, 5 sc, 1 inc (7 stitches).
- Row 8: 1 turning chain, 1 inc, 6 sc (8 stitches).
- Row 9: 1 turning chain, 7 sc, 1 inc (9 stitches).
- Row 10-12: 3 rows, each row 1 turning chain, 9 sc (9 stitches).
- Row 13: 1 turning chain, 8 sc, 1 inc (10 stitches).
- Row 14-16: 3 rows, each row 1 turning chain, 10 sc (10 stitches).
- Row 17: 1 turning chain, 8 sc, 1 des (9 stitches).
- Row 18-20: 3 rows, each row 1 turning chain, 9 sc (9 stitches).
- Row 21: 1 turning chain, 7 sc, 1 des (8 stitches).
- Row 22: 1 turning chain, 1 dis, 6 sc (7 stitches).
- Row 23: 1 turning chain, 5 sc, 1 des (6 stitches).
- Row 24: 1 turning chain, 1 dec, 4 sc (5 stitches).
- Row 25: 1 turning chain, 3 sc, 1 dis (4 stitches).
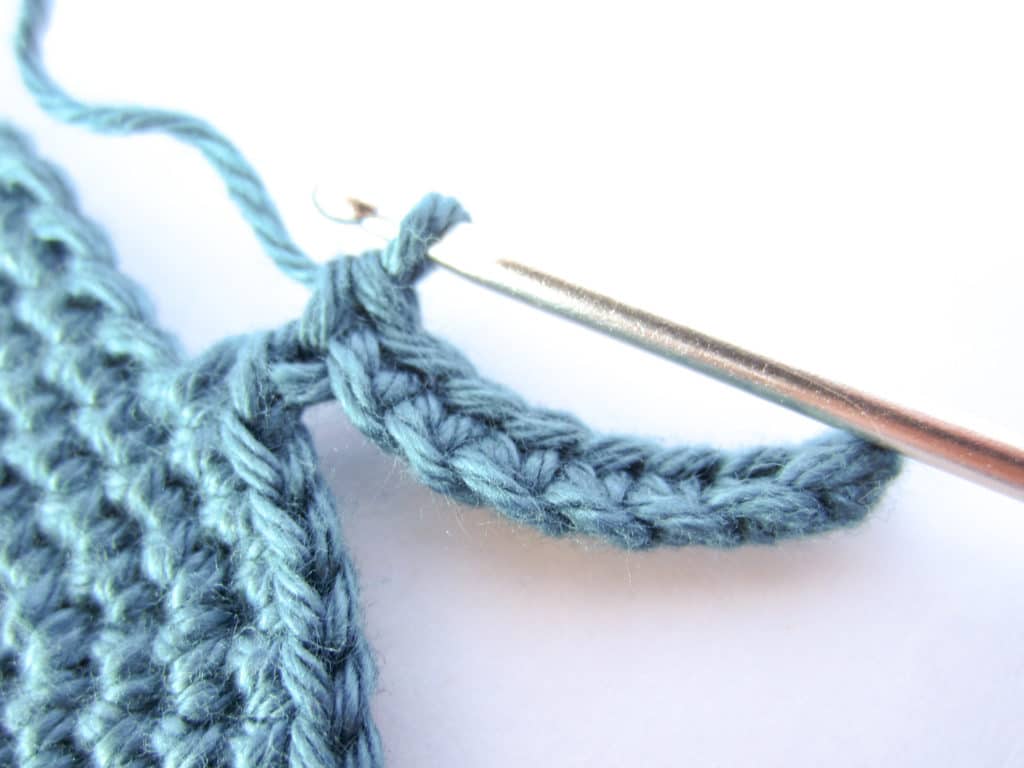
- Row 26: Turn without turning chain, 3 sl st (3 stitches).
- Finishing: Cut the thread leaving a good margin and finish off and hide the excess pieces of thread.
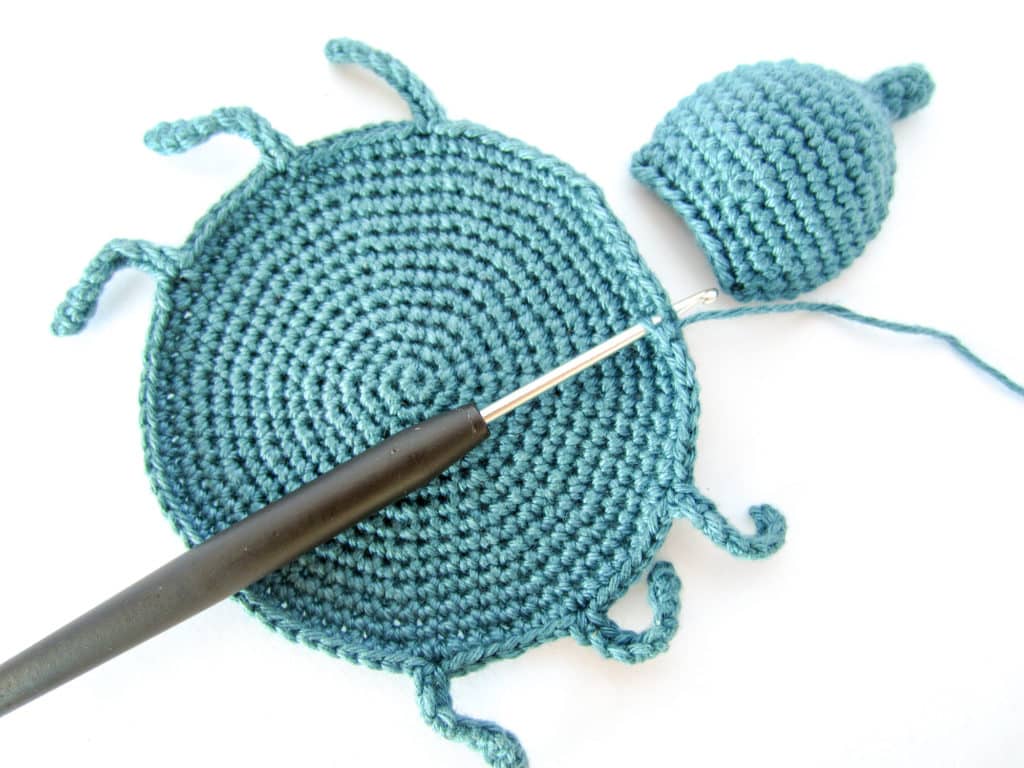
Weave the Body of the Fly
The body of the fly is the main part of the coaster and is knitted in Petroleum color , with spiral turns in chain stitch, slip stitch and single crochet. All legs are knitted together with the body and no sewing is necessary.

- Crochet the body in a spiral with Petroleum yarn .
- Round 1: 6 sc inside the magic ring (6 stitches).
- Round 2: [1 inc] x 6 (12 stitches).
- Round 3: [1 sc, 1 inc] x 6 (18 stitches).
- Round 4: 1 sc, 1 inc, [2 sc, 1 inc] x 5, 1 sc (24 stitches).
- Round 5: [3 sc, 1 inc] x 6 (30 stitches).
- Round 6: 2 sc, 1 inc, [4 sc, 1 inc] x 5, 2 sc (36 stitches).
- Round 7: [5 sc, 1 inc] x 6 (42 stitches).
- Round 8: 3 sc, 1 inc, [6 sc, 1 inc] x 5, 3 sc (48 stitches).
- Round 9: [7 sc, 1 inc] x 6 (54 stitches).
- Round 10: 4 sc, 1 inc [8 sc, 1 inc] x 5, 4 sc (60 stitches).
- Round 11: [9 sc, 1 inc] x 6 (66 stitches).
- Round 12: 5 sc, 1 inc, [10 sc, 1 inc] x 5.5 sc (72 stitches).
- Round 13: [11 sc, 1 inc] x 6 (78 stitches).
- Round 14: 6 sc, 1 inc, [12 sc, 1 inc] x 5, 6 sc (84 stitches).
- 1st and 2nd Leg: [1 sc, 9 chain stitches, 1 sc in the 2nd stitch from the needle, 7 sc along the chain, 2 sc in the next “body” stitch of the fly, 5 bp] x 2.


- 3rd Leg: 1 sc, 9 chain stitches, 1 sc in the 2nd stitch from the needle, 7 sc along the chain, 2 sc in the next stitch on the “body” of the fly, 23 bp.
- 4th and 5th Leg: [1 sc, 9 chain stitches, 1 sc in the 2nd stitch from the needle, 7 sc along the chain, 2 sc in the next “body” stitch of the fly, 5 bp] x 2.
- 6th Leg: 1 sc, 9 chain stitches, 1 sc in the 2nd stitch from the needle, 7 sc along the chain, 2 sc in the next stitch on the “body” of the fly, 7 bp.
- Finishing: DO NOT cut the thread, continue in the step “Assemble the Amigurumi coaster in the shape of a fly”
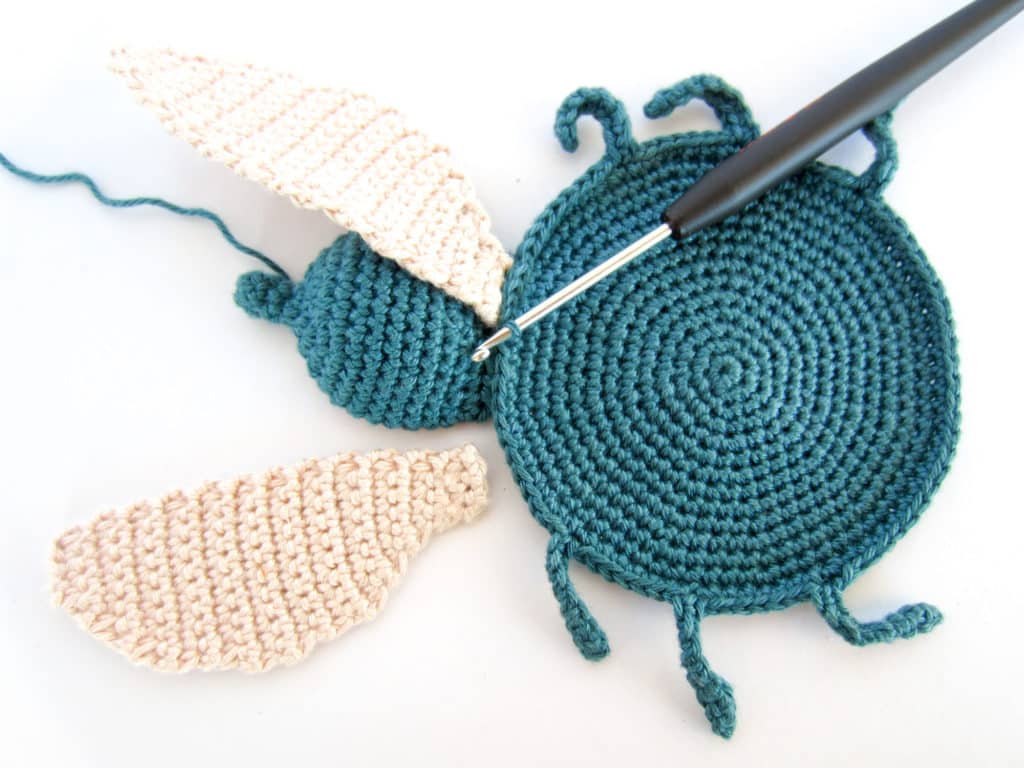
Fly Mount
Assembly: You have crocheted 7 single crochets on the body of the fly. The rest of the points that close the circle are the part to which the head and wings of the fly will be attached to the body.
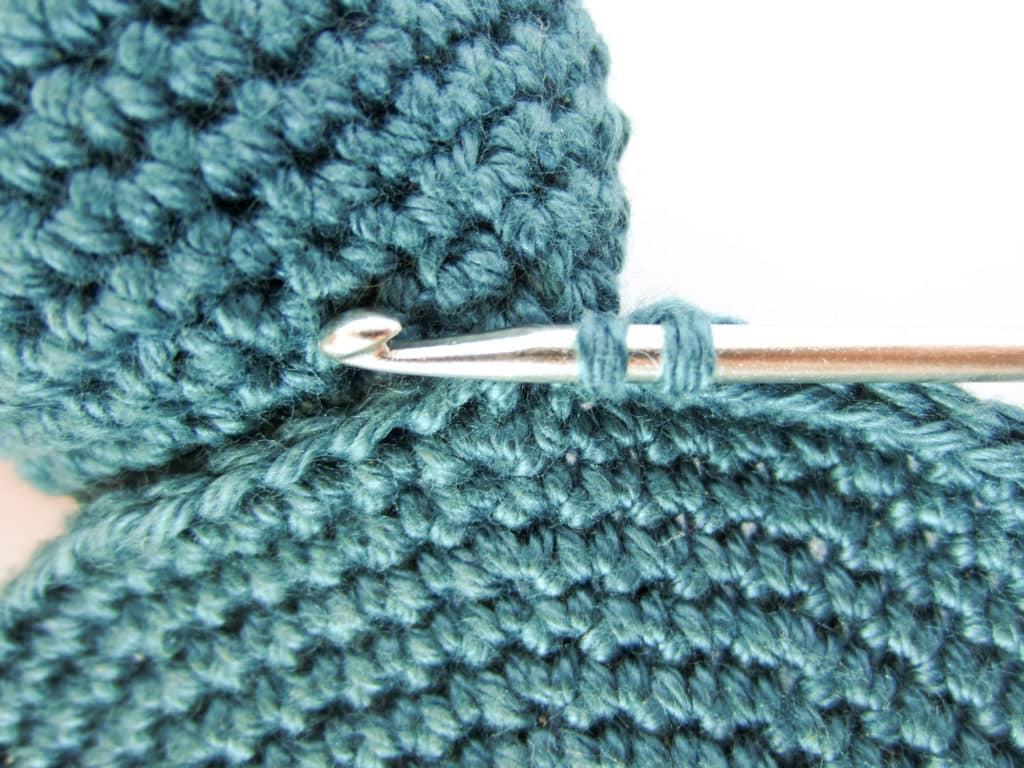
These parts are attached as described below. Apart from the eyes of the fly, there is no need to sew any other elements.
Start by passing the needle through the next stitch and through the stitch on the far right of the head. Use the stitches you made to close the head. Insert the needle through the points on the head from above, look at the images to give you a better idea.


After you have passed the needle through both stitches, make a yarn over, thread through both stitches and slip stitch. With this, the head will already be attached to the body.


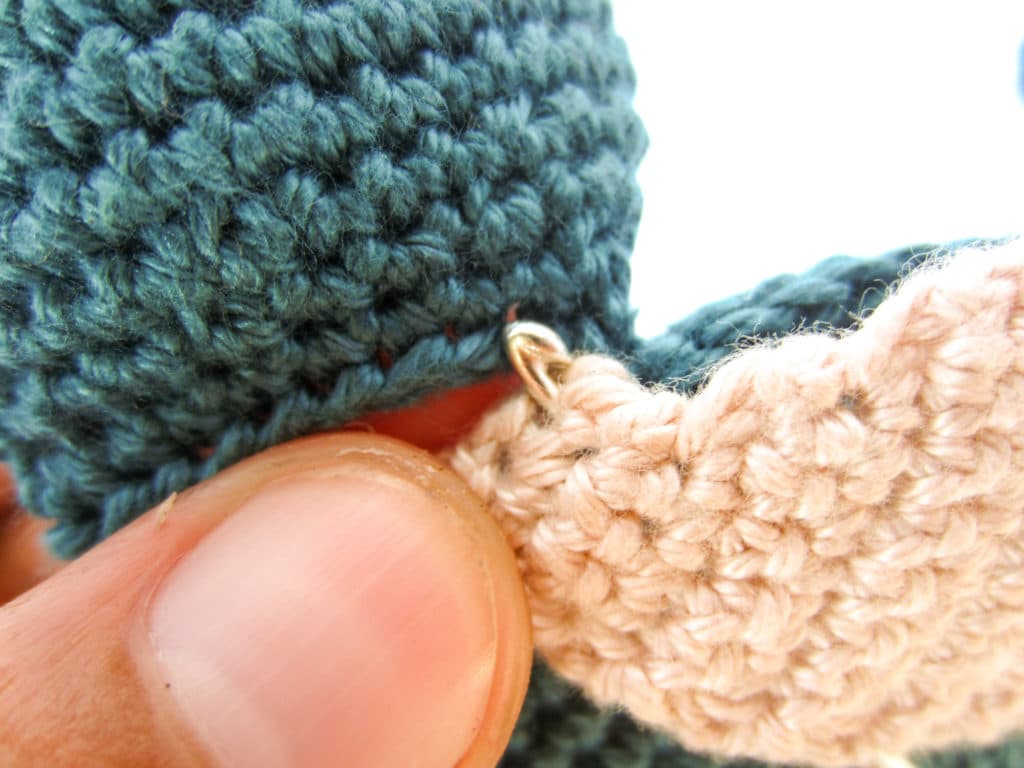
The next thing is to join the first wing. The upper part of the wing is formed by three points. Place the wing as in the images so that it is fixed correctly.
Pass the needle through the next stitch on the body, then through the stitch on the right end of the wing (make sure the wing is in the correct position), and then through the next stitch on the head. Make a yarn over, pass the thread through the three stitches and make another slip stitch.


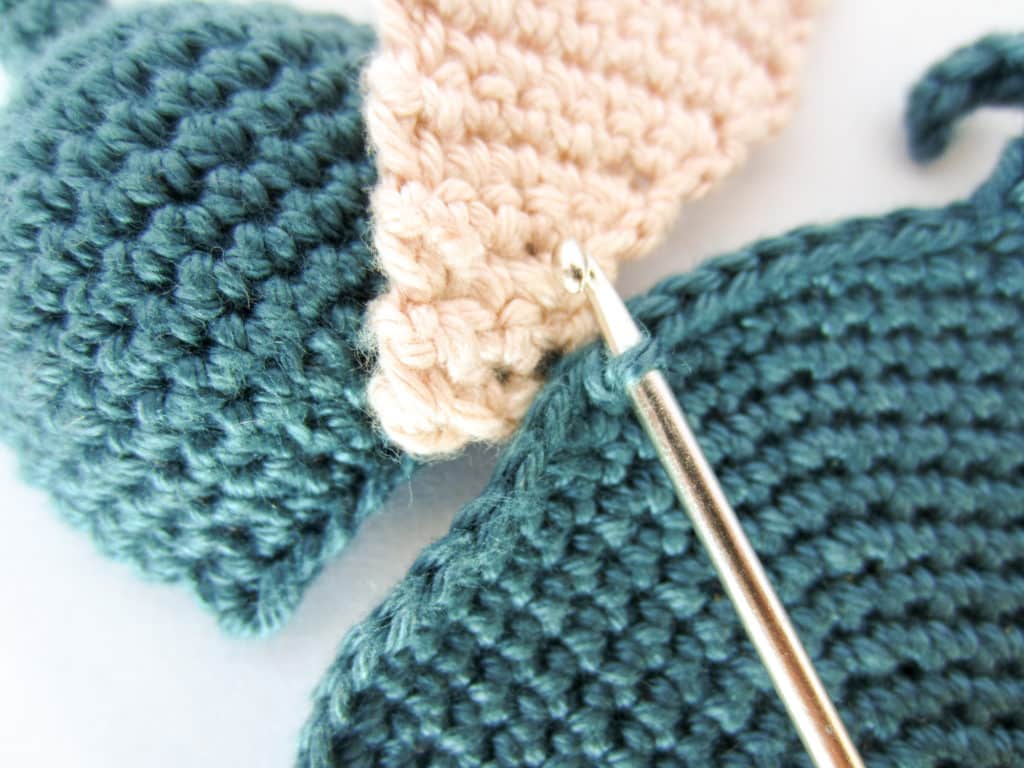
Now, repeat this process for the 2nd and 3rd stitch on the wing (pass the needle through the body, wing and head again). In this way, you will have attached the first wing to the head and body.


Next, pass the needle only through the next stitch on the body and the next stitch on the head, thread through both stitches and make a slip stitch.
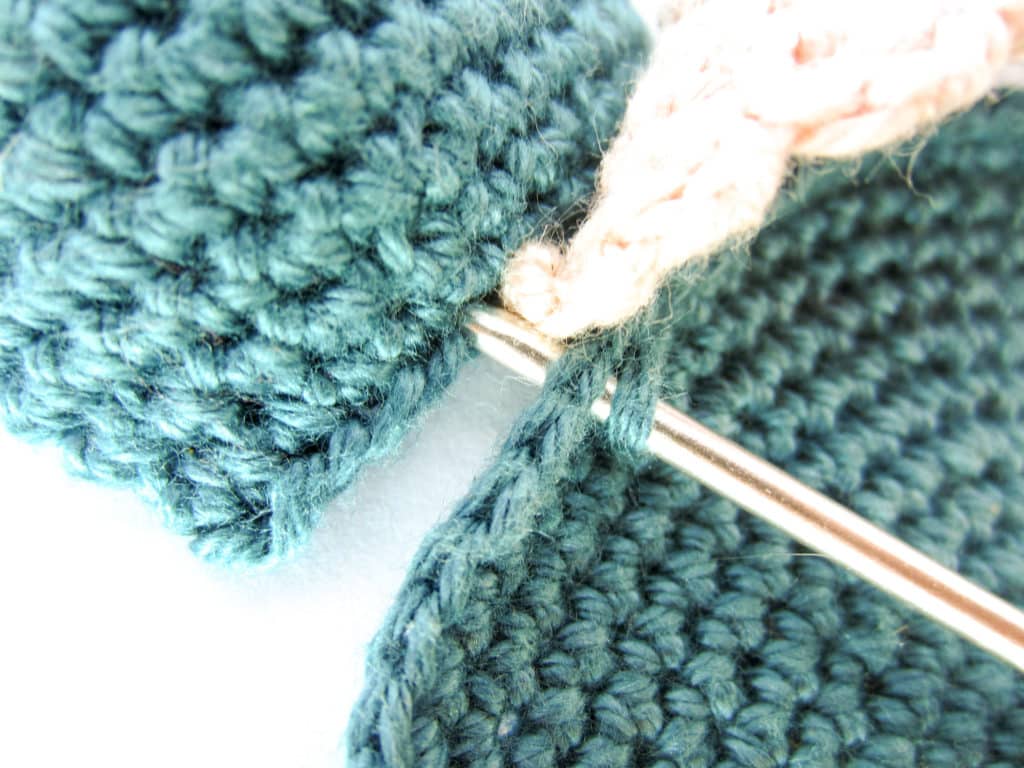
Next, we are going to attach the second wing. Make sure the brim is set correctly and pass the needle through the next stitch on the body, through the stitch on the far right of the brim, and through the next stitch on the head. Make a yarn over, pass the thread through the three stitches and make 1 slip stitch. Repeat this process for the next 2 stitches.