Work a magic ring and 3 sc and 11 dc in the ring = 12 sts.
Join all rows with 1 sl and 3 sc.
All sizes
Row 1: Work 2 dc in each st = 24 sts.
Row 2: *Work 2 dc in first st, 1 dc*, around = 36 sts.
Row 3: *Work 2 dc in first st, 2 dc*, around = 48 sts.
Row 4: *Work 1 dc in each dc*, around = 48 sts.
Row 5: *Work 2 dc in first st, 3 dc*, around = 60 sts.
Row 6: *Work 2 dc in first st, 4 dc*, around = 72 sts.
Row 7: *Work 2 dc in first st, 5 dc*, around = 84 sts = 18.5 inches (47 cm) diameter = size 4 years.
Only size 6 years
Row 8: *Work 2 dc in first st, 13 dc* around = 90 sts = 50 cm circumference = size 6 years.
Only sizes 8 and 10 years
Row 8: *Work 2 dc in first st, 15 dc* around = 96 sts = 20.9 inches (53 cm) circumference = size 8 years.
Only size 10 years
Row 9: *Work 2 dc in first st, 23 dc* around = 100 sts = 22 inches (56 cm) circumference = size 10 years.
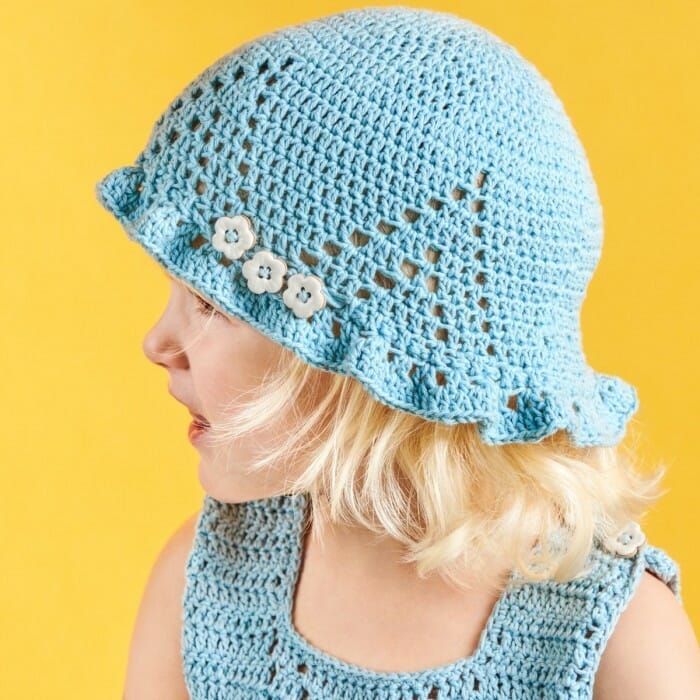
Now, you have finished increasing and crocheting in a lace shape.
Work 4 (7, 10, 12) dc, 1 st, skip 1 st, *18 dc, 1 st, skip 1 st*, repeat from *-* and finish with 3 (6, 9, 11) dc.
You should now have 5 holes in the loop. Continue following the chart until the piece measures approximately 5.9 (5.9, 6.3, 6.3) inches (15 (15, 16, 16) cm) measured from the top.
Edge
Row 1: 4 dc, 1 dc in first st, *1 dc, skip 1 st, 1 dc, 1 dc, 1 dc in next st*, repeat from * to * around.
Row 2: 4 Sc, *2 dc in next sc space*, repeat from * to * around. Knit the ends.
Cord
Make 1 pc with a thread tail of about 20 cm. Work a base pc (a cord) that is approximately 5 cm longer than the diameter of the bucket hat.
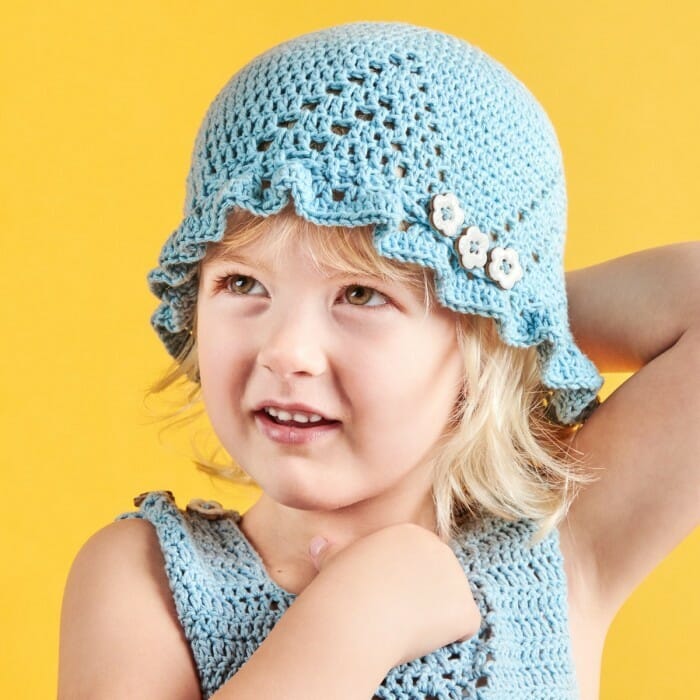
Place a dot marker on one side of the Blue Girls Hat (next to the ear).
In the last row of the Blue Girls Hat, use the tail of the thread (from the set) to sew a button on the mark and sew 2 more buttons (towards the neck).
Thread the cord through the holes (towards the neck and then continue around the head and forward to the button).
Fold the end of the thread bead over, creating a button loop as a buttonhole, and attach the tail of the thread. Fasten the button.
You can now adjust the Blue Girls Hat using the other buttons.