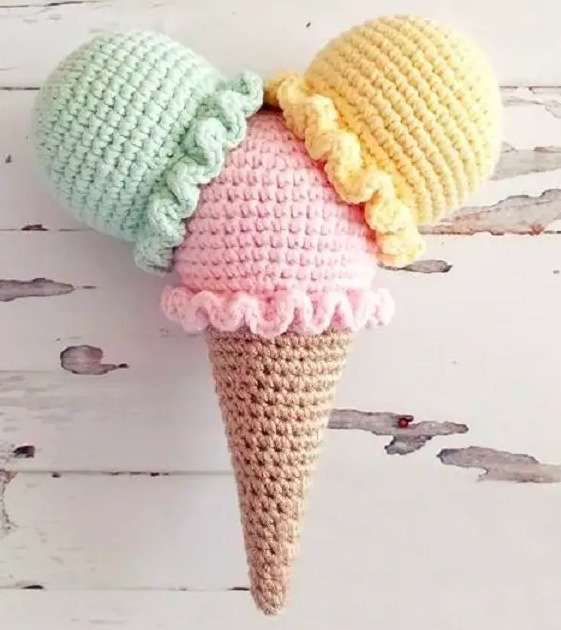
Ideal for cooling off during hot weather, this tasty 3-flavor amigurumi cone is a charming project that you will love to knit. Customize the ice cream balls with your favorite flavor or add thread scraps to create an exquisite topping
Abbreviations
✅ V: Return.
✅ Pc: Chain.
✅ Am: Magic ring.
✅ Pb: Low point.
✅ Inc: Increase (2 sc in the next stitch).
✅ Dec: Decrease (join the next 2 points into 1).
✅ Pr: Sliding point.
✅ [ ]: Number of stitches you must have at the end of the round/row.
✅ ( ) x 6: Repeat what is in parentheses the indicated number of times.
Materials
✅ Beige, yellow, pink and green cotton thread.
✅ Gancho of 3-4 mm.
✅ Fiber filling.
✅ Thread needle.
✅ Scissors.
Instructions
Ice cream ball
Start with pink thread.
V1: 6 bp in am. [6]
V2: Aum x 6. [12]
V3: (1 pb, aum) x 6. [18]
V4: (2 pb, aum) x 6. [24]
V5: (3 pb, aum) x 6. [30]
V6: (4 pb, aum) x 6. [36]
V7: (5 pb, aum) x 6. [42]
R8-14: 42 sc (7 rounds). [42]
V15: (5 pb, dism) x 6. [36]
V16: (4 pb, dism) x 6. [30]
R17: Work only on the front loops: (5 hdc in one stitch, 2 hdc in the next stitch) repeat 15 times.
V18: Work on the back loops. Knit 20 sc around. Fasten and weave the ends.
Note: Make two more scoops of ice cream (green and yellow) as above. From round 1 to round 18. Fasten and leave a tail to sew.
ice cream cone
Switch to beige thread.
R19-21: 30 sc (3 rounds). [30]
V22: (8 pb, dism) x 3. [27]
V23: (7 pb, dism) x 3. [24]
V24: (6 pb, dism) x 3. [21]
R25-26: 21 sc (2 rounds). [twenty-one]
V27: (5 pb, dism) x 3. [18]
R28-29: 18 sc (2 rounds). [18]
V30: (4 pb, dism) x 3 [15]
R31-32: 15 sc (2 rounds). [fifteen]
V33: (3 pb, dism) x 3 [12]
R34-35: 12 sc (2 rounds). [12]
V36: (2 pb, dism) x 3. [9]
R37-38: 9 sc (2 rounds). [9]
V39: (1 pb, dism) x 3. [6]
Assembly
Pin two ice cream scoops (green and yellow) to the top of the pink ice cream scoop and sew them together (as in the photo).