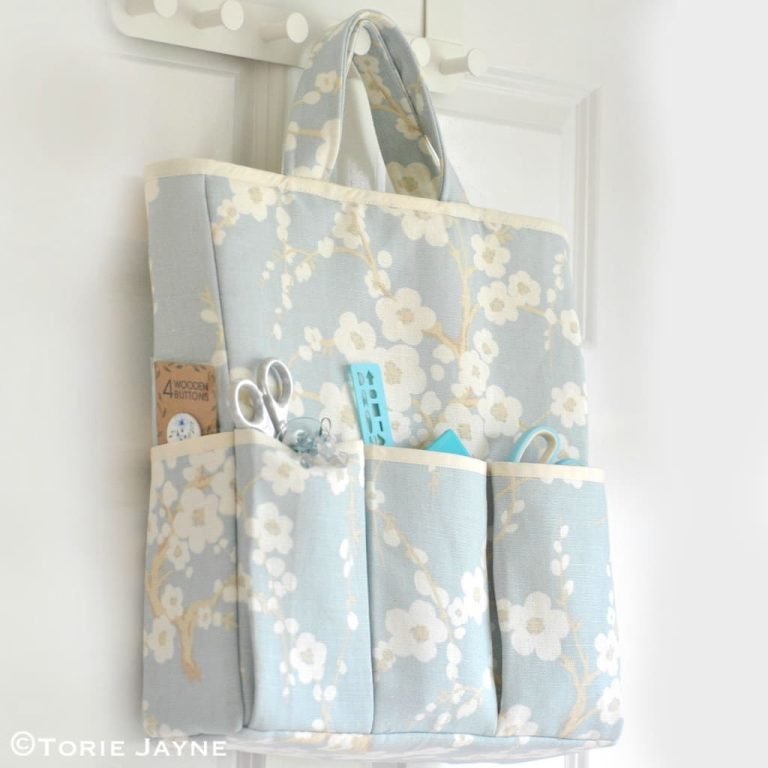
A place to put her current projects along with a set of handy pockets on the front and sides for craft tools storage. Here’s my Craft Organizer Bag sewing tutorial…
You will need…
lori duck egg floral linen/cotton fabric
style-vil from vilene
all purpose sewing thread
How-to step by step…
Step 1
Start by cutting out the outer side panels, base and bag handles as above illustration.
Step 2
Cut out the lining pieces as above illustration.
Step 3
Cut out the pocket outer, lining and bias binding as above.
Step 4
Cut out the style-vis, fusible wadding and bias binding as above.
Step 5
Place the bag outer panels to their corresponding style-vis panels, wrong sides together. Pin to secure in place.
Step 6
Machine baste the style-vis and outer fabric together around all four sides 5mm (1/4″) from the top edge.
Step 7
Place the side pocket panels to the corresponding pocket lining panels, wrong sides together. Bind the top edges.
Step 8
Place the left side pocket to the left side panel, matching up the bottom and side raw edges. Pin to secure then baste stitch in place.
Step 9
Repeat steps 5 & 6 with the right hand panel and pocket.
Step 10
Place the front pocket wrong sides together with the front pocket lining, pin to secure in place then baste stitch them together. Bind the top edge.
Step 11
Using the template above with a water-soluble pen, mark on the right side of the front pocket panel the fold lines, stitch lines and placement lines that are placed 1cm apart.
Step 12
Near each side edge of the pocket panel, make a knife pleat using the three lines near the edge as a guide. To do this, make an outer fold ( with wrong sides together)along the outer line, then make an inner fold (with right sides together) along the inner fold line, and finally bring the outer fold over to the placement line. Use pins to secure pleats in place. Press the folds in place.
Step 13
Each of the two inverted pleats flanking the central pocket consists of two knife pleats that meet in the middle at a mutual placement line, so follow the same folding procedure as Step 11.
Step 14
Place the pleated pocket panel, right side up, on the right side of the printed front., matching the side and lower edges. Stitch the pocket panel in place from top to bottom, along the placement line that runs down the middle of each of the two inverted pleats you made in step 12. With the pleats in position, pin and then machine baste the pocket panel to the front 5mm (1/4″) from the side/lower edge
Step 15
With right sides together and raw edges even, pin the front panel to one of the side panels. Starting at the top, stitch a 1cm (3/8″) seam, stopping 1cm (3/8″) before the lower edge of the side piece. With right sides together and raw edges even, pin the side panel to the back panel.Starting at the top, stitch a 1cm (3/8″) seam, stopping 1cm (3/8″) before the lower edge of the back piece. Repeat to join the side piece, forming the sides of your bag. Press the seams open, trim seam allowance.
Step 16
Pin the bag bottom to the bottom edges of your bag sides, with right sides together, raw edges even, and corners matching. Stitch a 1cm (3/8″) seam around all four edges, pivoting the fabric at the corners. (the unstitched portions at the ends of teh side seams will open up to allow you to do this) Press the seams open, trim seam allowance.
Step 17
Turn the bag right side out. Repeat steps 14 & 15 with the bag lining pieces.
Step 18
With the outer bag right side out and the lining wrong side out , place the lining inside the outer bag, so they are wrong sides together. Check that the seams are lined up, then pin in place. Machine baste the lining and outer fabric together around all four sides 5mm (1/4″) from the top edge.
Step 19
Following the manufacturer’s instructions fuse the wadding to the wrong side of the four bag straps. Pin a pair of straps , wrong sides together. Stitch a 1cm (3/8″) seam around side edges. Repeat with remaining handles. Turn handles right side out and using a 1cm (3/8″) seam allowance edge stitch the seamed sides.
Step 20
Pin handles to inside of bag as illustrated above and baste stitch in place. ( the handles are placed 8.5cm over from side seams)
Step 21
Use the bias tape to bind the top edge. Pull the handles upwards and slip stitch in place.


.jpg)

.jpg)


